Tuesday, February 25, 2014

February's Tutorial Tuesday - the VBg Reversible Quick Tote

The VBg Reversible Quick Tote

Hi Everyone! I'm so honored to be here sharing my Reversible Quick Tote with you on Tutorial Tuesday, Thank You Danielle! These little bags stitch up quick with cute fabrics and for additional cuteness just add adorable trim and a Machine Embroidery design. Here we go...

Click on any of the photos to enlarge.  

The cute fabrics I chose are Riley Blake Sidewalks by October Afternoon and Gracie Girl by Bee in my Bonnet. Danielle used her keen designer eye to pick the matching Ruffle Ric Rack, I love it!

Supplies You'll Need per Tote:
  • 1/2yd Main Fabric
  • 1/2yd Lining Fabric
  • 1yd Woven Fusible Interfacing (sugg. Pellon SF101)
  • 1yd 1" Cotton Webbing for Straps-add additional yardage for longer straps
  • 1yd Decorative Trim-Ruffle Rack
Note: We have a nice selection of kits on our site that contain everything you need to create this tote, except thread and webbing, which may be purchased at your local craft/sewing store. You can find those kits here.  Use the code TutorialTuesday to save 20% off these kits through Monday, 3/3/14.
Basic Sewing Supplies:
  • Scissors and/or Rotary Cutter, Ruler and Cutting Mat
  • Fabric Marking Pen/Marker/Tailor's Chalk
  • Coordinating Thread
  • Iron and Ironing Board
  • Sewing Machine
Optional Supplies:   
  • Embroidery Machine, Embroidery Machine Thread and Machine Embroidery Design
  • Cut Away Stabilizer for embroidery design **use in place of 1 cut of fusible woven interfacing if doing embroidery design**

Cutting Instructions for Small Tote:
  • 2) 11"wide x 12"tall Main Fabric (print)
  • 1) 11"wide x 15"tall Main Fabric for pocket
  • 2) 11"wide x 12"tall Lining Fabric (solid)
  • 1) 10.5"wide x 11.5"tall Fusible Woven Interfacing *2 if not doing embroidery design*
  • 1) 10.5"wide x 7"tall Fusible Woven Interfacing for pocket
  • 2) 18"long Cotton Webbing for straps (or cut desired for longer/shorter straps)
  • 1) 22" long Ruffle Rack-trim
  • **1) approx 10"wide x 12"tall Cut Away Stabilizer for embroidery design option*
 ***All Seam allowances are 1/2" unless otherwise noted***
***press with warm iron after each step*** 

1. Fold pocket fabric in half to equal 11"wide x 7.5"tall, right side out and press.  Open folded fabric and following manufacture's guidelines fuse interfacing along inside edge, so it butts up to the fold line.

Once cool, fold fabric along press line, sandwiching the interfacing inside and top stitch along folded top edge 1/4".  

2. Fuse interfacing to lining piece **do both lining pieces here if you are not stitching an embroidery design and using the Cut Away Stabilizer**. 

I added the machine embroidery design here...Thank You Abigail Michelle for the wonderful Mary Grace alphabet!    

3. Align prepared pocket panel right side up on one lining piece (not embroidered/embellished lining piece) across sides and bottom, pin (clover clips, woot, woot) and stitch with a wide running stitch to secure. Mark in 3" across top of pocket panel and bottom (all) and stitch to create pockets.

4. Match prepared Pocket Panel/Lining piece and embroidered/embellished lining piece, right sides facing and pin (clips again, woot, woot). Stitch around 3 sides leaving the top and a 3"- 4" opening at center bottom to pull cover thru at a later step. 

5. Boxing the Corners...pinch the bottom corners so that the bottom seam and the side seam are matching. Pin near the pointed end and at about 2 inches up into the seam to keep all layers flat without wrinkles. Measure up 1" from the point of the seam and mark (pink line is under the ruler here).

Stitch across marked line.

6. Align both cover fabric panels right sides facing, pin and stitch sides and bottom, leaving the top open then repeat step 5 to box the corners and trim seam allowance on both the cover and lining corners. Turn Cover right side out!

7. Fold bottom corners of Cover inward to aid in slipping it into the lining. Pin or clip trim all the way around the top opening of the cover, overlap 1/2" and trim to fit.

 Slip Cover into Lining, right sides facing.

Measure in 3" along top and pin each end of webbing to the top with trim.  Tuck in handles, being careful to keep only the ends of the handles in the stitching path. 
***Straps lay inside during stitching!***

8. Pin or clip layers evenly around the top of the tote, matching side seams and centers. 
  
Free arm stitch around top through all layers. Go slow through the bulk and making sure handle loops are out of the way.


9. Pull Cover through the 3"-4"opening in bottom of Lining...all the way through...

and tuck it back into itself! I chose to tuck in the Cover fabric as it will be easier to see the top stitching on the colored fabric and to slip/invisible stitch the opening in the Lining closed.

10. Press around the top edge and pin. Top stitch 1/4" from top edge. 

Slip/invisible stitch bottom opening closed.

11. Press and Enjoy!!! 

hmm, I think I need a Flower for this tote and a matching Key Fob...watch for those tutorials to go up on my blog soon at Vintage Barngirl and I would love it if you all would like to follow me on Facebook.

Thank You Everyone, looking forward to talking to you again and please let me know if you have any questions. 

Happy Stitchin'!
Vanessa
Vintage Barngirl Blog
My Facebook 
If you would like to purchase a VBg Reversible Tote Kit you may find those here.  The kits contain all the fabric, lining, and trim you need to complete your tote. You'll only need to pick up thread and webbing at your local craft/sewing store.  Don't forget to use the code TutorialTuesday to save 20% off any kits through Monday, 3/3/14.

Monday, February 17, 2014

Weekly Special - 20% Off ALL Packaging Supplies and Valentine's Coupon Expires Today


This Week's Special is 20% off ALL Packaging Supplies
http://www.whimsicaldesignsclothing.com/index.php?main_page=index&cPath=42&sort=20a&page=1
Save on Self-Sealing Bags
http://www.whimsicaldesignsclothing.com/index.php?main_page=index&cPath=42&sort=20a&page=1
Save on Zippered Bags
http://www.whimsicaldesignsclothing.com/index.php?main_page=index&cPath=42&sort=20a&page=1
Save on Poly Mailers!

And if you hurry and order today you can still use our Valentine's coupon code and save an additional 15% off EVERYTHING on the site.  Combined with our special, that's a total of more than 30% off ALL packaging supplies!  Hurry though because the coupon code expires at midnight MT tonight. Stock up now and save BIG! 
www.whimsicalfabric.com
Enjoy 15% off the whole site with coupon code: BeMine
Make sure to check out our Sale Category and our Weekly Special for amazing savings when stacked with this coupon code.
Happy Valentine's Day!
Code expires at 12:01 midnight MT Monday night, 2/17.

Happy creating!
Danielle Storm
www.whimsicalfabric.com

Wednesday, February 12, 2014

Valentine's Day Coupon, New Fabrics, New Sew-Along, and some Restocks. Oh my!


 You are the heart of our business!
www.whimsicalfabric.com
We really appreciate you.
Enjoy 15% off the whole site with coupon code: BeMine
Make sure to check out our Sale Category and our Weekly Special for amazing savings when stacked with this coupon code.
Happy Valentine's Day!
Code expires at 12:01 midnight MT Monday night, 2/17.


Looking for Country Girls fabric?  
We now have our Country Girls up on the site. 
This is a great line of fabric for spring sewing.  I love those colors!!
http://www.whimsicaldesignsclothing.com/index.php?main_page=index&cPath=3_4_375
Photo by tashahorsley.typepad.com

We are gearing up for our next Sew-Along.  
http://www.whimsicaldesignsclothing.com/index.php?main_page=index&cPath=99_367_374
Isn't it just adorable?
http://www.whimsicaldesignsclothing.com/index.php?main_page=index&cPath=99_367_374
Grab your patterns and fabric kit today.  No purchase is necessary to participate, but you will need the patterns to be able to follow along.  And of course we sincearly appreciate your support so we are able continue to bring these sew-alongs to you. The sew-along starts on Monday, 2/24.

We have restocked many Fat Quarter Bundles including, chevrons and dots!
http://www.whimsicaldesignsclothing.com/index.php?main_page=index&cPath=3_11

We have also restocked the Little Red Riding Hood Border Prints in Red and Pink.  
http://www.whimsicaldesignsclothing.com/index.php?main_page=index&cPath=3_4_321
Grab them while we still have them as these have been selling at record speed.   
http://www.whimsicaldesignsclothing.com/index.php?main_page=index&cPath=3_4_321

And don't forget to use the code: BeMine to save 15% off everything!

Happy creating!
Danielle Storm
www.whimsicalfabric.com

Tuesday, February 11, 2014

February's Featured Customer - Rosemary Gulledge of Applique Cafe


I discovered Rosemary's blog, The Cafe Blog, in 2010.  Whimsical Fabric was just starting out at that time and I was an avid appliquer. (Is that a word?)  I was drawn to Rosemary's teaching technique and wealth of applique knowledge that she shares on her blog.  Then, I discovered her applique design website!  I immediately fell in love with the classic simplicity of her designs.  They are super easy and quick to stitch and yield perfect results every time. And, her prices are amazing!  What more could you ask for?  I was hooked!

Please help me in welcoming Rosemary Gulledge of Applique Cafe.

Where are you located Rosemary?
I am located in Montgomery, Alabama. 

What was your background prior to starting your business?
I graduated from Troy University with a degree in Elementary Education and never taught school! Following college I worked for an investment banking firm for 10 years and LOVED it, but decided to “retire” after having my 2nd child. Having 2 kids at home, I was interested in monogramming, so I talked my husband in to buying me an inexpensive embroidery machine (Brother PE700) and I taught myself how to use it. After I “mastered” monogramming and discovered applique, I started doing embroidery and applique for customers and did this for a couple of years. We (my husband and I) then decided to switch gears and try our hand at digitizing. Applique Café was started in August of 2009. At the time there were only a hand full of applique websites that out there, so it was a great time to start a website and get in to that side of the business. I have continued all these years to monogram and applique for friends, family and a few loyal customers, so technically I’m on both sides of the business! 

What got you started in your business?
After doing applique and embroidery for customers for a couple of years, designing just seemed like the next step and Applique Café was born. Like I said, at the time there weren’t that many websites out there. It’s a different story now, as a new applique website pops up every other day it seems. My husband does the actual digitizing, and he also works full time, so this is “part time” for us. We try to produce 3-5 new designs each week. Why does HE do the digitizing, you ask? At the time, I was monogramming and appliqueing for customers almost full time so when we decided to do this, he agreed to learn how to digitize because I had my hands full. I still monogram for customers and friends during the day in addition to keeping up with the website, my blog and other web business.
http://www.appliquecafe.com/

What choices have you made that helped your business the most?
Setting limits and realizing I don’t have to be on the computer 24/7. I try to work while the kids are at school and I try NOT to work much on the weekends. Balancing work and family is a must in owning your own business.

What mistakes have you made that others could learn from?
Thinking I had to be on the computer or sewing something 24/7 was a mistake I made early on!! It took me a while to figure out I had to organize my time and that applique wasn’t life or death. It’s also OK to sometimes say “no” to people! I also spend a lot of time on Facebook, and Facebook is a blessing and a curse. While it’s a great marketing tool, it is easy to get sucked in for an hour, or get involved with other groups and pages on Facebook. Another mistake I’ve made is worrying about what everyone else is doing (cue Facebook again). I’ve learned I have to focus on MY business and not how many fans so-and-so has. It’s a very competitive business so it’s easy to get distracted.

What do you find the most fun and rewarding about having your own business?
Flexibility!! I worked “9-5” for 10 years, so having flexibility and working when I want to is awesome! It’s still a balancing act but if I don’t want to turn my machine on for 2 days, then I don’t have to. I can be a working mom, and yet I never miss a field trip or library duty at my kids’ school. I also love being able to turn a $4 t-shirt in to something adorable! I’ve met some amazing people through this business ~ customers and also people across the US whom I’ve never met in person but talk to regularly on the computer! Helping people is also very rewarding. When I got my machine there wasn’t a lot on the internet like blogs or YouTube, so I taught myself everything and learned from trial and error A LOT. Now I try to write blog posts that are helpful and answer questions from people who are frustrated and ready to throw their embroidery machine out the window! 

Tell us a bit about your drive and purpose, your vision for your business.
What drives me is that while this very well may be the most fun “job” I could ever dream of, it’s also my family’s business. I get to work with my husband in our office in the comfort of our home (sometimes with kids spider-man-ing up the doorway in our office). I also get to make people happy with cute new designs, or by monogramming a bib for a new baby, or by helping them figure out what might be wrong with their embroidery technique or machine. I love helping people through my blog, teaching classes, or answering emails or questions about where I got such-and-such fabric. Sometimes it does get daunting and sometimes I do have to deal with unhappy customers, but overall it really is a dream job! As far as my vision, I just want to keep designing great designs and helping people. I need to blog more often, and I’ve love to experiment more with video.  

What inspires you to create?
Having 3 kids inspires me to create! Being surrounded by beautiful fabrics, amazing thread colors and all of the awesome “blanks” as we call them also inspires me to create! We’ve been digitizing for close to 5 years and I get ideas everywhere! I’m always looking around and thinking about that next batch of designs.

What do you feel makes your work unique?
Simple designs! When we started Applique Café, I had been slaving away for 2-3 years doing applique turkeys with 8 fabrics and 38 steps and 14 thread changes. I love to keep things simple and easy for our customers. As I mentioned earlier, there is so much competition out there. It’s hard to be unique! We try to come up with the cutest designs we can, and we try to make them as easy to sew as we can. When we are coming up with new designs to do each week, we also try to look around and make sure no one else has done exactly what we have in mind. I also test and sample each and every design we sell, so I’m able to make changes where needed and “know” how each design sews.

What’s your favorite design from your website? 
It might be hard to pick 1 favorite! I love our Stitch the Dog Designs. Stitch is a simple lab design that has become somewhat of a trademark for Applique Café. We currently have about 40 Stitch designs and they are all cute and great for the many seasons. 
http://www.appliquecafe.com/category_26/STITCH-the-Dog.htm

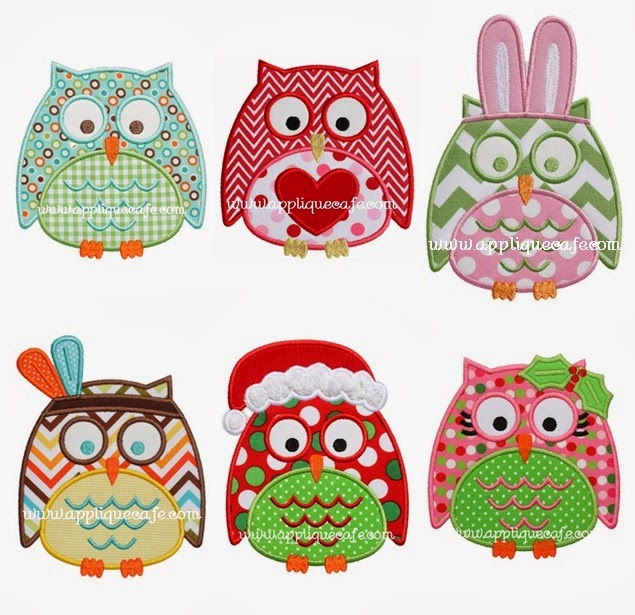
I also love our Owl Applique Designs. Again, we’ve changed the owl for the many seasons. 

My other “favorite” design is our Elephant Applique Design which is one of the first designs we did. I see it a lot on Pinterest and Facebook and other places so I think it’s a customer favorite as well! 
http://www.appliquecafe.com/item_12/Elephant-Applique-Design.htm

I’m constantly re-sewing old designs and bringing new life to them, so my favorites change!

Where do you see your business in a year? Or where would you like to see it?
We would like to expand our customer base outside of Facebook. Applique Café is also on Instagram, Pinterest, Twitter, and of course there is my blog. I’d love to increase our newsletter subscribers and reach more people. Our goal is to stay competitive, produce as many cute designs as we can come up with and to continue our presence in the applique world! I also want to expand my blog and experiment more with video tutorials.
http://appliquecafeblog.com

  
As a customer of Whimsical Fabric, what is your favorite thing about our store?
I love Whimsical Fabric because it’s a one stop shop for fabric, blanks, patterns (for those of you who sew) and even packaging supplies! WF carries the fabrics I love and use a lot ~ ginghams, polka dots, chevrons, etc. ~ in the brands that I love!

What is your favorite item purchased from us?
Fabric! I’m a huge fan of Michael Miller, Riley Blake and Fabric Finders fabrics, which are all fabrics sold at WF. Also, with applique you only use a small amount of fabric on each design. I like that I can buy fat quarters or fabric by the yard if I want to.
  
What words of wisdom do you have for readers who are considering starting their own work at home business?
I think anyone can start their own work at home business, but you have to learn to balance work and family or else you will get burned out quickly. Set a work schedule and try to stick with it. Don’t work so hard that you put your family on the back burner. My daughter was born in 2008 and we started Applique Café in 2009. She’s about to turn 6 and I realize now how much I worked when she was a baby! I should have worked less and enjoyed that time more. Other words of wisdom... remember that there is plenty of business out there for you and everyone else. Be kind and respectful even when you don’t feel like it!

Thank you so much for sharing about your business and yourself Rosemary!   

If you enjoyed reading about Rosemary and her business, please take a minute or two and let her know by leaving a message on her Facebook page.  And don't forget to check out her website, Applique Cafe.  I noticed she is having a great sale right now!

PS If you are interested in being featured in one of our future newsletters please send us an email with FEATURE in the title.

Happy creating!
Danielle Storm
www.whimsicalfabric.com