Saturday, May 31, 2014

Only 12 Hours Left!!


JUST 12 HOURS LEFT OF OUR FLASH SALE!


Use the code SAVE15% to save 15% off your entire order.
Even save 15% off the already 20% off Paper Pattern Category!

In addition, we have a little Facebook "Share This Status" giveaway. One person who PUBLICLY shares our Facebook Flash Sale post AND places an order with the SAVE15% coupon code will receive a FULL REFUND for their order. How amazing is that? Hurry, the code expires TONIGHT, Saturday at midnight MT!

Happy creating!
Danielle Storm
www.whimsicalfabric.com

Friday, May 30, 2014

32 Hour Flash Sale & Facebook Giveaway


FLASH 32 HOUR SALE!


Use the code SAVE15% to save 15% off your entire order.
Even save 15% off the already 20% off Paper Pattern Category!

In addition, we have a little Facebook "Share This Status" giveaway. One person who PUBLICLY shares our Facebook Flash Sale post AND places an order with the SAVE15% coupon code will receive a FULL REFUND for their order. How amazing is that? Hurry, the code expires TOMORROW, Saturday at midnight MT!

Happy creating!
Danielle Storm
www.whimsicalfabric.com

Thursday, May 29, 2014

Weekly Special - 20% Off All Paper Pattern


This Week's Special
http://www.whimsicaldesignsclothing.com/index.php?main_page=index&cPath=71_325
No coupon needed.  
Items have already been discounted on the website.
Prices are good through Monday, June 2nd.  
No further discounts apply.
  
Happy creating!

Tuesday, May 27, 2014

Only 8 Hours Left To Save Up To 20%!

Save up to 20% with our Memorial Day Sale
www.whimsicalfabric.com

Use the code Memorial10 to save 10%
OR
Spend $25 & use code Memorial15 to save 15%
OR
Spend $50 & use code Memorial20 to save 20%

Hurry, codes expire at midnight MT tonight!

Happy creating!
Danielle Storm
www.whimsicalfabric.com


Monday, May 26, 2014

Memorial Day 48 Hour Sale - Save Up To 20%


Save up to 20% with our Memorial Day Sale
www.whimsicalfabric.com

Use the code Memorial10 to save 10%
OR
Spend $25 & use code Memorial15 to save 15%
OR
Spend $50 & use code Memorial20 to save 20%

Codes are good for only 48 hours so order now before it's too late.

Happy creating!
Danielle Storm
www.whimsicalfabric.com


Monday, May 19, 2014

LAST DAY To Save 20% Off NEW Riley Blake Buttons and NEW Sew-Along Starting Soon!

Today is the LAST DAY to SAVE . . .

 http://www.whimsicaldesignsclothing.com/index.php?main_page=index&cPath=72_390

Sew-Along #14 

Our next sew-along starts on Wednesday, May 28th.  We will be sewing the Children's Corner Frannie Dress.

We have lots of awesome kits that contain most everything you need to make the project.  You just supply the thread and your personal creativity.

Use the coupon code SewAlongSavings to save 15% off your kit and pattern purchase through Friday, May 23th.
For more information regarding the sew-along, or to join in, please click here and request to join our Facebook Sew-Along Group.   

Happy creating!
Danielle Storm
www.whimsicalfabric.com

Tuesday, May 13, 2014

May's Featured Customer - Blossom Vinson of JustBabyz


 Please help me in welcoming
Blossom Vinson of JustBabyz.

Tell us a little bit about yourself and your business.  
I have a e-commerce store that I started named JustBabyz and an Etsy shoppe called JustBabyz

Where are you located?
I live on farm in Warner Robins, GA.
  
What was your background prior to starting your business?
Prior to starting this e-commerce store I did affiliate marketing and built a lot of niche websites along with Dog Beds E-commerce store then I did some online, social media and mobile marketing for local businesses. I had couple of e-commerce stores always selling other people's products. I was not passionate about dogs and could not do all the research to blog and local businesses they had hard time understanding online and social media marketing. Currently I just do just Mobile marketing and consulting. 

What got you started in your business?
I had always wanted to have my own product and would always look at someone who can create literally anything with a WOW and I had no idea I was creative until after I had my third child, Anaiah. 

I guess she triggered some part of my brain. After I had my baby I realized fabric relaxed me and every time I saw a piece of fabric I had these ideas.  I sewed my first outfit ever Thanksgiving outfit and then realized that I had found something that I love. 

What inspires you to create?
My inspiration comes from my children. 

Tell us a bit about your drive and purpose, your vision for your business.
My sweet spot is online marketing.  I just love it.  I've always wanted to have my own products, and I did not want to settle. 


What do you feel makes your work unique? 
I combine patterns together with applique.  

What’s your favorite piece from your current inventory? Any all time favorites? 
Some of my favorite inventory is my Thanksgiving, Christmas, Valentines, & Easter Outfits. 

Where do you see your business in a year? Or where would you like to see it?
In a year I would want people to recognize JustBabyz as a brand.  I would like to see lot of JustBabyz clothes become part of keepsakes in many families.

What words of wisdom do you have for readers who are considering starting their own work at home business?
Find your sweet spot.  Don't give up.  Build on your failures.  Have an accountability partner or join a master mind group. Always do one thing a day that will propel your business.

As a customer of Whimsical Fabric, what is your favorite thing about our store? 
I love the Sew-Alongs at Whimsical Fabric.  I have learned a lot.  I am a silent member.  Even though I don't comment much I read every single post by everyone in the group and make notes of tips and suggestions.  

What is your favorite item purchased from us?
I think I have bought most of the patterns I see in the sew-along group.

Anything else you would like to share?
I will be starting a blog in June for moms just like me who want to see growth.  It will be about marketing, business, and balance.

Thank you for giving me the opportunity.
Blossom
__________________________________
  
Thank you so much for sharing about yourself with us, Blossom.  You will have to make sure to share a link to your new blog on our Facebook page when you have it set up.  

If you too have enjoyed reading about Blossom and her business, please take a minute or two and let her know by liking and leaving a message on her Facebook page.  And don't forget to check out her Etsy store and Website.

PS If you are interested in being featured in one of our future newsletters please send us an email with FEATURE in the title. 

Happy creating!
Danielle Storm
www.whimsicalfabric.com

Monday, May 5, 2014

LAST DAY To Save 20% Off Little Matryoshka and Up To 30% Off E+M Patterns

Today is the LAST DAY to SAVE . . .

20% Off All Little Matryoshka Items

http://www.whimsicaldesignsclothing.com/index.php?main_page=index&cPath=3_4_312&sort=20a&page=1

Save on Fabrics, Bundles, and even Sew-Along Kits!

Want to win a Little Matryoshka Fat Quarter Bundle?  
Like, Comment and Share our post on Facebook.  
http://www.whimsicaldesignsclothing.com/index.php?main_page=index&cPath=3_4_312&sort=20a&page=1

E+M Skirt No.5

 Today is also the last day to save 10-30% off the brand NEW E+M Skirt No.5 pattern.
http://www.whimsicaldesignsclothing.com/index.php?main_page=index&cPath=71_324_378

The pattern is rated beginner and is a super fast sew.  
We just love how easy it comes together and the pretty results.
http://www.whimsicaldesignsclothing.com/index.php?main_page=index&cPath=71_324_378

Grab the Skirt No.5 today along with the rest of the E+M patterns.  
We have some great coupon codes for you to use.
 The more you buy the more you save.
Buy 1 pattern - Use the code EMPatterns10% to save 10%.
Buy 2 patterns - Use the code EMPatterns20% to save 20%.
Buy All 3 patterns - Use the code EMPatterns30% to save 30%. 
Codes are good through tonight.

Happy creating!
Danielle Storm
www.whimsicalfabric.com

Tuesday, April 29, 2014

Weekly Special - 20% Off ALL Little Matryoshka Items + NEW E+M Pattern + Coupon Codes!


Save on Fabrics, Bundles, and even Sew-Along Kits!
http://www.whimsicaldesignsclothing.com/index.php?main_page=index&cPath=3_4_312&sort=20a&page=1

Every Little Matryoshka item on our site is on sale this week for 20% off!
http://www.whimsicaldesignsclothing.com/index.php?main_page=index&cPath=3_4_312&sort=20a&page=1


E+M Skirt No.5

 We are also happy to announce that we have a brand NEW E+M pattern.
http://www.whimsicaldesignsclothing.com/index.php?main_page=index&cPath=71_324_378

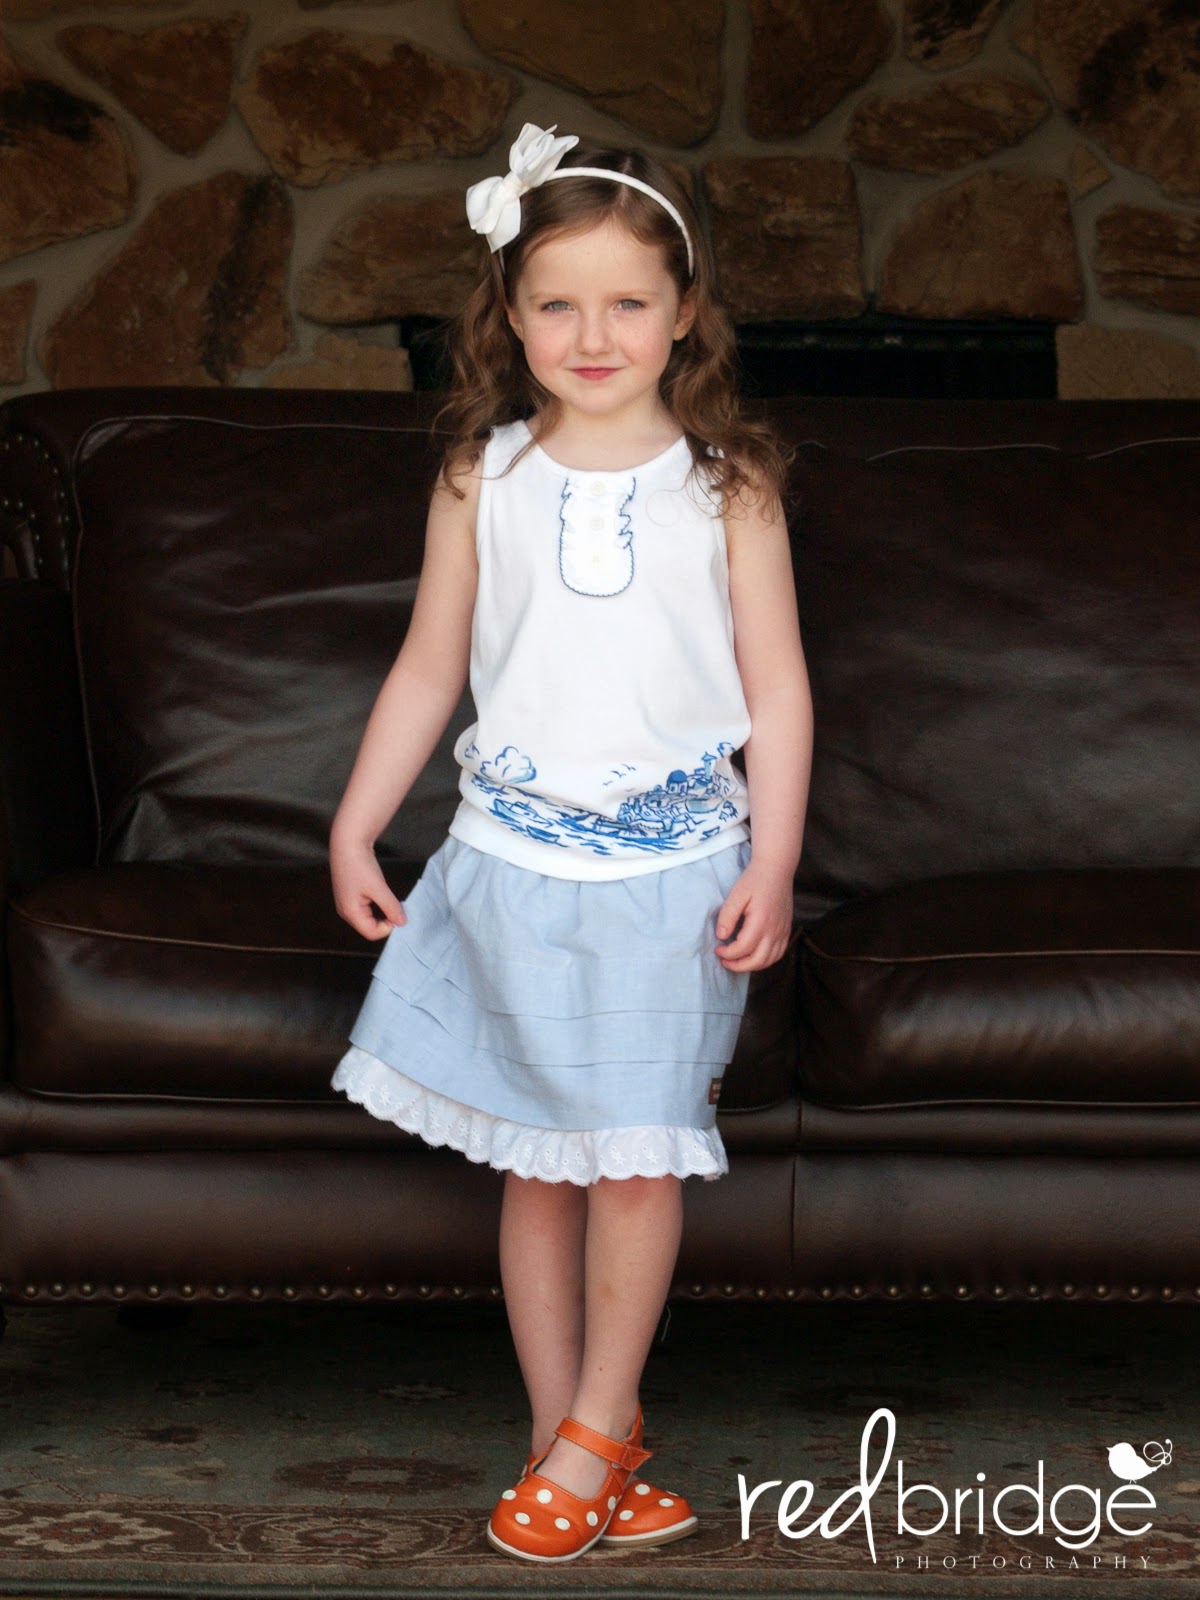
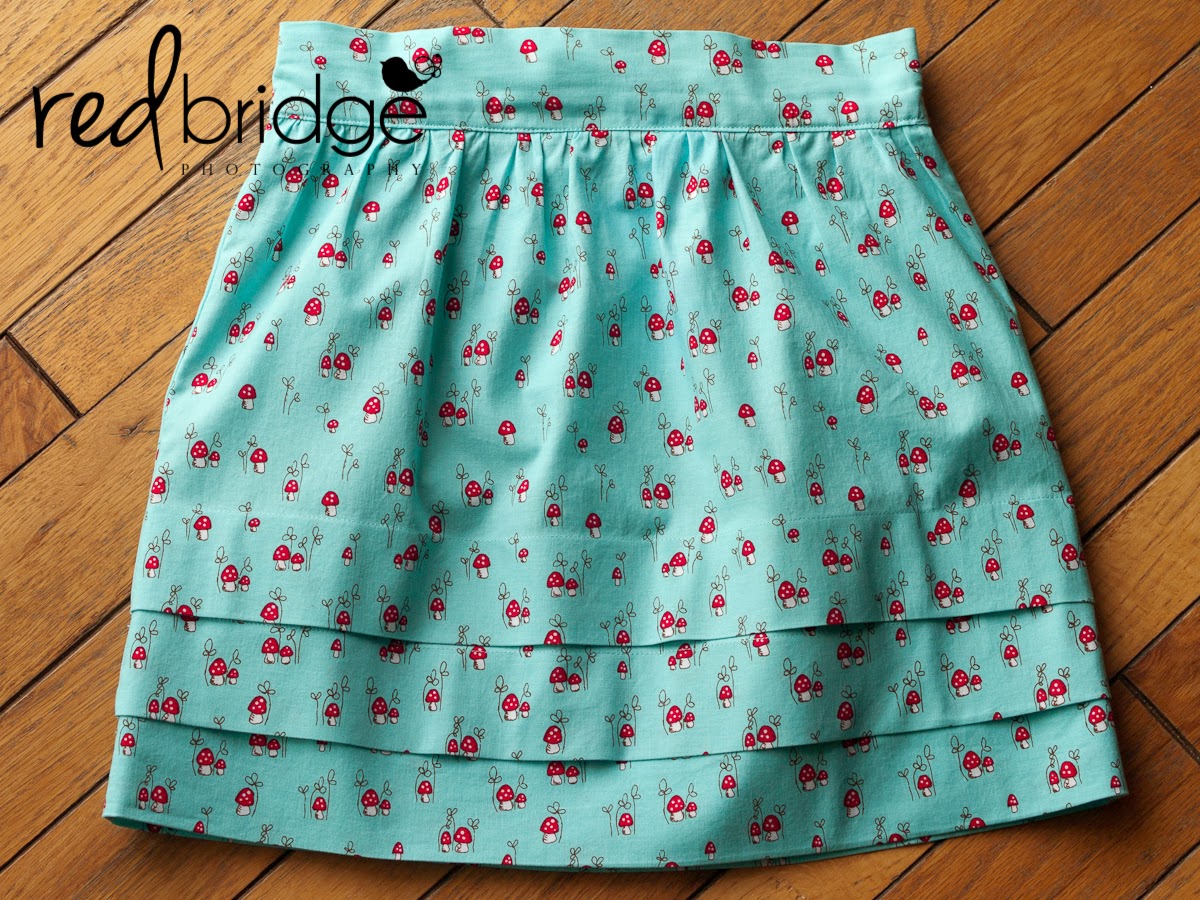
The new E+M Patterns Skirt No.5 is a sweet little skirt with rows of tucks near the bottom.
http://www.whimsicaldesignsclothing.com/index.php?main_page=index&cPath=71_324_378

We created one out of our Fabric Finders Chambray (above), one out of our Fabric Finders Quatrefoil (here), and two our of our Little Red Riding Hood Mushroom fabirc (below).
http://www.whimsicaldesignsclothing.com/index.php?main_page=index&cPath=71_324_378

The pattern is rated beginner and is a super fast sew.  We just love how easy it comes together and the pretty results.
http://www.whimsicaldesignsclothing.com/index.php?main_page=index&cPath=71_324_378

Grab the Skirt No.5 today along with the rest of the E+M patterns.  
We have some great coupon codes for you to use.
 The more you buy the more you save.
Buy 1 pattern - Use the code EMPatterns10% to save 10%.
Buy 2 patterns - Use the code EMPatterns20% to save 20%.
Buy All 3 patterns - Use the code EMPatterns30% to save 30%. 
Codes are good through next Monday, May 5th.

Happy creating!
Danielle Storm
www.whimsicalfabric.com

Tuesday, April 22, 2014

April's Tutorial Tuesday - Detachable Apron Dress

How to Create a Detachable Apron Dress

I just love detachable aprons on dresses.  Aprons can give a dress such a cute look. They are a great way to add a pop of interest or change the look of any dress.  And with a detachable apron it can be removed if desired.  Think of all the possibilities. . .  With a few detachable aprons you create almost endless options mixing and matching aprons with dresses.    

This tutorial will teach you how to create an apron to attach to almost any dress with a waistband.  Your little princess will love being able to create her own custom look.  

Make sure you read all the way to the very end for a special 20% off coupon! And remember, you can click on any of the photos to enlarge.

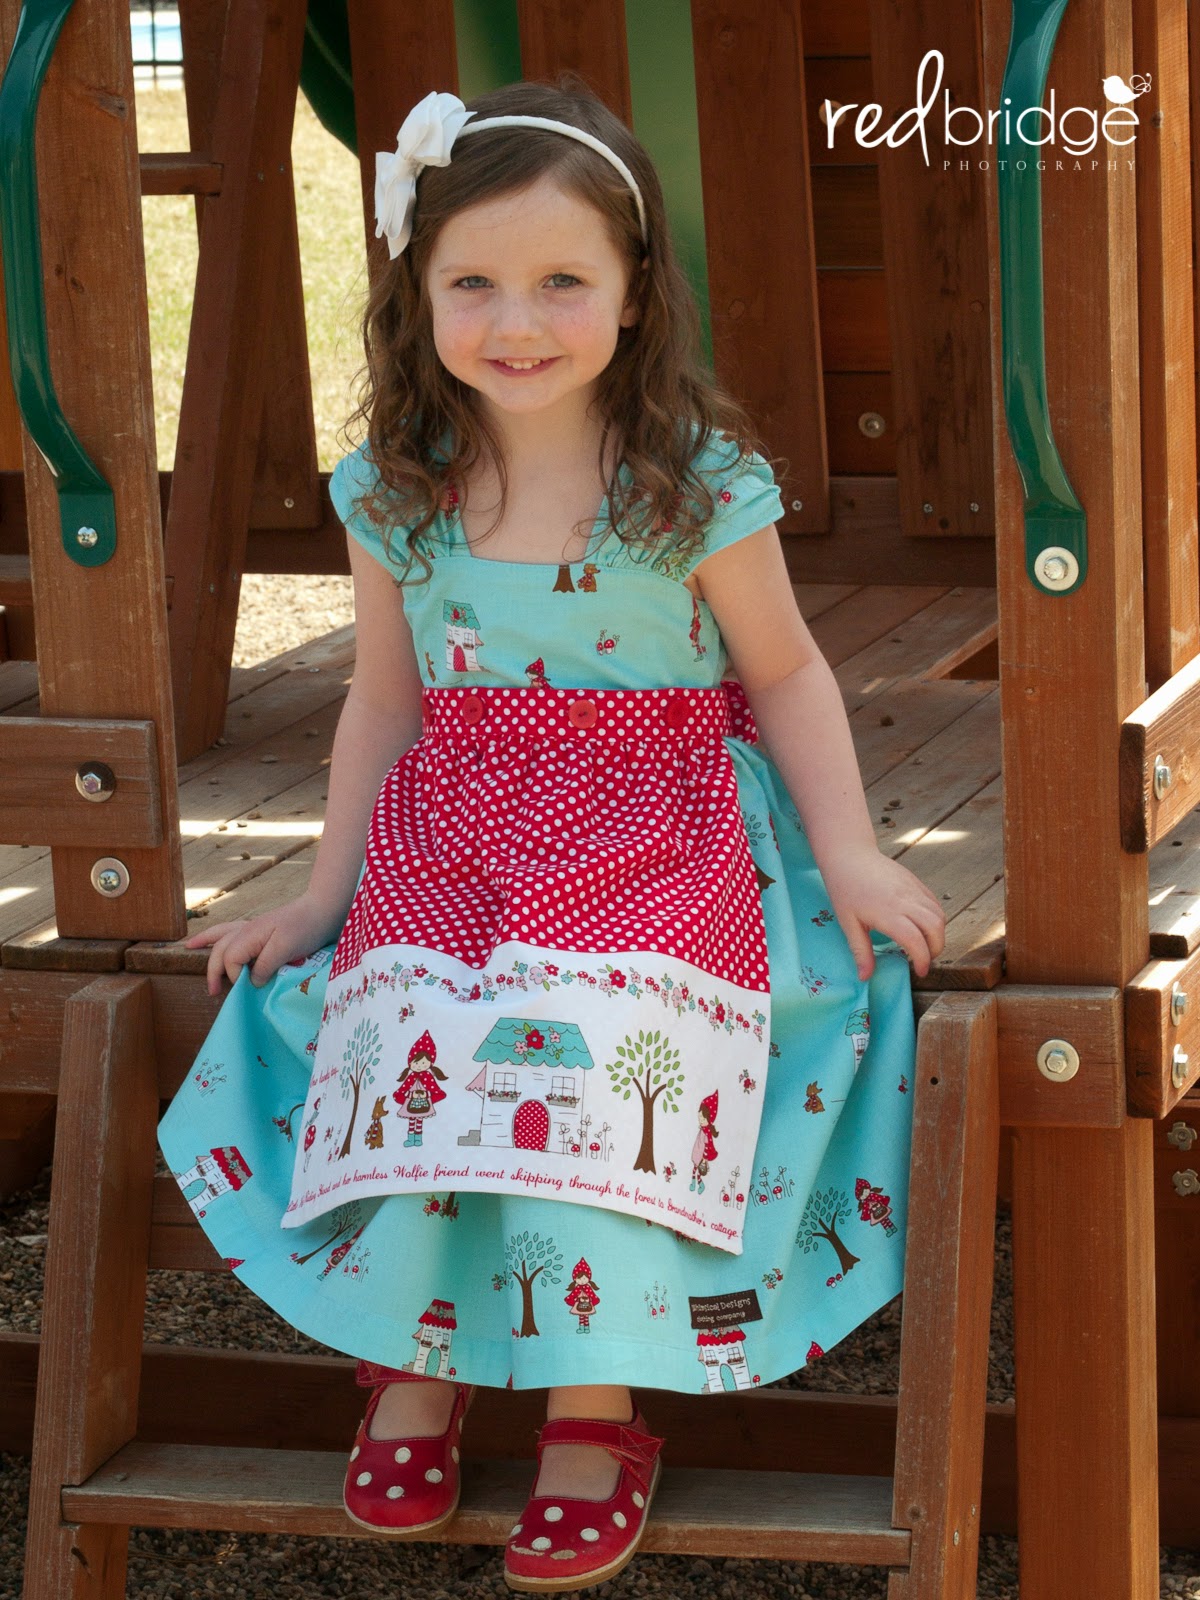
The first thing you will need to do is either create or find a dress with a waistband.  In our sample we created the Macy Giggles dress by Izzy & Ivy Designs out of Riley Blake Little Red Riding Hood fabric. If you would like to create the Macy Giggles dress we have a super detailed step by step set of sew-along lessons you can follow here.  We also have kits made up so all you need to do is pick your size, purchase coordinating thread and buttons, and your set to go!  


In my dress above I made the skinny hem version of the Macy Giggles, like taught in the sew-along, but omitted the hemband and pockets.

Once you have your dress you will need to decide how large to make your apron.  Below you will find a set of general measurements I use to cut my apron fabrics.  For my Little Red apron I changed up the numbers a bit because of the higher waist on the Macy Giggles and the fact that I wanted the apron to showcase the whole Little Red border print story.  I'll include exactly what I did to make my apron, which was created with a size 4t Macy Giggles in mind.  

For the best results you will want to measure the finished waistline of the dress you are using and decide what width and length of sash will look best with the dress.  You will also want to decide what width and length of apron panel will look best.  Keep in mind that you will be gathering the apron panel at the waistline.

Supplies
  • Front Apron Fabric
  • Back Apron Fabric
  • Sash Fabric
  • Lightweight Fusible Interfacing
  • Buttons
  • Coordinating Thread 
  • Marking Pen or Chalk
General Apron Measurements
Size Apron
Cut 1 from Front Fabric.
Cut 1 from Back Fabric 

(width of apron x length of apron)
Sash
Cut 1 from Sash Fabric
*See note below.

(width of sash x length of sash)
6-12M 14" x 9" 5.5" x 49"
12-18M 14.5" x 10" 6" x 52"
18-24M 15" x 10.5" 6" x 55"
2t 15.5" x 11.5" 7" x 58"
3t 16.5" x 12.5" 7" x 61"
4t 17.5" x 14" 7.5" x 64"
5 18.5" x 15" 8" x 67"
6 19.5" x 16" 8" x 73"
7 20.5" x 17" 8.5" x 75"
8 21.5" x 18" 8.5" x 79"
10 22.5" x 19" 9" x 83"
12 23.5" x 20 9" x 85"
14 24.5" x 21" 9" x 87"
*Note: To save on fabric you can cut your sash from selvage to salvage (width) and seam it together.  Keep in mind that if you divide your sash in half you will create a seam in the middle of the front.  You probably don't want to do that.  The best practice is to divide the sash into three pieces and have two seams.  Keep the front sash piece long enough so the seams will fall at the sides of the dress.  Don't forget to add in seam allowances for your spliced sash.  The seam allowance will need to be doubled for the center sash piece since it will have seams on both ends.

Directions

1. Determine the size you desire for your apron and sash pieces and cut them out accordingly.
I gave you all those numbers above as a general guideline but I did change mine up for the Little Red apron.  First, since the waistline is high on the Macy Giggles I feel the sash width looks better narrowed a bit.  I wanted my finished width to be 1.25".  I also wanted my sash to be a little longer for this dress.  Finally, the words on the bottom of the border fabric I used have an 18" repeat.  I wanted to make sure I got all of that on my apron.  I also knew that I wanted to cut about 1.75" off the bottom of my border so I added that to the length of my apron front piece (not the back piece).  I cut my apron and sash fabrics to the sizes listed below for my 4t dress.

Apron Front - 18.75"(w) x 15.75"(l)
Apron Back - 18.75"(w) x 14"(l) 
Sash - 4.5"(w) x 78"(l)
I then trimmed off the 1.75" at the bottom of the border print so my apron front fabric and apron back fabric were exactly the same size.

2. Measure across the waistline of your dress and determine where you want the apron panel to fall.  My dress measured 13" from side seam to side seam, so I wanted my apron to be 11" at the waist.

3. If you did not cut your sash from one piece of fabric you will want to seam that together now.  Make sure to press open your seams.

4. Take your sash and fold it in half matching up the ends to find the center.  Mark the center.

5. Using your center mark, measure out and mark where the apron will attach to the sash.  For my apron that was 5.5" on either side of the center mark.

6. Cut a piece of fusible interfacing.  The width should be your sash width minus 2".  The length should be the width you decided for your finished apron panel in step 2 above. My interfacing piece measured 2.5"(4.5"-2") x 11".

7. Iron your interfacing onto the wrong side of your sash centering it on the center mark. You should have about an inch of fabric on either side of your interfacing.  My picture here shows too much fabric on the left.  ;)

8. With right sides together and matching up fabric edges, fold and iron your sash lengthwise.  If desired, cut your sash ends at a 45° angle.

9. Sew your sash using a 1" seam allowance.  I know this sounds HUGE, but trust me, it's important so that we have a surface to attach the apron panel to.  Leave an opening from about 1" before the interfacing to about 1" after the interfacing so you can turn your sash right side out and have a spot to insert your apron panel. Oops, I forgot to take a picture of this.


10.  Trim your seam allowance on your sash everywhere except where you left it open and un-seamed in the middle.  Don't forget to clip corners.

11. Turn your sash right sides out, push out points and corners, and iron well.  Set aside.

12. With right sides together and using a ½" seam allowance, stitch the apron front to the apron back down along both sides and the bottom.  Leave the top open for turning.

13. To achieve really nice corners you can try this trick.

When you reach a corner stop 1 stitch shy of the corner and leave your needle down in the fabric.

Lift your presser foot and rotate your fabric 45°.  Now, using your handwheel, stitch 1 stitch across the corner.

Leaving your presser foot down again, rotate your fabric another
45° and stitch down the next side.

14. Once you have stitched up the three sides clip your corners, turn your apron panel right sides out, push out your corners, and press well.

15. We now need to create two rows of gathering stitches at the top of the apron panel.  Set your stitch length to the longest length and sew two rows of stitches about ¼" apart.  Try to keep them contained within ½" of the top edge.

16. Pull up your bobbin threads to gather your apron panel so that it fits on your sash between the two marks you created earlier.

17. Opening up your sash and folding out the bottom/back seam allowance, pin the apron panel to that bottom/back seam allowance.  The right side of your apron panel should be facing up and the front of your sash should be opened up and out of your way.  Note: Your interfacing should extend to both the front and back of your sash.  I only have mine on the front in this picture.  Your seam allowance will be longer than that pictured too.  I was distracted by a little and trimmed mine by accident.  Don't do that because it makes it very hard to work with.     

18. Use about a ½" seam attach your apron panel to the sash.  See why we used a 1" seam allowance on the sash?  Because I accidentally trimmed mine to about ½" I had almost nothing to work with.  :(  Not good.  Tim Gunn would be proud though because I "made it work!"

19. Fold the sash front down over the stitches.

I have a little cheat I like to use to hold my fabric down without pins.  Just apply it to the seam allowance and iron.  ;)

20. Edgestitch/topstitch in place continuing around the whole sash.

21. We now need to create some buttonholes on the sash.  Determine how many buttons you would like to use and space them out evenly.  I used 4 buttons for my 11" wide apron.  Mark your buttonhole placements.

22. Stitch those buttonholes.  This part always makes me nervous even though I've done buttonholes many, many times.  Anyone else feel that way?  I usually hold my breath.

23. Almost done!  Once you have created your buttonholes go ahead and lay your apron on top of your dress and mark where to attach the buttons.  I just use my marking chalk and draw right through the buttonholes.  Now, attach those buttons.  I'm not a huge fan of sewing on buttons by hand, so I use my machine.  If you have a button foot you can use that.  If not, you can just attach them like I do.  I explain how at the end of our Exchange Dress sew-along located here.
 
24. Your all done!!  Stand back and admire the cute little detachable apron you created!

Check out our website for kits to make both the Macy Giggles Dress and the Detachable Apron.  You can see all of them here.  Use the code TutorialTuesday to save 20% off the kits through Monday, 4/28/14.

Happy creating!
Danielle Storm
www.whimsicalfabric.com