Imagine my excitement when asked to be this month's guest for Tutorial Tuesday on the Whimsical Fabric blog! Hello there, I'm Rebekah from RebekahSews,
here to show you a tutorial to make a reversible fabric banner. You
really can use this for any occasion! I chose to put Merry Christmas on
one side and Happy New Year! on the other. This is perfect for
decorating or photos. I'm using it for both! It even made it into our
family Christmas card this year and is now currently above our mantle.
Just take a look at some of our photos!
** If you would like to see an image on our blog in a larger format, just click on it to enlarge.
Note: Links to products within this post are either links to the Whimsical Fabric website or affiliate links.
Materials:
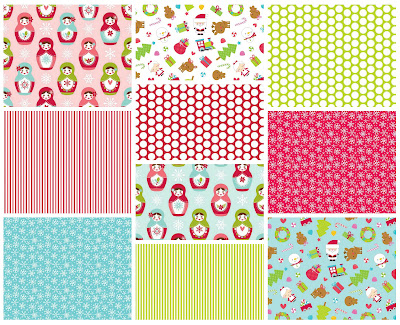
3/4 yrd each of Background Fabric
1 Fat Quarter each of letter fabric
8 yrds Twill Tape (or 4yrds of each color if doing two different colors)
Wonder Under
2 yrds Interfacing (medium weight)Matching
Thread
Sewing Machine
My Picks:
For the Merry Christmas side:
For the Happy New Year side:
Twill Tape:
3/4” Herringbone twill tape in Champagne and Red
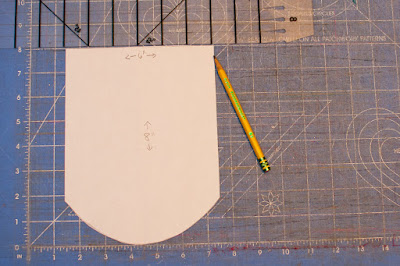
1. First, we will cut our pendant pattern piece. It really can be any
shape you choose: triangle, rectangle... I chose a rectangle with a
curved bottom. I made it 8" tall and 6" wide. Make sure it is
symmetrical.
2. Take your pattern piece and cut 14 of each of your background fabrics and 28 each of your interfacing.
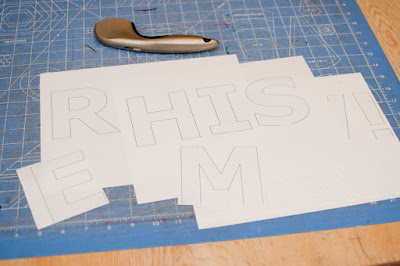
3. You will need to make your letters and the exclamation point. For my letters I used this site
and just played around with it till I got the size that worked with the
pendants. My settings where: 6~31/32", scale 2:1, supersize, font:
Verdana.
4. After you cut out your paper letters we will now need to cut out the
fabric ones. First, fuse a large piece of wonder under to your letter
fabrics according to manufacture directions.
5. Then, trace your letters to
the right side of the fabric. Make sure you only trace the letters you
need on each fabric.
6. Cut your fabric letters out.
7. Next we are going to spend some quality time with our iron. Iron your
interfacing on to the backs of the background fabric according to
manufacture directions.
8. Peel the back off the wonder under and iron each letter to its
background fabric according to manufacture directions. Make sure they
are all nice and centered. *For the New Year's side you will have one
blank pendant. You can choose to leave it blank or you can add a little
decoration here. The choice is yours.
9. Let's begin appliquéing. Because the wonder under was used to fuse
the letters to the background fabric the edges won't fray. This gives us
two options for appliquéing. You can choose to satin stitch like I did
with the Merry Christmas side or you can straight stitch around the edge
like I did with the Happy New Year side.
10. Find a large space to lay everything out. Lay out Merry Christmas
and then under that lay out Happy New Year BACKWARDS. This is important
so that when you turn the banner around to display the other side it
will be the right way.
11. Take the letters under and lay them on top of the letter above it
with right sides together. Example: The H and the Y go together. The A
and the R go together...
12. Using a 3/8" seam allowance sew the two pendants together around the
sides leaving the top open. Do this to all the letters.
13. Clip your curve if your pendant has one or clip the points if you
chose a different shape. Turn your pendant right side out and press.
14. Time to topstitch. If you want two different colors for topstitching
put one color on top and one in the bobbin. Topstitch 1/8" away from
the edge, making sure that your colors correspond if you are doing two
different colors like I did.
15. Let's start row 1 which for me is "Happy" and on the other side,
"Merry". Take each color of your Twill Tape and cut 54".
16. Now take one 54" piece and lay it on top of the other. If you notice
a right and wrong side, place them wrong sides together. Now, sew along one edge of the twill tape, 1/8"-1/4" away from the edge.
17. Find the middle of the 54" piece and line up the center of the
middle letter of row one word: the R/P pendant with the center of the
54" piece. Then place the rest of the letters 1" away from each
pendant. Sandwich the pendents between the twill tape.
18. Once they are all pinned/clipped in place make sure the letters spell what
they are supposed on both front and back. This is what happens when you
check only one side.
Yes this was finished. Time for the seam ripper!
19. You will repeat step 16 with the remaining twill tape piece for
the second row of the banner. The only exception is that we will have to
finish both ends of the twill tape. To finish the ends, just fold both
into the middle or wrong side 1/2" so that they are sandwiched
in-between the outside.
20. Repeat directions 17-18 for the remaining piece of the twill tape
and row 2 of the letters.
21. Take both rows to your sewing machine and sew the open edge
closed. Sew 1/8"-1/4" from the edge, making sure you catch the pendant
in-between the layers.
22. Time to attach row 1 and row 2 together, this does involve a very
small amount of seam ripping. Take row two and measure 5" from the first
and last letter going outward from those letters and mark. You will
need to seam rip from that mark to another 1.5" out only on the top row
of stitching.
23 Take row 1 and clip the ends of the twill tape so that you
create a slant. You will now insert that slanted edge into the area you
just seam ripped, in-between the two layers.
24. Sew both open areas closed.
25. You are now done. Isn't it beautiful? Now go decorate as you please.
Rebekah
RebekahSews
Merry Christmas Everyone! Use the coupon code TutorialTuesday to save 10% off all regular priced fabric and notions on the site. The coupon code is good through Christmas Eve, December 24th, 2015.
Happy Creating!
Danielle Storm www.whimsicalfabric.com