Showing posts with label Knit Fabric. Show all posts

Saturday, August 27, 2022

$𝟏𝟎𝟎 𝐏𝐑𝐎𝐃𝐔𝐂𝐓 𝐆𝐈𝐕𝐄𝐀𝐖𝐀𝐘!!

We are giving away a $100 package of sewing supplies and fabric to one lucky customer!!
Read below to find out how you can win. 
 
𝐖𝐡𝐚𝐭: A package full of sewing supplies and fabric valued at over $100!
 
𝐇𝐨𝐰 𝐭𝐨 𝐖𝐢𝐧: Earn 1 entry for every $50 purchased from our Clearance items located on the Whimsical Fabric & Me group.
 
𝐖𝐡𝐞𝐧: Entry earning begins now and runs through Sunday, September 11th.
 
𝐁𝐨𝐧𝐮𝐬: If we have more than $1,000 in orders between now and the 11th we will giveaway a second $100 bundle! More than $1,500 and we will draw three winners!
 
𝐇𝐨𝐰 𝐭𝐨 𝐒𝐡𝐨𝐩: All Clearance items are located in the GUIDES on the Whimsical Fabric & Me group. Click on Guides to see everything available. There is so much listed and everything is priced to sell!


Hop on over to Facebook today to grab a deal and earn some entries!


Happy Creating!
Danielle Storm
WhimsicalFabric.com
 
PS Don't forget to check the Facebook group often. We are listing new discounted items weekly until everything is gone!

Thursday, June 2, 2022

Save an EXTRA 20% Off Clearance Prices 😍

Now through Monday save an extra 20% off everything in the Inventory Clearance Guides on the Whimsical Fabric & Me Facebook group!

  • Quilting Cottons are only $6/yard
  • Chambray and Denim is only $7.20/yard
  • Knits and Piques are just $7.60/yard
  • Children's Corner Patterns are only $9.60 each, while Izzy and Ivy Patterns are as low as $7.20 each


Hop on over to Facebook today to grab a deal. Hurry though because stock is limited and the extra 20% off is only good through Monday.

Happy Creating!
Danielle Storm
WhimsicalFabric.com
 
PS Don't forget to check the Facebook group often. We are listing new discounted items almost daily, M-F, every week throughout the summer until everything is gone!

Thursday, May 26, 2022

WIN FREE FABRIC from Whimsical Fabric! 🎁

We will be 𝐆𝐈𝐕𝐈𝐍𝐆 𝐀𝐖𝐀𝐘 𝐅𝐑𝐄𝐄 𝐅𝐀𝐁𝐑𝐈𝐂 to one of our customers next Wednesday, June 1st!!

There are 3 ways to enter to win!
  1. Comment on posts on our Facebook VIP group, Whimsical Fabric and Me. Earn 1 entry for each comment you make
  2. Purchase from our Inventory Clearance Sale. We have Quilting Cotton, Piques, Denim, Chambray, Knits, Precuts, Patterns, and more all on sale for 30% off or more!. Everything can be found by going to the Whimsical Fabric and Me group and clicking on the GUIDES section. Every yard or item purchased counts as an entry!!
  3. And Now thru Tuesday, May 31st, 𝐄𝐕𝐄𝐑𝐘 𝐈𝐓𝐄𝐌 𝐎𝐑𝐃𝐄𝐑𝐄𝐃 from the Guides 𝐂𝐎𝐔𝐍𝐓𝐒 𝐀𝐒 𝟐 𝐄𝐍𝐓𝐑𝐈𝐄𝐒!! Order 5 yards of fabric and earn 10 giveaway entries plus 5 more entries for your comments ordering, for a total 15 entries!! 🎁


Hop on over to Facebook today and earn some entries. 

Happy Creating!
Danielle Storm
WhimsicalFabric.com
 
PS Don't forget to check the Facebook group often. We are listing new discounted items almost daily, M-F, every week throughout the summer until everything is gone! 
 

Thursday, May 19, 2022

More DEEPLY Discounted Items as we Continue to Clear Out Whimsical Fabric's Inventory

In case you missed our last message, Whimsical Fabric is closing it's doors and we are selling off ALL of our inventory at 30%-50% off or more!

Please make sure you are a part of our Facebook VIP group, Whimsical Fabric and Me, as this is where we are listing these deals. 

 Below are all the new items we have listed over the past week. 

Everything is discounted 30%-50% or more!

KNITS


 DENIM & CHAMBRAY


Some of these CC patterns are now Out of Stock, Rare, 
and Hard to Find! Grab them now at this discounted price!!


Hop on over to Facebook today. 
 
And don't forget to check the Facebook group often. We are listing new discounted items almost daily, M-F, every week throughout the summer until everything is gone! 

Happy Creating!
Danielle Storm
WhimsicalFabric.com

Wednesday, May 11, 2022

Inventory Clearance Sale - BIG Discounts at Whimsical Fabric

 It is sometimes really hard to close chapters in our lives. Especially when those chapters were so good! 

Our family is moving on to a new adventure and with that I must close a chapter in my life. I am in the process of shutting Whimsical Fabric's doors. At least for the time being. And I need to clear out ALL fabric, patterns, packing supplies, notions, clothing blanks, etc. EVERYTHING must go. 

As I slowly work through all the goodies I am listing them at a deep discount on our Facebook VIP group, Whimsical Fabric and Me. We would love to have you join us and take a peek at all the goodies.

 Below is what we have listed over the past week. 

Everything is discounted 30%-50% or more!

KNITS


 QUILTING COTTONS


Izzy & Ivy Designs are no longer in business and these patterns are now super hard to find! Snag some while you can. 💖
 
Hop on over to Facebook, Grab some great deals, and Help Us fund our next adventure. 
 
Make sure to keep checking the Facebook group often. We are listing new discounted items daily M-F every week throughout the summer until everything is gone. 

Happy Creating!
Danielle Storm
WhimsicalFabric.com

Monday, October 10, 2016

WIN Your ENTIRE Order FREE! - Hurry, Today's the LAST DAY!


Today is the LAST DAY of our 20% Off Knit Fabric Sale!
Did you know that you can win your entire order for FREE

Here's how!
1. Place an order during our 20% off Knit Sale. Hurry, the sale ends TONIGHT!
2.Sew up ANYTHING you wish from your knit order. Yup, you have to use the knit you ordered from us during this sale to qualify.
3. Post a picture of you finished item on our Whimsical Fabric & Me Facebook Group along with the hashtag #OctKnitChallenge before the end of the day October 31st, 2016.
4. One winner will be randomly picked from all entries and that person will win their knit order for FREE*. *Note: Winner will receive a gift certificate to use on our website for the original purchase price of their knit order, up to a $50.00 value.


Happy Creating!
Danielle Storm
 
www.whimsicalfabric.com

Thursday, June 30, 2016

Modkid Kyoko & Kyoko Misses Pattern Reviews

Hello Whimsical lovelies!

Alyssa here, with some only slightly awkward pics and a pattern review of the Modkid Kyoko and Modkid Kyoko Misses.  And for a bit of extra fun, I made both out of some adorable Riley Blake Knit Anchors.

Let's start with the Modkid Kyoko Misses pattern and the details:
• Sizes XS - XXL
Shirt, Tunic or Dress Lengths
Long, 3/4 or Short Sleeves
• Various neckband finishing options
Optional Obi
Knit or Woven

I chose: a knit short sleeved shirt with a neckband.  When making the knit version, you may want to go down a size, because you'll have the stretch from the knit, that you wouldn't have with woven fabrics.  My bust is actually outside range of the XXL (44"), so I went with the XXL and I really like the fit.  It's not too tight where I feel uncomfortable, nor is it so baggy that I feel like I'm wearing a sack, which often happens with clothes at my size!

For my shirt I used the Riley Blake Multi Anchors.  I found the fabric chart to be spot on for the size I made.  I ordered a little extra to account for shrinking, easily had enough fabric to make my shirt, without having a bunch of extra left over.  I did manage to eek out a strip for a head band for myself using the Whimsical Wraps Tutorial, though!

The pattern has elastic measurements in it, and instructions to customize the elastic to fit you exactly as well.  I used the pattern measurements and found them to work well on me.  I REALLY love the length of the shirt.  The shirt has a nice a-line shape to it, that makes my hips look smaller and the length covers problem areas well (I think, at least?).

The pattern includes all pieces needed for bodice, sleeves, skirt, neckband, and obi.  Since it is a paper pattern, the pattern pieces come nicely folded up with the pretty instruction booklet.

From cutting pattern pieces to trying on, this shirt took me about 2 hours to make (including breaks to make sandwiches for Connor, dance to our favorite songs, and solve random three-year-old-earth-shattering-emergencies), which I think is fantastic.

Now, let's move on to little miss in her Kyoko.  Unlike the Misses version, the girl's Kyoko isn't written for knits, so I made a few minor changes as I went to make it work better for knits.  
First, let's start with the details:
• Sizes 2T - 7
Dress or Shirt Length
Short or Long Sleeves
Lined or unlined bodice
Optional Obi

Since I made mine out of knit, I went with the lined bodice, because that was the easiest to modify for knits.  For my bodice I used Riley Blake Anchors in Navy Blue.  Follow the instructions up to step 3, and then take your bodice main and bodice lining and lay them right sides together and sew the neckline.

 Then turn right side out and press well.

Now continue following the instructions for figure 9 of step 5 to do the crossover of the bodice.  You can do the sleeves as written, but since you have a lined bodice, you can do the sides lined as well, which is what I did, by sewing the side lining seams, and then the side main seams, making them enclosed.

This means you will have to sew your sleeves in the round, so take your sleeves and sew the side seam of the sleeve.  And then hem your sleeve 1/2" at the bottom.

Now take your sleeve and turn it right side out and put it inside your inside-out bodice (so right sides are facing) and sew the sleeve into the bodice.  Note that the sleeves have a FRONT and and a BACK, so make sure you get them in the correct side.  Then just sew the sleeve into the armhole.

From here on out, the instructions are pretty much the same, except I just hemmed the bottom of the skirt up 1/2" instead of using bias binding.  For my skirt I used Riley Blake Anchors in Red and Red Half Inch Stripe alternating for the six paneled stripwork skirt.

I did consider leaving the Obi off of Inara's dress, but the dress is meant to be loose fitting, so if you don't want to do an Obi, then you'll want to consider sizing down  TWO sizes from your child's standard size when doing knits, but remember to account for height OR doing an elastic strip like on the women's version to pull in the waistline of the dress.  Inara is a standard size 8, and I sized down to a 7 for the knit change for this dress.  This gives her a roomy dress, without it being too baggy on her, but without the sash it is definitely baggy (as it is intended to be).

The Obi is really fast to sew and I think the ribbon detail gives you a chance to add a cute pop of color as well.  The pattern calls for 7/8" ribbon, but I used 3 pieces of 3/16" ribbon on each side to give it a little bit of flair.

If you couldn't tell, little miss is totally thrilled with her dress.  She refused to take it off even after pictures! From start to finish this dress took about 2 1/2 hours to make.  There are pattern pieces for the bodice, sleeves and obi.  The pattern includes a chart with measurements for the strip-work skirt pieces.  Oddly though, the kids version pieces were like paper, and the misses were more like tissue paper, not a complaint, just something to note.

The instructions for both the Misses and Kids versions were clearly written and easy to follow.  The instruction booklets that came with both patterns were very clear and in depth.  I've already planned out my next Kyoko and I know Inara wants another one too, so these are definitely a hit in this house.  I'm really impressed at how easily the girl's version was adapted to knits and how lovely the fit is with the lined bodice and a knit obi.  

What Whimsical Fabric do you think we should make our next Mommy and Me matching set out of???

Pick up the Modkid Kyoko Patterns at 30% off. Hurry though because this sale is today only!

Happy creating!
Alyssa Carrion
www.whimsicalfabric.com


Tuesday, May 3, 2016

May Tutorial Tuesday - Whimsical Wraps

Alyssa of Keep Calm and Carrion brings us our May Tutorial Tuesday

**Note, click on the pictures to enlarge them for better detail**


For this month's tutorial I am going to teach to to make Whimsical Wraps!

This tutorial is super fast, and since it's May, I'm making mine in adult size for myself for Mother's Day, but I'll give you the measurements that worked for the kiddos as well.  Since they stretch, the sizes are pretty flexible!

Whimsical Wraps - catchy name right?  There are two different versions, that will give you slightly different final looks - The single twist and the double twist.

The single twist will result in you seeing half of each fabric while worn.

The double twist will result in you only seeing the second fabric in the twist, and you'll have a reversible headband with a different focus fabric on each side. 

Here's what you'll need:
* 2 coordinating knit fabrics 
           you want good stretch and recovery - so check out our Knits Section for some great cotton/spandex knits that will work perfectly.
* Sewing machine
* hand sewing needle
* coordinating thread
* cutting mat, ruler and rotary cutter or scissors

This tutorial uses a 3/8" seam allowance.

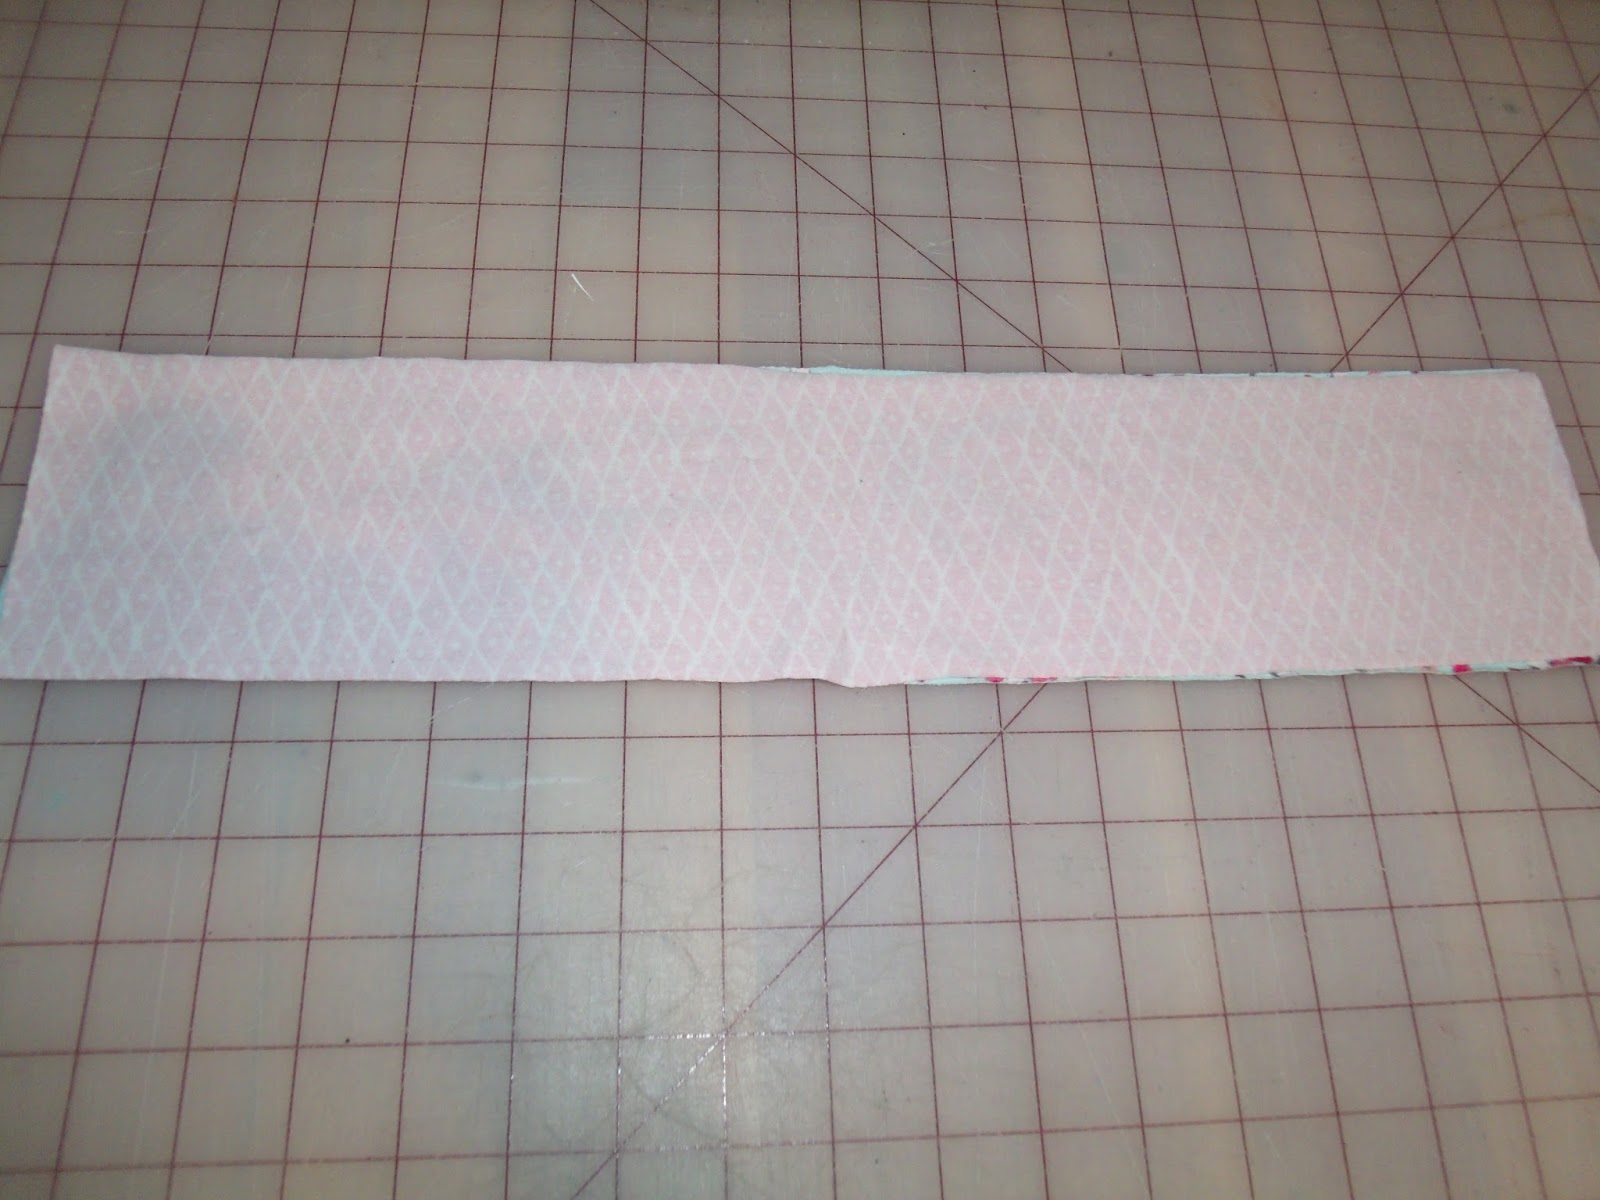
1. From each of your two knits cut the following:
           Adult headband:  18" x 4" (greatest stretch needs to go along the 18" side)
           Child headband:  16" x 3.5" (greatest stretch needs to go along the 16" side)

2. Place the strips right sides together and sew along both long edges. 

3.  Turn right side out and press well along long seams. 

4. For the one twist version continue here, for the double twist, skip to step 12Take your pressed tube, and flip it once at the middle.  

5.  Now take the raw edges and bring them together, keeping the twist in place.  You'll want to line up the seams, and you'll have opposite fabrics together.

6.  This next part is a little bit awkward, and I find it easier to do on my sewing machine, not my serger, so I have the seam allowance left over to tuck for the hand sewing portion.  Here is what you're going to to.  Making sure you only grab two layers at once, position them under your presser foot.  Using a stretch or zig-zag stitch, sew starting at one seam all the way around as far as you can go.  Eventually, the headband will get in your way, and you'll have to stop.  You'll end up with a gap of about 1" to 1 1/2" left.  
eek! I lost a Jamberry!
7.  Now tuck the seam into the headband and this is what it should look like.  

8.  Now we are going to hand stitch this gap closed using a ladder stitch.  

9.  Start under the seam on one side of the headband and bring your needle out about 1/8" forward. 

10.  Now bring your needle through the other fabric and come out another 1/8" forward.  Repeat until the entire gap is closed.  Tie off your thread and tuck the knot in and snip the tails.  

11.  Now press this seam well, flip the headband over and press the twist well, and this version is done!

12.  Continue here from step 4 for the double twist version.  Take your headband and flip over at the middle.  Then flip over at the middle again, so that there is a twist in the middle, but the same fabric is showing at both ends.  

13.  Now line up the seams again and this time when you bring the raw edges together, the same fabrics should be facing each other.  

14.  Now follow steps 6 through step 11 to complete this version.

And here's me attempting to show them off!!  

I love them and wear one pretty much every day - and I love that they don't use a lot of fabric and are fun to mix colors with!  I hope you enjoy this tutorial and please head over to the Facebook Group to show off what you make!

~Alyss
Keep Calm and Carrion