Hi Everyone! Thank You for having me back for another Tuesday Tutorial Danielle! This time I'm excited to be sharing a wallet with a detachable, wrap-able ribbon strap so you can attach it to the handles of your favorite tote or just grab&go...a Walkin' Wallet Wristlet, if you will. Inspired by a few of my favorite indie designers and created for Danielle and Whimsical Fabric's Tuesday Tutorials.
I chose Gracie Girl and Sidewalks again, such adorable fabrics and to match the Reversible Quick Totes from the February, 2015 Tuesday Tutorial located here. However, the first test wallet quickly resulted in a firm request from dear daughter, for hers to be next and in Gray Chevron please, LOL! Oh, and a last minute addition of green, gotta have green, ggg. Danielle was kind enough to use her keen coordinating eye once again and chose the perfect coordinates, Thank You Danielle! I love them and I'm going to have a hard time parting with this one!


Snap or Button Closure
Zipper Pocket
6 Credit Card Pockets
2 Slip Pockets (Phone & $$$)
Wristlet Strap-Detachable & Wrap-able
This Walkin' Wristlet finishes at approximately 7" tall x 4" wide folded and the wrist strap is 1" wide x 6" folded. All Seams are 1/2" and Topstitching is 1/8". Also you'll see 2 different Tab closures and 2 different zipper inserts. Please let me know if you have any questions or need any help.
Supplies you'll need per Wallet/Wristlet
Wallet
- 2 or 3 Coordinating Fat Quarters - about a 1/2yd total
- Woven Interfacing - about 1/4yd of Pellon SF101
- Batting, Felt or Fusible Fleece - 10"x 10"- I used Quilters Dream Cotton
- 7" Zipper (will cut to fit)
- 3" Coordinating Ribbon - loop for connecting wristlet
- Split Ring
- Snap Set - Kam Snaps/Pliers/Tool
- Elastic - 3" length of round or 1/4" flat - check sizing to go around the button but still be snug to hold the wallet closed.
- 2 or 3 Coordinating Grosgrain Ribbons - 12" to 14" of each--I used 1", 3/4" and 1/2" for just over 1yd total but its always good to have a little extra of each length here as you don't want the strap to end up too small for your wrist.
- Small Hook-bag hardware from Joann's
- Scissors and/or Rotary Cutter, Ruler and Cutting Mat
- Fabric Marking Pen/Marker/Tailor's Chalk
- Lapel Stick - Fabric Glue Stick makes stitching layers of ribbon together a breeze and can assist with zippers too!
- Coordinating Thread
- Iron and Ironing Board
- Sewing Machine
- 100/16 Sewing Machine Needle - for Topstitching
- Zipper Foot - zipper installation and Topstitching
- Sticky Notes (post-it) - makes keeping all the pieces organized sew much easier!

SF101 Interfacing:
- 1) 7"t x8"w-inside cover
- 1) 7"t x2.5"w-small/front cc pocket
- 1) 7"t x 3.5"w -slip pocket/cc pockets base
- 2) 4.5"t x 3"w-tab for closure
- 1) 7"t x 8"w-Main Cover
- 2) 1" x 1"-Snap Installation
- 1) 8"t x 9"w-Outside Main Cover
- 1) 8"t x4.5"w-Zipper (cover that shows)
- 1) 8"t x 8.5"w-Slip Pocket/Credit Card Pocket(s) Base-fold wrong sides together to 8"t x 4.25"w with SF101 enclosed between fold
- 1) 8"t x 5.5"w-Md. Credit Card Pocket(s)-fold wrong sides together to 8"t x 2.75"w
- 1) 5"t x 3.5"w-Tab Main
- 1) 8"t x 9"w-Inside Main Cover
- 1) 8"t x 7"w-Lg Credit Card pocket(s)-fold wrong sides together to 8"t x 3.5"w
- 2) 8"t x 4.5w-Zipper (inside of zipper cover and backside of zipper pocket)
- 1) 8"t x 6"w-Sm Credit Card Pocket(s) (front that shows)-fold to 8"t x 3"w with SF101 enclosed between fold.
- 1) 8"t x 4.5"w-Zipper Pocket (inside)
- 1) 5"t x 3.5"w-Tab Underside
*Cut all pieces, apply all fusibles, press all folds and topstich along folded edges at 1/8th.
Zipper Pocket Construction
The Wristlet uses the box method and the Wallet uses the pouch method. If you are familiar with the Zipper Pouch craze you already know about the pouch method or a quick search on YouTube will return several nice videos on that method as well. We'll cover the box method here:
1. Lay 1 8"t x4.5"w fabric (inside zipper) turned long side up face down. To make the box draw a line 1" down from top edge and 1" in on each side. Now move down 1/2" and mark another line, connect these lines to create your box. Mark the center of the box leaving 1/2" on each end to create a triangle at each corner.

2. Add 1 8"t x 4.5"w fabric (zipper cover) under this piece face up, right sides facing. Stitch around the outside lines of the box you drew, thru both layers.

3. Cut down center line and triangle corners thru both layers. Being careful to not clip corner stitches but get as close as possible so it lays flat when turned.

4. Push/pull top layer thru hole you just cut so layers are now wrong sides facing. It takes some fiddling to get it to lay nicely. Press.


5. Lay Zipper under fabric showing thru the box. Pin and/or use the Lapel Glue Stick on zipper tape to hold in place. If you are shortening your zipper now is the time...mark end opposite pull, stitch a few hand stitches where you want it to end and cut off the rest. Using your Zipper Foot, top stitch around the box to attach the zipper. Go slow and try to keep the stitches neat and smooth any wrinkles around the box.


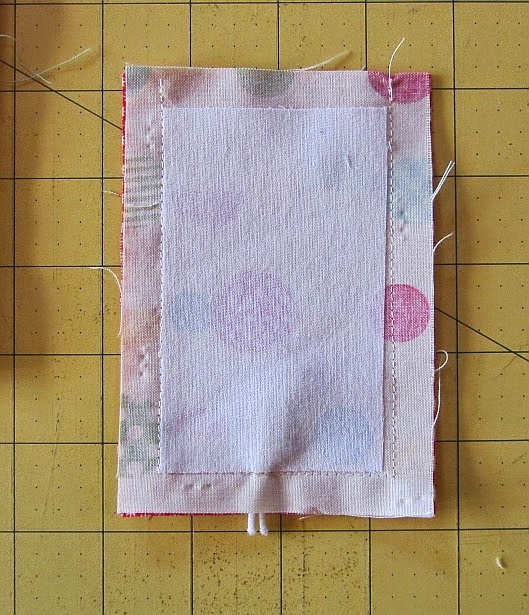
6. Place two 8"t x 4.5"w pieces wrong sides together on top of the Zipper cover (top facing fabric is inside back/faces main inside cover). Match edges, pin and stitch across top edge with 1/4" seam.

7. Flip so Zipper is up and roll seam to hide. Topstitch across top at 1/8th and baste 3 other sides.

Zipper Pocket is finished, set aside.
Slip Pocket (base for cc slots) and Credit Card Slots Construction
1. Lay folded Slip Pocket/Base lengthwise with folded and top stitched edge facing up (lengthwise/like you did to construct the zipper pocket). Place Lg. CC pocket over slip pocket/base with folded edge 1/2" down from top slip pocket/base folded edge. Next, place Md CC pocket over Lg. CC pocket 1/2" down from top folded edge of Lg. CC pocket.

2. Pin and mark lengthwise 3" down from the top (Slip Pocket/Base) folded edge. Stitch marked line and trim just the seam allowance of the CC pockets 1/4". This line of stitching will not show when finished.

3. Next, lay Sm Credit Card pocket on top (base/cc stack), matching bottom and side edges to Slip Pocket/Base. Mark and stitch center thru cc pockets to divide and secure. Baste the three open edges and trim bottom seam allowance 1/4".

Slip Pocket/Base and Credit Card Pockets are finished, set aside.
Tab Construction
1. Place both 5"t x 3.5"w fabric for tabs right sides together and pin. ***Stitch 2 long sides and 1 short side, leave 1 short end open making a "U" of stitches. Trim and turn right sides out. Add the 1"sq batting after turning, press and top stitch "U". Mark Snap Location on Tab, 1" up and centered from stitched short end.


***Button Closure-fold elastic in half and insert folded elastic loop into layers, place at the bottom of the "U" stitches. Loop goes inside and hangs 1/2" past edge, you can tape it down inside to hold straight. *Make sure your loop goes around your button*.

Stitch "U", going twice over elastic.
Clip seams and turn, elastic loop will be facing out. Press and topstitch. If using Button Closure, Tab is finished after topstitching***

Final Construction
1. Place Inside Cover right side up, on top add Zipper Pocket Placket on the left and Slip Pocket/CC Slots Placket on right, matching all edges. Baste around all edges.

2. Add Tab on top Slip Pocket/CC Slots with tab snap facing inside
(towards zipper placket) and over outside edge about 1.5". Add folded
ribbon loop with loop facing in at center (where the wallet will fold)
and pin.


4. Poke out corners, smooth and press.


5. If using a Snap***Insert Batting and apply bottom half of Snap per manufacturers instructions thru opening.

6. Top stitch around rectangle at 1/8" with 16/100 needle and zipper foot closing the opening as well. Go slow and stitch neatly... if you stitch in too far then your Credit Card Slots wont be wide enough (ask me how I know, LOL).
***Button Closure-after top stitching, mark placement and stitch on Button. Fill and Enjoy!


Wristlet Strap
1. Lightly heat seal all ends of ribbons. Place 12" length of 1" Ribbon on table, add Lapel Glue to backside of 13" length 3/4" ribbon and lay centered on top of 1" ribbon. Add Lapel Glue to backside of 1/2" ribbon and layer centered on top of 3/4" ribbon, ends even with 1"ribbon.

2. Stitch ribbons together as 1 layer by stitching down both long sides of the 1/2"/top ribbon. Fold matched short ends up 1" and stitch across to make a loop.

3. Stitch end of long 1/2" ribbon to attach hook.
4. Add Split Ring to wallet ribbon loop and then slide loop end of layered ribbons onto split ring to attach and snap hook to split ring to create wrist strap.

You're finished, Fill and Enjoy!
Thank You again for the privilege of sharing with you you. Please let me know if anyone has any questions.
Vanessa Behymer
Vintage Barngirl
Want to win a $10 gift certificate to Whimsical Fabric?
1. Join our Facebook group Whimsical Fabric & Me.
2. Sew up one of these awesome wristlets.
3. Post pictures of your wristlet in your Facebook sewing groups and use the hashtag #whimsicalfabricwalkinwristlet (Make sure to post and hashtag them in WF&Me also!)
We will randomly draw a winner who will win a
$10 gift certificate to Whimsical Fabric! Contest ends Monday, March 23rd, 2015.
Danielle Storm
www.whimsicalfabric.com