
Hi! It's Alyssa again from Keep Calm and Carrion. Welcome to my second attempt at a tutorial. . . I'll go slow and if you have any questions, just ask and I'll be sure to answer them!
I made this top for the Whimsical Fabric & Me Make It Mine Design Challenge. Inara and I both love it. I'm going to show you how I made it so you can make one for your own girl.

And after much consideration.. I'm calling it The Inara Tunic!

For the tutorial I am using the awesome
Riley Blake Gracie Girl line.
Riley Blake Gracie Girl line.

Note: I am making what equates to about a size 6 for Inara, but will try to make sure I include all the measurements you will need to make one in a different size as well!

Here is what you'll need:
• 1 Fat Quarter of fabric for the straps
• 1/2yd fabric for bodice and bodice lining
(you will need a little more if you are making a size bigger than a 6)
(you will need a little more if you are making a size bigger than a 6)
• 1yd fabric for the overskirt
(to calculate you need waist radius + skirt length x 2. As long as this number is less than 43”, you can make the skirt with a full circle.)
(to calculate you need waist radius + skirt length x 2. As long as this number is less than 43”, you can make the skirt with a full circle.)
• 1yd fabric for underskirt (to calculate you need waist radius +
skirt length x 2)
• 2yds of ¾" ric-rac for overskirt (you’ll need enough of
this to go around the hemline)
• 3yds of ¾" ric-rac for underskirt
• 1 yd ruffle-rac trim
• 3yds of ¼” elastic
*Remember
for your skirt fabric that the skirt pieces are done in full circle, so
you will either need a print that isn't too directional or you can
cut the skirt in half circles to account for it, (but don't forget to add
seam allowance!)
And the other basic sewing stuff:
• sewing machine
• needle, thread
• safety pins
• scissors
• ruler, etc.
*For ease of math, I am using ½” seam allowances. Feel free to make these smaller if you want
to do more math and use less fabric! • sewing machine
• needle, thread
• safety pins
• scissors
• ruler, etc.

And now it's time to cut out the pieces. When you're done you'll have this.
 |
| Front Bodice Main, Front Bodice Lining, Back Bodice Main, Back Bodice Lining, Overskirt, Underskirt, 2 Straps, and elastic. |
** For a size 6 we are using a chest measurement of 24", an underarm to bellybutton measurement of 7.5", and a bellybutton to mid-thigh measurement of 10.5"
Bodice Front and Lining: For a size 6 - CUT 2 - 8.5”x14”
1. For front bodice width, take the child’s chest measurement,
divide by 2, and add 1” for seam allowances and 1” for ease.
MATH: Chest measurement (24”) / 2 = 12” + 1” + 1” =
14”
2. For front bodice length, you will want to measure from
underarm to belly button and add 1” for seam allowance.
MATH:
Underarm to bellybutton (7.5”) + 1” = 8.5”
-------
Bodice Back and Lining: For a size 6 - CUT 2 - 8”x17"
1. For back bodice width, take child’s chest measurement, divide by
2, and add 5” for ease and scrunch. If
you want less scrunch, you can go down an inch or so here.
MATH:
Chest measurement (24”)/2 = 12” + 5” = 17”
2. For the back bodice length, you will use front bodice
length – ½” (you’ll see why later)
MATH:
Front bodice length (8.5”) - .5” = 8”
-------
Straps: For a size 6 - CUT 2 - 10”x6”
*For Strap width. The
straps are intentionally wide, so maybe if you are doing sizes below a 3, go
down to 4”. If you are doing sizes
larger, you are probably fine with the 6” width.
*For strap length,
you’ll want to measure from armpit over the shoulder to the armpit over the
back. You’ll want to check the fit of
these before finishing the bodice, but we’ll talk about that when we get there!
-------
Underskirt: For a size 6 - waist radius: 4”, underskirt length: 11.5”1a. To find the waist radius we must first find the waist opening (accounting for bias stretch).
MATH: waist opening = front bodice width (14”) + back bodice width (17”) – seam allowance (2”) – bias stretch (3”) = 26”
1b. And even more math…. I will try to keep this simple, since
there are a million circle skirt tutorials out there.
MATH:
waist radius = waist opening/2π= 26”/ 2π = 4.14 ≈ 4”
Quick reference: 2π ≈ 6.28, and round to the nearest decent measurement on this step. I’d say within ¼” is close enough, since you’ve got wiggle room with the circle.
2. To find the underskirt length, measure the distance from the child's belly button to mid-thigh and subtract the seam allowances.
MATH: underskirt length = distance from belly button to mid-thigh measurement (10.5”) + seam allowances (1”) = 11.5”
MATH: underskirt length = distance from belly button to mid-thigh measurement (10.5”) + seam allowances (1”) = 11.5”

Double fold the fabric. Fold selvedge to selvedge . . .


Make several dots with chalk or a fabric pen, measuring from the point of the double fold, the distance of the waist radius. Connect the dots to form the top curve of your circle.

Measure down 11.5” from the
curved line you just drew and make a second curved line. Cut along
these lines.

-------
Overskirt: For a size 6 - waist radius: 4”, overskirt length: 10”
The overskirt is a bit easier. You’ll use your calculated waist radius from
the underskirt, and make the length 1.5” shorter. The nice part of this step…. Really simple
math!
MATH:
underskirt length (11.5”) – 1.5” = 10”Repeat the same cutting steps as the underskirt. When you unfold the pieces you should have this:

Elastic: For a size 6 - CUT 7 - 13” long strips
This measurement is going to be a little fiddly, but here is
how I did it. Take the child’s chest
measurement/2 + 1” seam allowance
MATH:
chest measurement (24”)/2 =12” + 1” = 13”
*Inara doesn’t like clothes super tight, so I wanted to make
sure there was enough ease that she didn’t feel constricted, but the elastic
was tight enough to keep the dress on well.
Almost time to sew... (but this is the last bit of math at least!)
------
Shaping the bodice:
Take your two front bodice pieces and put them right sides
together. Then fold in half so the short
sides meet. 
You will now mark dots on the fabric. Two of these will stay the same no matter what size, so we’ll do those first. On the side of the fold, make a dot ½” down. On the opposite side, make a mark down ½”.
On the top of the pieces you will make two additional dots. These dots will also serve to mark where the straps go, so on your child, you’ll want to measure how far out from the center you want the straps to start. For Inara, I started them 2.5” from the center, which made that straps sort of centered over her nipples.
Then make a mark 1” from the first mark, to mark where the straps will end.

Now connect the two left dots and the two right dots. And cut along the curved lines you've made.
Okay, that's all the cutting.. let's sew!
------
Remember, I’m using a ½” seam allowance.
Take
your front bodice and back bodice right sides together and
pin the short sides together and sew both sides. Your back is wider
than your front, but just line up the short sides. Repeat with lining,
press seams open, and set
aside.
Take your straps and fold in half so the long sides meet.

Sew and press this seam open. Center seam on the strap.

Turn straps.

Then you will need to either pleat or gather your strap ends so they are approximately 1” wide. Here is a close up of my pleats so you can see how they are done:
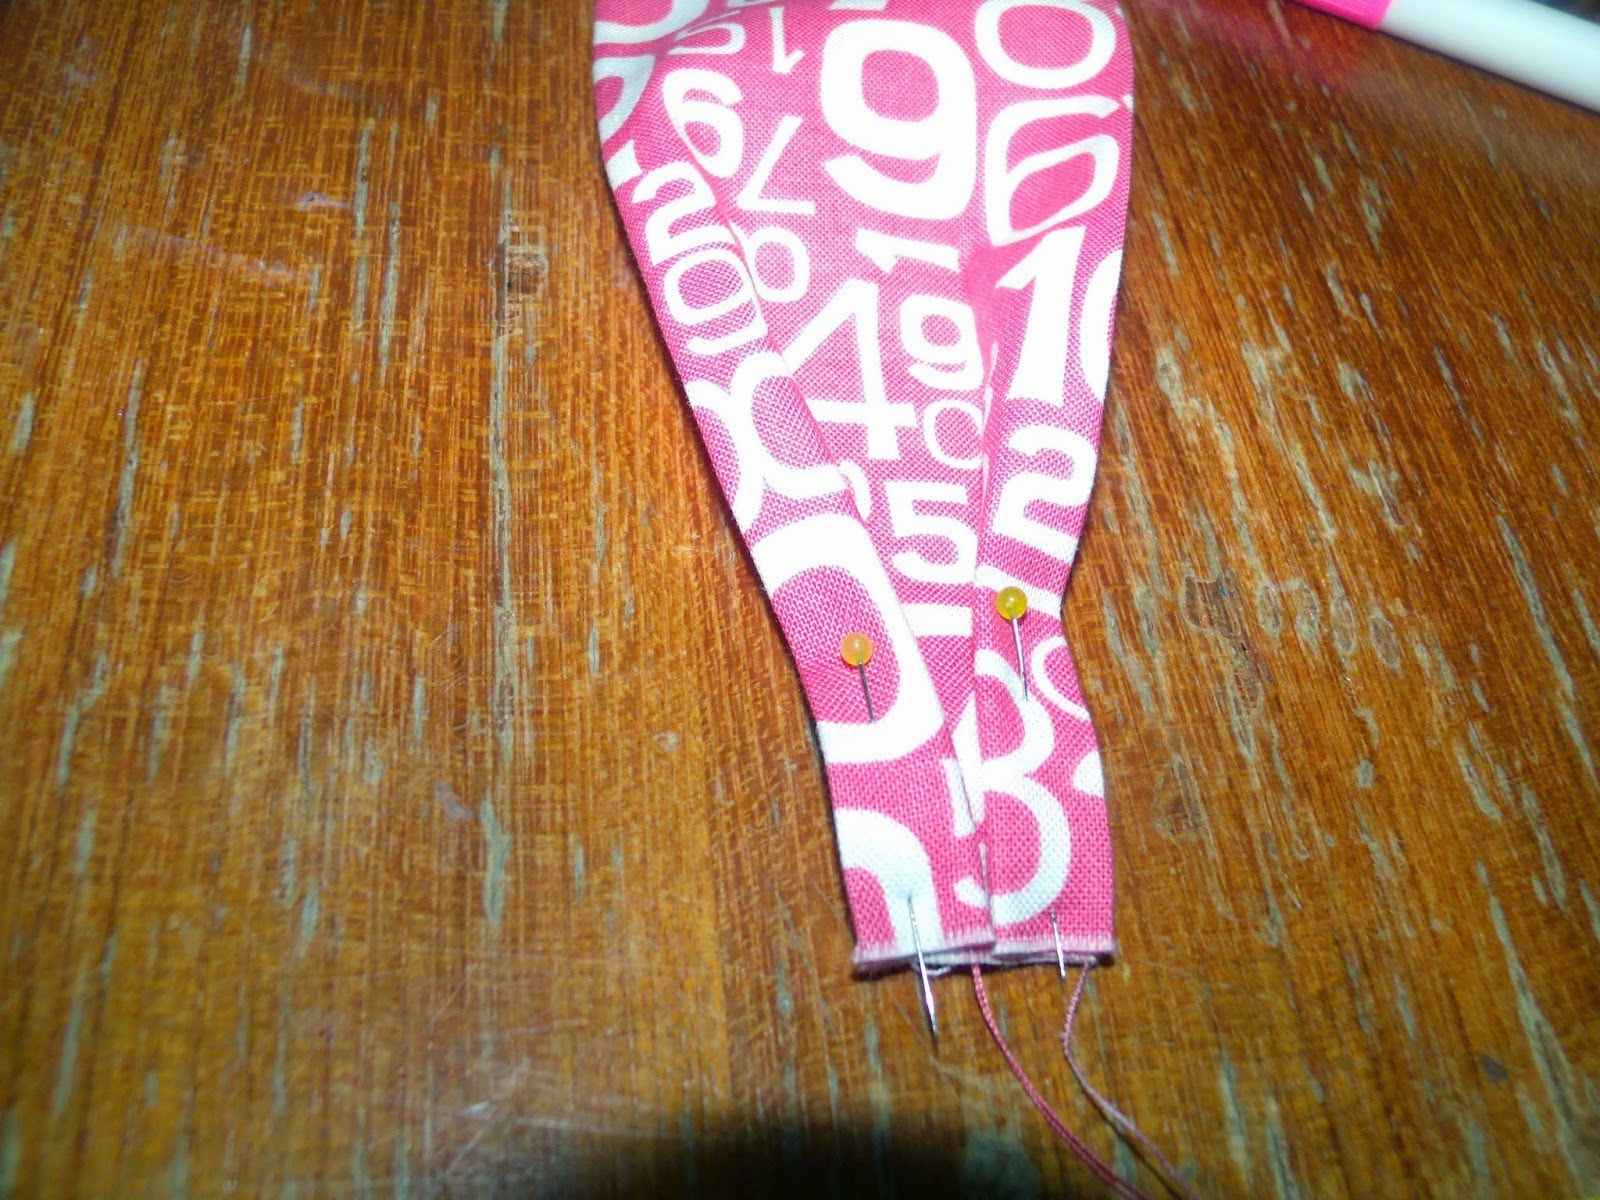
Repeat gathering or pleating for all four sides. If you pleat, baste your pleat so it stays together.

Take your main bodice piece front side up, and place straps
at the dot you made to mark the inner part of the strap. Baste in place.

Flip over so the back side is facing up. Take a pin and mark the center point of the back.
Now you’ll mark the placement for where the straps will attach at the back. You’ll want your back straps to attach slightly further in than your front straps. For Inara I did mine at 4”, but you’ll want to put the bodice on your child and check the strap placement before securing.

Roll the bottom of the bodice up so the straps can go around
the bottom to lay flat with right sides together on the back bodice. Once you’re happy with the placement, pin the
straps to the back and baste in place.

Slip the bodice lining over the bodice, right sides together and pin along the top edge ensuring the side seams line up.

Trim seam allowance to ¼” and clip around the curve and the center point of the dip in the front.

Turn right side out and press.

At this step you have two options. I chose to under-stitch my front bodice, because I like how it looks, but you can topstitch if you prefer.
To understitch, pull your bodice away from the lining. And stitch the seam allowance to the lining at 1/8” seam allowance.

When you look at the outside, you won’t see any stitching, but from the inside you will have a row of stitching.


Now, turn the bottom edge of the bodice lining toward the wrong side ½”, press well, then unfold.

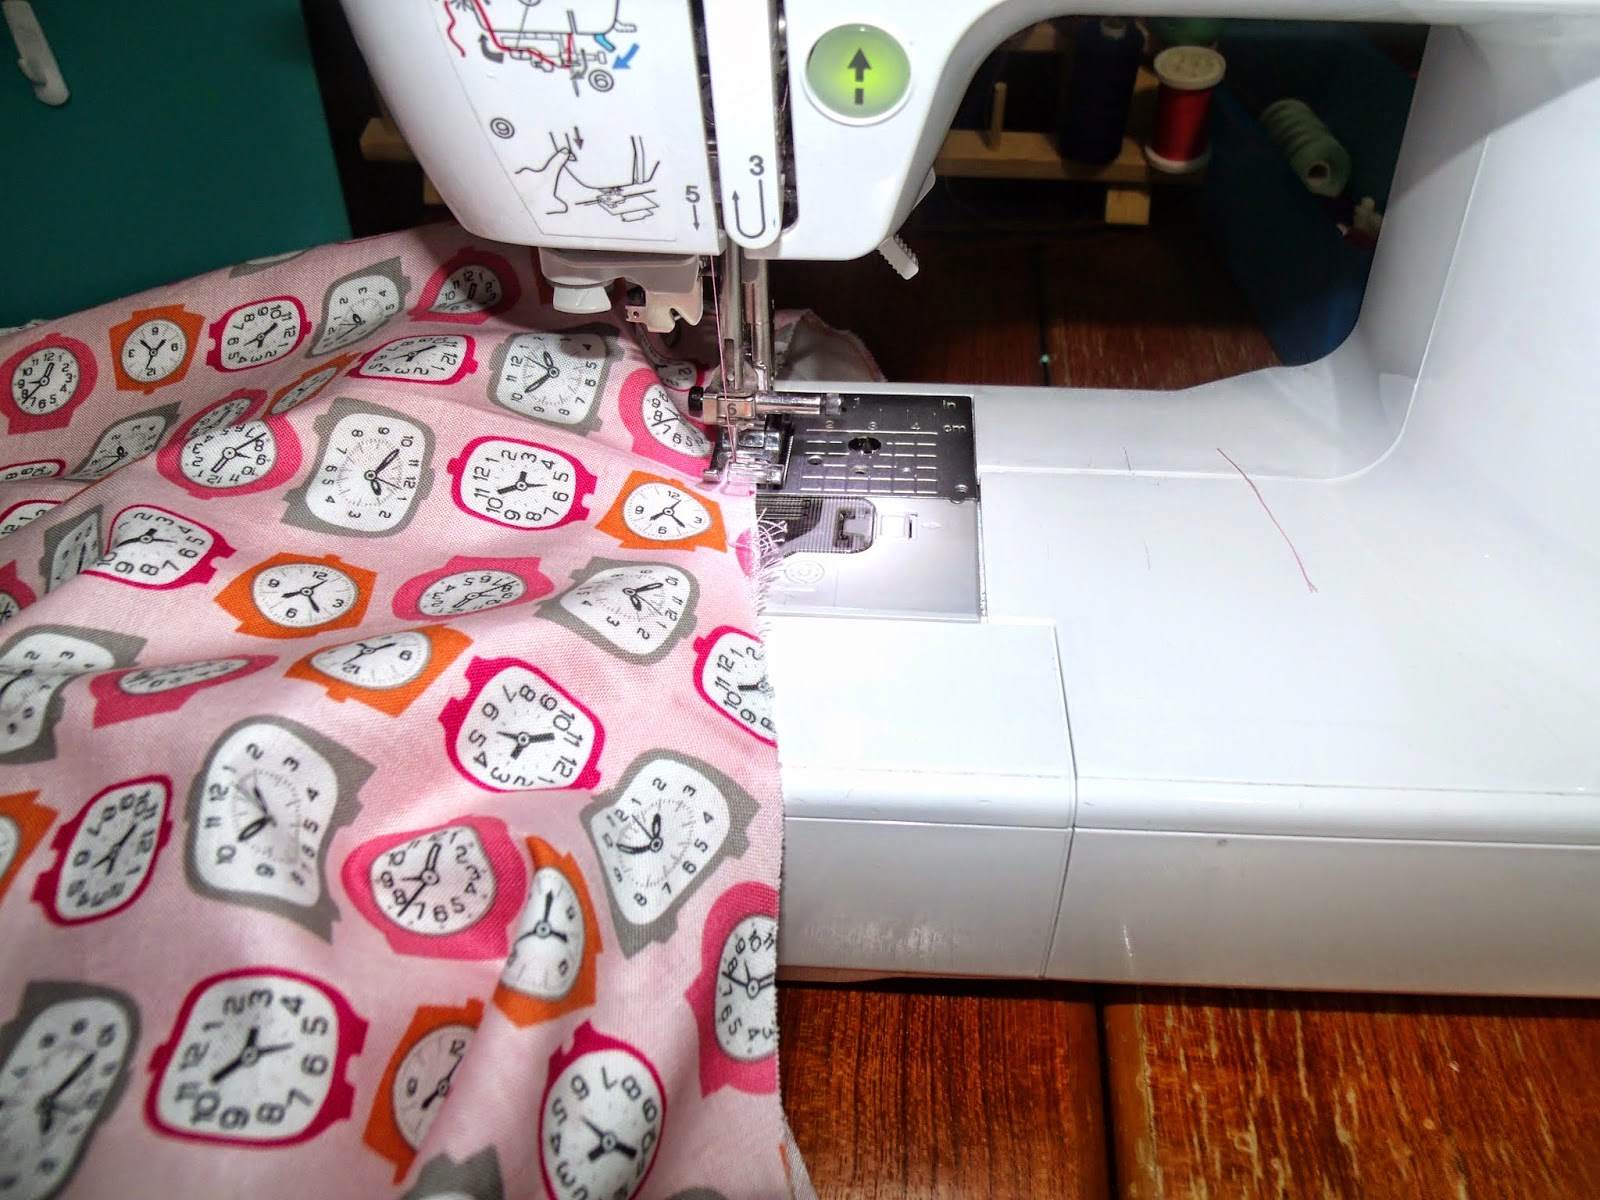
Next we will do the bodice back. You have two options here. You can shirr the back, or you can do elastic casings. I know that not everyone likes shirring, so I am going to show you how to do the casings.


This will give you ½” channels. Repeat this down the bodice stopping 1” from the bottom.
So if you make your bodice longer for bigger sizes, and want to do more channels of elastic, just make sure your last channel ends no less than 1” above the bottom.
If you're using my measurements, you should have 14 channels.
Now we will start feeding the elastic through, starting at the second channel from the top.

Once you’ve got it fed through till the last ½”, stitch in the ditch at the side seam to secure that end.

Continue feeding the elastic through until you come out the far end of the channel.
I recommend securing this far end with a safety pin and not
stitching yet.
Continue feeding the elastic through every other channel, and
securing the far end with a safety pin until you reach the last channel.
At this point, try the bodice on your child and make sure that your elastic is the right length. Once you’re happy with the length, stitch in the ditch down the pinned side and secure the elastic.
Set the bodice aside for a bit.
Now, let’s finish the skirts before we attach them. Either serge or zig-zag the raw edge of the bottom of your skirts.

Line up your ric-rac on the right side with the scallop aligned with the serged edge and attach with a ¼” seam allowance.

Then, flip the raw edge under and press well.

Topstitch bottom edge.

Your bottom edge now looks like this:

Repeat for your other skirt.
Place over-skirt on top of underskirt and baste together at waist.
Flip skirts inside out and place bodice right-side out inside them (so you will have right side of bodice main to right side of overskirt).
Pin main bodice to skirts (making sure to keep lining out of the way.) Sew together with a ½ seam allowance. Press seam toward bodice.
Fold the lining back under at the ½” that you pressed earlier. I like to secure this seam in place with my glue pen until I stitch it down.

You have a couple options now. You can topstitch along the bottom edge of the bodice to secure the lining and enclose the waist seam or you can hand-stitch the lining in place. Whichever you choose is fine, since the seam will be covered in the next step.
And for the last step, we will attach the ruffle-rac. Pin the ruffle-rac centered over the seam where the bodice meets the skirt. Start at one side seam, go all the way around the bodice and overlap back at the side seam.

Make sure you
heat seal your ends here, so they don't fray.

Using a slightly lengthened stitch, sew along the stitch line that is on the ruffle-rac.

Beg your model to sit still while you brush her hair and attempt to explain that it wouldn't be so knotted if she hadn't been making gravel angels on the ground at the park. Take pictures and you're done!


It's really fast to make once you get through all of the math, and if you make it a little loose, you can layer it with a long sleeved shirt for wear in cooler weather.

The extra length in the back creates what I am totally technically calling "scrunch." So even when the elastic is stretched while on, you have the nice scrunched look, kind of like with shirring.

And the skirt... well Inara loves anything with twirl, but she isn't a big fan of ruffles. So the layered full circle skirts give us tons of twirl and femininity without being lots of ruffles. And the ruffle-rac "belt" and ric-rac hem gives it just a fun touch of added detail to complete the look.

Well, I hope that I explained everything clearly. And if you have any questions at all, post them below or please come join the Whimsical Fabric & Me Facebook Group and I will be there to help!
Alyssa Carrion
Keep Calm and Carrion
Want to win a $10 gift certificate to Whimsical Fabric?
1. Join our Facebook group Whimsical Fabric & Me.
2. Make the Inara Tunic.
3. Post a picture of your Inara Tunic in the WF&Me group using the hashtag #whimsicalfabricinaratunic
Alyssa and I will pick our two favorite Inara Tunics and each winner will receive a
$10 gift certificate to Whimsical Fabric! Contest ends Monday, April 27th, 2015.
Danielle Storm
www.whimsicalfabric.com