Saturday, October 31, 2015

No Tricks, Just A Treat!


www.whimsicalfabric.com
The entire website is marked 15% off.  In addition, spend $25 and use the code TREAT to save an additional 10% off the already reduced website prices.  

And don't forget, we are including raffle tickets for our Black Friday Giveaway with every $20 website order (after discounts and before shipping). Spend $20.00-$39.99, receive 1 ticket. Spend $40.00-$59.99, receive 2 tickets. If you spend $200 you will receive 10 raffle tickets!  Tickets will only be included on shipped orders.  If you purchase downloadable products (PDFs) and would like to receive tickets, you must include an item on your order that requires shipping.  Tickets will only be given for website orders unless otherwise stated.  The raffle ticket offer ends on Monday, November 23rd.

Happy Shopping and Creating!
Danielle Storm 


Tuesday, October 27, 2015

Mattie and Sara Pattern Reviews


Hello everyone!! Today we are bringing you another couple pattern reviews. The Mattie Knit Shirt, by Children's Corner and an adorable skirt to compliment it perfectly, the Sara's Skort, also by Children's Corner Patterns. 

Note: Please click on images to view in a larger format.

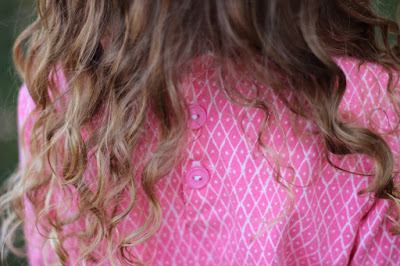
Let's look at the Mattie Knit Shirt first. Here I used a dreamy knit from the Art Gallery Wonderland line, Diamond Flush Dance.

This is a paper pattern, which comes in sizes 1-10. The sizes are not nested, which means I didn't have to trace out her size 5. YES!! No printing and no tracing. Already off to a great start!

This is a very classic, very versatile, staple for any closet.  It comes with either short or long sleeve, and a dainty ruffled finish on the sleeves and neckline, which can be omitted of course, as you can see on mine. Mattie also has a two buttoned placket. Mattie is designed for knit, though I have to admit, I think I'm going to try this in woven as well

So, let's stop and talk about this placket really quick. If you are one to avoid plackets, or find them hard to do...you need this pattern. I have never been a big fan of plackets myself, because I haven't felt confident when doing them. {bad directions usually, and considering I'm self taught I had never learned the proper way} This pattern has changed that for me. I will use this method from now on with ease. Knit or woven

It's the little details that make this shirt. Pattern calls for lettuce edge rolled hems on the ruffles, which again, can be omitted or even left raw.

As you can see, I embellished the top with a bit of free motion applique.  I cut it straight from the extra yardage I had from the Art Gallery Wonderlandia Fondant fabric I used on my skirt.

Which brings me to the next pattern, Sara's Skort.

  
This is a lined skirt with sewn in shorts (shorts are unlined.)  The skirt is fitted in the front for a nice smooth look. Back is gathered by elastic casing. You can hem the skirt with your favorite trim. As you can see I have used ric rac. The pattern also has directions for a dainty ruffle. I think I'll try some pom pom trim next time.

My daughter loves this skirt. It's very roomy and it allows for plenty of movement, which has been a big pet peeve of mine on my other skirt patterns. Not to mention, those built in shorts for coverage. Don't have to worry about extra bloomers...I am happy!! 

I love how both of these patterns are classic and trendy. They are both going to be staples in my sewing room.
  
All products and patterns are sold on the Whimsical Fabric website. Click on the names below to find each product in the shop. 

Shirt: 

Pants:

Notions:

Be sure to share all your creations on our Facebook group as well! 

Nichole

Wednesday, October 21, 2015

$500 Raffle Giveaway and a Sale!

https://www.facebook.com/groups/1701707403388641/
 
We've reached 5,000 members on our Whimsical Fabric & Me Facebook Group, and so it's time to celebrate.  If you haven't joined our Facebook group, now is a GREAT time to do it.  Each day we are giving away a raffle ticket to our special Black Friday Giveaway.  We have LOTS of other surprises in store also for the Whimsical Fabric & Me group, so please make sure to join us today.

Our Black Friday Raffle Giveaway has a total of over $500 worth of prizes!  Here is a bit more about each prize. 

First Prize
An awesome Brother 1034D serger.
Valued at $345.00

 • Reliable, high performance 3/4 thread serger delivers professional edge finishing on a wide range of fabrics, including knits, linens and formal wear. Create ruffles, decorative edges, gathers; join laces; serge narrow sleeves, spaghetti straps, and more!
 • 22 built-in stitch functions with 4-thread overlock, 3-thread overlock, narrow, rolled hem, and ribbon lock stitches, with specialty stitch functions for formal and bridal wear, home decor and crafts, heirloom and reinforced tape applications.
 • Differential fabric feed;for truly professional, even stitch quality, even on thin, knitted, and stretchy fabrics. 
 • Easy to thread, easy to learn and use; with included instruction video, printed manual, and completely color-coded and numbered upper and lower looper threading. 

 
Second Prize
A $100.00 Whimsical Fabric gift certificate.

Third Prize
A 21 piece Ardently Austen Fat Quarter Bundle.
Valued at over $65.00 shipped.

Raffle Tickets with Every $20 Shipped Order
In addition to winning tickets on the Facebook Group, we are also including tickets in packages we ship out from website orders.  For every $20 spent (after discount and before shipping) you will receive a raffle ticket.  Spend $20.00-$39.99, receive 1 ticket. Spend $40.00-$59.99, receive 2 tickets. If you spend $200 you will receive 10 raffle tickets!  Tickets will only be included on shipped orders.  If you purchase downloadable products (PDFs) and would like to receive tickets, you must include an item on your order that requires shipping.  Tickets will only be given for website orders unless otherwise stated.  This offer ends on Monday, November 23rd.

www.whimsicalfabric.com
And finally, to help celebrate 5000 members, we are having a 2 week sale!  Yup, two full weeks of 15% off the entire website.  Have a repeat customer coupon code?  Go ahead and stack it on top!  Take advantage of these great prices and earn yourself some raffle tickets in the process.  Sale ends at 11:59pm, Tuesday, November 3rd.

Happy Shopping and Creating!
Danielle Storm 

Tuesday, October 20, 2015

Jona's Favorite Things


We are starting a new series here on the Whimsical Fabric blog.  Each month we will bring you a My Favorite Things post that will let you get to know some of the team members behind Whimsical Fabric
Note: Some links within this post are affiliate links.
Jona Lourenco has been working with Whimsical Fabric for almost a year now.  Some of Jona's biggest strengths that she brings to Whimsical Fabric are her organizational skills, creativity, and positive attitude.  Jona is amazing at helping me to stay organized (which I desperately need) and is awesome at coming up with creative and new ideas.  She planted the seed for the Make It Mine Challenge and plays a HUGE roll in keeping the challenge running smoothly.  In addition, Jona also runs our Pinterest board and helps admin our Facebook group, Whimsical Fabric & Me.  I adore working with Jona and am blessed to have her on the team.  I'm very thankful for everything she does to help keep Whimsical Fabric running smoothly.

Here are some of Jona's Favorite Things.


Favorite pin from our Sew Helpful Pinterest board:
Elizabeth Rosario pinned this blog post from Melly Sews on how to hem different projects.

Favorite in-stock fabric: 
I am currently loving the Art Gallery Happy Home line. I have been pinning away Happy Home project ideas on the Happy Home Pinterest Board.
http://www.whimsicaldesignsclothing.com/index.php?main_page=index&cPath=3_544

Favorite past sew-along:
My all time favorite Whimsical Fabric Sew Along to date is the Oliver + S Sleepover Pajamas! The sleeves have a big enough hem that I was able to roll up the sleeves for a while and the pants have cuffs that can be up or down. It's been almost a year, and my toddler still wears them!

Favorite room in my house:
This is a hard one.  I recently redid my sewing room, and LOVE how it looks.  But, this last week, my bedroom started getting a make over and I am completely in love with the progress. I will post both. I would love to hear from you in the comments which you like more. 
This is the first time in my life that I have lived in
 a home with painted walls!
Hubby found two nightstands and the table on Craigslist.
My great-grandma hand quilted that quilt by kerosene lantern.

Favorite Pinterest Board:
One of my favorite Pinterest Board's is Riley Blake's Quotables Board. I love it because there aren't any projects to add to my to-do list, or any advice about what I should change in my life. Just a place to giggle.
https://www.pinterest.com/rileyblake/quotables/

 Favorite Books:
So the only thing I do more than sew, is read. I will easily read an entire book in an evening (more like middle of the night). I love a variety of books and will gladly choose a print book over a digital copy any day. I LOVE reference books or books to teach me new skills, even though the same info can be found online.

Here are my most recently read/referred to books (other than the 3 in my car, and the one on my Kindle):

  1. Oh My, Oh My, Oh Dinosaurs!: My two year old and I read this book every day.
  2. Piggie and Elephant Books: We own most of the collection and these are our bedtime stories, I play the part of Piggie, and my Husband plays the part of Elephant.
  3. Almost Amish: I purchased this used, and found that my copy was signed by the author. 
  4. Oliver + S Little Things to Sew: This one was a birthday gift and the giver even wrote a note in the front of the book, I LOVE notes from the giver!
  5. For Keeps: I am a beginner quilter and this book has been very useful and has darling patterns.
  6. Stitch Along: I have fallen in love with hand embroidery and the design ideas in here are darling.
  7. Trim Healthy Mama: I have been slowly trying to eat healthier and this (plus the cookbook) have become a great resource.
  8. Action Art: My kids and I love to do art and this provides a ton of great ideas beyond paper and crayons.
Happy Creating!
Danielle Storm 

Monday, October 19, 2015

Tuesday, October 13, 2015

Mattie, Emma, and Bella Pattern Reviews


Hello and Good Morning! 
I am very excited to bring to you the very first Whimsical Fabric pattern review! 
 
Note:
Please click on images to view in a larger format

Today I have sewn three patterns that are carried in the Whimsical Fabric shop, Children's Corner's Mattie, Bella Marie Boutique's Emma Top, and Pink Fig's Bella Pants. I used the Wonderland fabric line for this entire outfit.

The first pattern I have sewn is the Children's Corner Mattie Knit Shirt. This pattern is a paper pattern. It is a moderate level pattern that comes in sizes 1-10. The pattern is designed to be sewn in all knit with a button placket on the back. It has both long and short sleeve options.

What I love about this pattern are the features! It has a lovely ruffled neckline that is sewn between the shirt and the neck bias. It has the same ruffle at the sleeve hems. The back has a button placket like that of a skirt portion on a dress, which makes it a breeze to dress my little girl. I have sewn other ruffled neckline patterns that were either hard to put over my daughter's head or the neckline was a bit on the big side. This shirt fits perfectly and goes on so well. 

This shirt is also the perfect length to be worn as a top alone. The instructions are clear and easy to read. I can say for sure that this is a love at first sew pattern! I wish I had this pattern sooner. It will be a wardrobe staple for Sarah for every season. Right now I am deciding what other knits to use to sew up at least three more for this winter! 

For the over top I used Bella Marie Boutique's Emma Swing Top pattern. This pattern is sold as a PDF and comes in sizes 1-8. There is not a skill level on the pattern but I would place it at a moderate level as well. The directions are great and it has colored photos to help. I have come to be a fan of Bella Marie Boutique patterns. 

What I love about this pattern are the details and that it is fully lined! It has such cute ruffles on the shoulder straps and a cute curved top band. I decided to add piping to the top band of mine to show this off.

This top has a bottom hem band and ruffle as well. Love! My daughter is at the ruffle stage but the pattern does make the ruffles optional if your daughter/grand-daughter is not into ruffles. 

My most favorite part of this Bella Swing Top pattern is the back! It has an open back style that wraps and buttons on the center back. I used two large Riley Blake Buttons on ours to show this off. This shirt can also be worn alone in hot weather, so this will be a great transitional piece all year long. I love versatile patterns like this. Another one that will be sewn lots! (I have a second one cut out right now as I type this.) 

Now one thing I would like to warn you about this pattern is to remember that when printing out the pattern pieces, be careful. Some print out on landscape and others on portrait. It is great that she does it this way because it saves on paper big time! I love how she has carefully put the pattern pieces together in this way. Very clever I think. 

The pants I sewed have to be my daughter's favorite. They are from Pink Fig, the Bella Pants patterns. This is a paper pattern that has a size range from 6-12 months to size 10. The size range on this pattern is wonderful! I would say this is a beginner pattern. The instructions are very straighter forward and easy to read. It took me an hour to sew these together, so big plus for me! 

The pants have a pocket option (which I did not sew), and a one or two layered ruffle on the bottom hem. We did the two layer ruffle look. It really is just one ruffle that looks like two, so it saves on bulk at the bottom of the pant legs. Another feature I adore! The pants have an elastic waist so these really are quick to make. I went by the size chart and made my daughter the size 5 with the size 6 length in the legs and the rise. For the ruffles I used the size 6 pattern pieces as well for a perfect fit. These couldn't have fit her any better! I can see this being a fun pattern for each Holiday in themed fabrics. 

 All products and patterns are sold in the Whimsical Fabrics shop. Click on the names below to find each product in the shop. 

Under Shirt: 

Over Shirt:

Pants:

Notions:

Be sure to share all your creations on our Facebook group as well! 

Happy Sewing!! 
Sharon

Monday, October 12, 2015

12 Hour 25% Off Flash Sale - Win A Serger!


Save 25% off pretty much everything on our site.  
Hurry though, this flash sale is only good for the next 12 hours!
www.whimsicalfabric.com
Note: Already reduced Fabric Bundles will not be reduced further with this code.

 In addition, all $50 or more orders (after discount is applied) placed during this flash sale will receive a raffle ticket for our
Black Friday Raffle!

www.whimsicalfabric.com
 Win a Brother 1034D Serger, a $100 Whimsical Fabric Gift Certificate, or a Fat Quarter Bundle of Fabric!

Happy Creating!
Danielle Storm 

Hurry Before These Prices Are Gone!


Today is the very last day to save an extra 20% off all fabric bundles.  
Save on full yard, half yard, fat quarter, and fat eighth bundles. Layer cakes, charm bundles, and jelly rolls are on sale too.
http://www.whimsicaldesignsclothing.com/index.php?main_page=index&cPath=3_488

The sale price is good through 11:59pm MT, tonight, Monday, 10/12.

Happy Creating!
Danielle Storm 

Thursday, October 8, 2015

Extra 20% Off All Fabric Bundles


Enjoy and extra 20% off all fabric bundles this week.  
Save on full yard, half yard, fat quarter, and fat eighth bundles. Layer cakes, charm bundles, and jelly rolls are on sale too.
http://www.whimsicaldesignsclothing.com/index.php?main_page=index&cPath=3_488
The sale price is good through 11:59pm MT, Monday, 10/12.

Happy Creating!
Danielle Storm 

Tuesday, October 6, 2015

October Tutorial Tuesday - Trick-or-Treat Bag

 ** If you would like to see an image on our blog in a larger format, just click on it to enlarge.

Note: Links to products within this post are either links to our website or affiliate links.

Jona, of Stiches and Spills, is our guest blogger this month.  Jona has created an adorable Halloween treat bag using fat quarters for our Tutorial Tuesday.  Enjoy!

This Halloween tote is adorable and large enough to hold a ton of candy! Not into Halloween? It is large enough to act as a library tote or a reusable shopping bag if different fabrics are used.

Materials: 
Whimsical Fabric has tote bag kits available for purchase here. The kit comes with everything you need to create your Trick-or-Treat bag. Just supply coordinating thread. Check out the coupon code at the end of this tutorial to save 15% of your kit.

• 6 fat quarters
Solid fabric for the lining
Ric-Rac for the handles

**All sewing is done using a 1/4" seam.**

**This is not my original design. The lovely ladies in our church quilt group uses this design to make quilts for new babies and members that are sick or hospitalized. I took the basic design and scaled it down to a bag size.

Cutting:
-For the straps, cut two strips that are 2.5" by 22" (if you use a fat quarter, the width is 22"). 

-Next, cut the fabric prints into 5.5" by 5.5" squares. Cut a grand total of 18 squares. 9 squares will be used for the front of the tote and 9 squares will be used for the back of the tote. I cut 3 squares from each print, but feel free to cut more of some prints and less of other prints.

-Now you should have a pile of 18 squares that are 5.5" by 5.5" each and two strap pieces that measure 2.5" by 22". Leave the lining fabric alone for now, we will cut that down later. If you haven't already, now is a great time to iron all of the pieces. You should have something similar to this:

-Set aside the ric-rac and strap pieces aside for now.

Square Layout: 
-Now, take nine squares and arrange them into three rows of three. There is no need to worry about the fabric direction as you arrange the fabrics.
**Note: After the squares are sewn together, the 9-square piece will be cut into quarters. See the second photo.

-Repeat with the remaining nine squares.

-Now we will sew all of these together to make two large squares. To speed things up, I like to chain stitch them together. However, I am frequently distracted, so I do one of two things to make sure I don't get my pieces all mixed up while stitching.
  • I take a picture of my layout and refer to it frequently
  • I use colored pens to make marks within the seam allowance to show what pieces get sewn together. See photos.
I received FriXion pens for my birthday and they work perfectly!
There are several colors and they disappear when ironed.
This is from a later step, but it shows how I mark before sewing.
The marks can be done on the front or back, depending on your preference.
 Sewing the Squares: 
-Now it is time to start sewing! First, sew the rows across horizontally.

-Repeat with the other set.

-Now press the seams. Use your preferred method. I like to press the seams to the side, alternating direction with each row. Do this to all of the strips.

-It is now time to stitch the strips together. Pin the top and middle strip together, taking care to match the  vertical seams. Press the seams.
Wonder Clip

-Repeat with the other three strips. You should now have two patchwork squares that look like this. If your sewing isn't perfectly spot on, that's fine! It won't be very noticeable when the bag is finished.

-Trim away a little from each side to make each of the large squares the same size and all sides the same length.

-Take a quick second, grab a cup of tea and get ready for the fun part of this bag!

-Find the vertical center of the square and cut.

-Cut across the horizontal center of the square. I find it easiest to take each half and cut it individually.

-Repeat for the other section, so you have four smaller squares.

-Repeat with the other 9 square so you know have eight small squares.

-Now play around with the eight squares by rotating the small squares around.

-Flip over and make little marks to match what pieces go together. Sew along the vertical seams first.

-Press the seams to the side. I prefer to press them in opposite directions to minimize the bulk in the center of the patchwork square.

-Stitch the top and bottom rectangles together. Repeat with the other pieces. You now have two squares that will look something like this:

-Square both pieces up so they are square and both are the same size. Mine measured 14.25" by 14.25", but yours may measure slightly larger or smaller, and that is fine.

Constructing the bag: 
-Grab your lining fabric.

-Cut two squares the same size as your main print squares. Mine are 14.25" by 14.25". Iron if desired and set to the side.

-It's time to make the tote! You should now have a pile that looks something like this:

-Grab the handle strips and the ric-rac for the next few steps. Take one handle strip and fold right sides together matching the long edge. Sew. Repeat with the second strip.

-Press the seam open down the center of the strip. Turn right side out and press in place. The seam will be visible along the front of the strip.

-Center the ric-rac on top of the seam and stitch in place. Repeat with the other handle strap.

-Take one of the main panels and measure 3" from the side and center one end of one strap on the 3" mark along the top with right sides together. Measure 3" from the other side and place the other end of the strap on that point along the top with right sides together. Make sure not to twist the straps. Repeat with the other patchwork square and strap. Baste in place.

-With right sides together, pin the two patchwork pieces together along the sides and the bottom. Stitch together the sides and bottom.

-With the lining pieces, repeat the above step, except leave a 3"-4" opening along the bottom center for turning the bag (see white marks on the bottom of the bag). Be sure to back stitch at each side of the opening so it doesn't come undone when turning.

-Optional: Iron open all the seams. This can be a little finicky, but it does make for flatter edges and it makes the next few steps easier.

-With the bag and lining still inside out: Along the bottom two corners of the bag and lining, measure two inches up from the bottom and mark and two inches in from the side and mark. Open up the bottom corner and match the two marks. I use a pin to stick through at both points and then pin in place. Repeat with the other side and with both sides of the bag.
These Modkid Pins are seriously my favorite!
-Sew along the line that has been created by the pins. Repeat along the other corner and along both bottom corners of the main bag.

-Cut the triangles off, leaving about a 1/4" seam allowance. Repeat for all corners.

-Turn the lining right side out as pictured.

-Place the lining inside the main bag with right sides together. Pin and stitch around the top using a 1/4" seam allowance. I usually stitch over the sections with the handles a few times, simply because these bags get a ton of use in our home.

-Turn the main print right side out by pulling it through the bottom hole in the lining.

-Stitch the hole in the lining closed. For a more finished look, hand stitch it together. Since it is in the bottom of the bag, I usually just stitch it together with my machine. Push the lining into the bag.

-If desired, top stitch around the top opening of the bag.
 
 -Your bag is now complete and ready for Trick Or Treating!

Need more Halloween Inspiration? Check out our Halloween Pinterest Board.

Use the coupon code TutorialTuesday now through Tuesday, October 27th and save 15% off the purchase of a Trick-or-Treat Bag kit.

Happy Creating!
Danielle Storm