Color Me Placemats
 Note: If you would like to see an image on our blog in a larger format, just click on it to enlarge.
These fun placemats are sure to give your little ones hours and hours of coloring fun. Use washable markers and when they are done eating, just throw the placemat in the wash and it will be ready to recolor again and again. Use different colored piping for each child so everyone knows whose placemat is whose. These are great to roll up and keep in a travel or diaper bag. And because they are double sided they have twice as much coloring fun!
Supplies
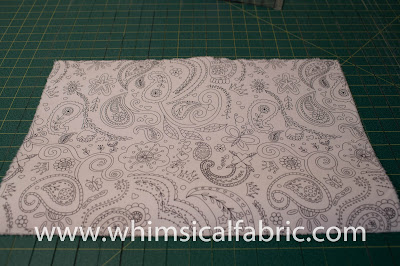
• 2 Color Me Coloring Book Fabric Fat Quarters (We used 1 Princess Paisley and 1 To The Moon and Back for coloring variety.)
• 1 Fat Quarter for Piping (We used Riley Blake Solid in Rouge)
• 3 yards of Petite Cording
• 19"x13" (or larger) Piece of Extra Firm Sew In Stabilizer (We used Pellon 926. This gives a nice surface to color on and keeps the markers from bleeding through.)
Note: For your convenience, we have put together some kits that contain all of these items. Click here to view them on our site. Make sure to check out the coupon code for the kits at the end of this tutorial.
Other Items
• Thread• Temporary Hold Basting Spray (We like 505)
• Rotary Cutter and Mat (You can use shears instead)
• Ruler
• Pins or Wonder Clips
• Sewing Machine
• Iron
• Washable Markers (We like Crayola brand)
Cutting the Fabric
1. Press all three fat quarters.
2. We are first going to work with our two Color Me fat quarters. I like to tear my fabric to make sure it is square. Grab one of your Color Me fabrics and make a small 1" long snip parallel and close to the the selvage edge.
3. Tear the selvage
edge off.
4. Then, make a second 1" long snip on an adjacent side and tear again. Repeat for the second Color Me fat quarter.Tearing your fabric tends to curl the edges, so give them a little press.
Note: I'm making 12"x18" placemats. Standard placemat size is 12x18 or 14x20. You can make your placemats whatever size you desire though.
5. If making your placemats 12x18" cut or tear your fabric 13"x19". We want to add an extra inch for seam allowance. Make sure to do this for both Color Me fat quarters.
6. Press your fabrics one more time.
7. Cut your interfacing the same size as your two Color Me fabrics.
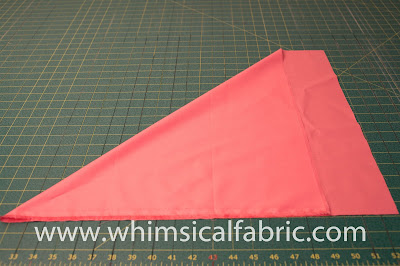
8. Grab your piping fabric and fold your fat quarter like the picture below to make bias strips.
9. Cut 1" bias strips. It's easiest to use a ruler and rotary cutter. If you don't have one, you can use a regular ruler, marking pen, and shears. Cut along the fold. Cut the first strip tat the half inch mark so when you unfold it the strip will be 1" wide. Cut the rest at 1".
Preparing the Piping
1. Cut the angled ends of your strips off so the ends are squared. Lay your bias strips right side together like this.
2. You are going to stitch across the diagonal. I like to use my ruler and a fabric marker to draw my stitch line. You don't have to, but it helps me keep things straight.
3. Stitch down the line.
4. It should look like this when you are done.
5. Trim the excess seam.
6. Press the seam open.
7. Continue to seam your bias until you have a strip about 2 yards long. You'll need more if you are making a larger placemat.
8. Lightly press your bias strip in half with the seams to the inside.
9. Open up your bias strip and place the cording against the center crease.
10. Using a zipper or piping foot, sew along your bias strip right up next to the cording. Continue sewing the length of the bias strip keeping the cording snug against the center crease. Note: Do not begin sewing right on the end, start about an inch from the end.
11. When you are finished you will have a nice long piece of petite piping for your project.
Adding the Piping
1. Lay your interfacing down.
2. Lightly coat your interfacing with a layer of temporary hold basting spray.
3. Lay your first Color Me fabric on top of the interfacing right side up. Press firmly to adhere.
4. I added Wonder Clips to make sure it held together.
5.Take it over to your machine and add your piping to the edge. You want to line up the raw edge of the piping with the raw edge of your placemat.
6. Don't start sewing right at the end; like before, start about 1" or so from the edge. Sew the piping to the Color Me fabric and interfacing. Make sure you are stitching right up next to the cording as you attach your piping.
7. When you get to a corner, clip into the raw edge of the piping a few times so you are able to easily curve your piping around the corner.
8. Slowly stitch around the corner pivoting your fabric as you go. Remember to keep stitching as close to the cording as possible.
9. After you have made it all the way around your placemat, stop about 1" away from where you started.
10. Open up your pipping where you first started stitching it down. Snip your cording so it isn't sticking out of the piping at this spot, but is instead about 1" shorter than the bias strip.
11. Fold back the bias strip so you no longer have a raw edge exposed.
12. Line up the end of your piping and snip it off where the other cording starts.
13. Tuck the raw edge of the piping into the folded part.

 |
| Mine looks really crooked because it was hard to hold the camera and keep everything from moving. But hopefully you get the idea. |
Assembling the Placemat
1. Lay out your placemat.
 |
| Mine looks curled like this because I pulled my piping too taut. You don't want to do that. ;) |
3. Pin or clip in place.
4. Still using your zipper foot, stitch the layers together stitching right up next to the cording. You should be able to see the cording through the fabric. You will definitely be able to feel it. Keep that zipper foot pressed right up to the side of it as you slowly stitch around the placemat.
5. Go slowly around the corners, and leave a 4-6" opening in the bottom for turning.
6. Clip corners.
7. Trim seams.
8. Turn, fold under fabric at opening, and press.
9. Edge stitch the opening closed.
10. Press the placemat one final time with your iron.
Note: If you want to add an extra touch, you could try quilting your placemat.
Give the placemat and some washable markers to your little one and watch them have a blast. Even I couldn't help but ask if I could color just a bit.
The Challenge:
1. Make a Color Me Placemat.
2. Post a pic of your placemat in the Whimsical Fabric & Me Facebook group with the hashtags #colormefabric and #whimsicalfabricdotcom
Complete #1 and #2 by Sunday, June 21st 28th, and you'll be entered to win a $10 gift certificate to our shop! Winner will be drawn on Monday, June 22nd 29th, 2015.
And a Coupon Code:
Save 10% off the regular price of the Color Me Placemat Kits with the coupon code TutorialTuesday now through Monday, June 15th.
Danielle Storm
www.whimsicalfabric.com


No comments:
Post a Comment