
Before we begin the sew-along on tomorrow, May 5th, you'll want to gather a few items and do a few things to prepare.
Items to Collect
1. You
must have the Frannie dress pattern by Children's Corner to complete
this project. If you have not yet purchased it, please do so here.If you do not have fabric for the project you will want to purchase that also.
2. At the time of this writing we do have a some fabric kits available. We also have lots of fun fabric selections on our website.

3. You will need coordinating thread to complete this project. The project kits did not come with thread, so please make sure you have some.
4. When we taught the Frannie sew-along previously we used ric-rac to trim out the collar. If you would also like to use ric-rac we do have a wide range of colors available on our site. In addition,one of the kits available at the time of this writing also comes with ric-rac. The remainder of the kits do not.

5. During the current sew-along their are additional instructions for adding piping to the collar and armscye. We will be making our own piping during the sew-along. For this you will need a coordinate fabric and petite cording. All kits came with coordinate fabrics and petite cording for this purpose. If you don't have petite cording and would like to add the piping, you will need to pick some up.

6. Frannie has the option of creating ties or adding elastic to the underarm casings. I prefer the ties and have included them in this sew-along. If you choose to do the ties you will most likely want a coordinate fabric to create them. All kits came with coordinate fabric for this purpose.
7. If you prefer not to create and use the underarm ties then you will need ¼" wide elastic. I did include that with the kits, so if you purchased a kit you are all set.

8. You will need a small button to close the back of the dress. The kits come with a button, so if you purchased a kit you are good to go.
9. During the previous Frannie sew-along we added decorative buttons to the front of the dress. If you would like to purchase some from us we carry a wide selection of adorable Riley Blake buttons. Again, one of the kits does come with decorative buttons. The rest of the kits do not.
10. I like to add a bit of fusible interfacing behind the buttons when I make the Frannie. This gives them some strength. You only need a small piece. About 1½" by 8" will do. This DID NOT come in the kits.
11. You can either create your own button loop for your back closure with thread (I have lessons for this) or you can use a simple little time saving hack. The hack is to use a small hair tie inserted into the seam as an elastic loop for your button closure. All kit did come with a hair tie.
12. You will need some sort of fabric marking instrument. You can use chalk, a marking pencil, washable fabric pen; even a bar of soap will work.

12. And finally, you will need pins, a sewing machine, a good iron (a steam iron is preferable for sewing), a pair of fabric shears or a rotary cutter and mat, and a ruler.
Optional Items to Collect - The following items are totally optional.
1. I will be tracing the pattern pieces onto freezer paper. I highly recommend this method. In addition to keeping your original pattern pieces intact, it also makes cutting out your fabric super simple. You can find freezer paper at most grocery stores where the wax paper and aluminum foil.

2. A sharpie or other permanent marker for tracing your pattern pieces onto the freezer paper is helpful. I recommend a black sharpie as the colored ones, though more fun, can tend to transfer onto your fabrics when you iron over them. Ack! Had that happen recently and I was so sad.
3. You have the option of making a buttonhole loop on the back of the dress. If you have access to embroidery floss you might find it is easier to work with than sewing thread for this step. If not, you can just use sewing thread.
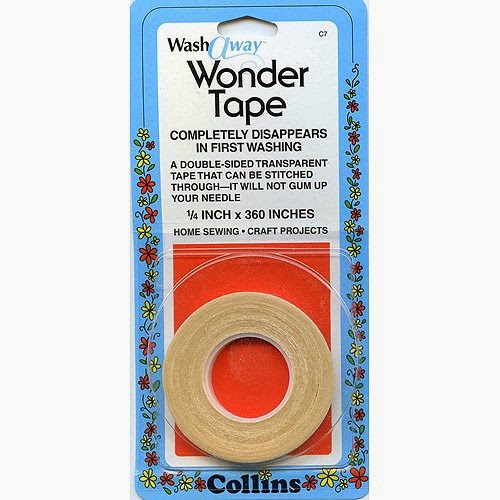
4. If adding ric-rac you will find it much easier to attach your ric-rac to your collar if you use either Wonder Tape or a glue pen. I prefer the Wonder Tape. It's a double sided tape that washes completely away when you are done. You can find it at most any fabric or discount store that carries sewing supplies. If you don't have Wonder Tape you can just use a child's washable glue stick for the ric-rac.
Things to Do
1. Make sure to prewash and preshrink all of your fabrics. I wash my fabrics on warm/hot and then I dry my fabrics in the dryer with no softeners. I always preshrink this way when I am using fabric for clothing construction. I would hate to work hard on something only to have it shrink and not fit when I was done.
2. You should also prewash your ric-rac. Prewashing will help prevent any bleeding when you launder your completed garment. First, take a match or lighter and lightly melt the edges of your trim so that is won't fray. Then, using a lingerie bag if you have one, wash your ric-rak on warm/hot in your washer. If you don't have a lingerie bag you can just wash your ric-rac in the sink by hand. Hang your ric-rac to dry.
3. Prewash your fusible interfacing to preshrink it. This will prevent any wrinkles or waves that might arise when you launder your garment. To prewash your interfacing simply soak it in a sink for about 5 minutes in very warm water. You don't want the water too hot to avoid removing the iron-on finish, but you do want it warm enough to shrink the interfacing. After soaking, just pat it with a clean towel and hang it to dry.
4. Press your fabrics well. I try to do this straight out of the dryer so that the wrinkles come out easier. Obviously, don't press your fusible interfacing.
5. If you haven't already, join our Facebook Whimsical Fabirc & Me Group so you can post your progress pictures.
The Prizes
Did someone say something about a prize? I love prizes and I know you do also. At the close of the Frannie Sew-Along we will be giving away Whimsical Fabric $10 gift certificates to 5 lucky winners! Make sure to join the Facebook Group so you have a chance to win.

We will give out entries for the prize drawing at the end of the sew-along. There are three different ways to earn entries into the prize drawing.
1. At the end of each lesson posted on this blog there will be a link to add a picture of your completed lesson into a photo album on our Whimsical Fabric & Me Facebook group. Each day that you turn in an assignment on time you will receive 1 entry per item you create. Thus, the more items you make, the more entries you will receive.
2. We will also award 1 entry for purchasing the Frannie pattern from the Sew-Along #14 Category. Note: This purchase must have been made in 2016 and before this sew-along starts.
3. In addition, if you purchased a kit from the Sew-Along #14 Category we will award you another 2 entries for each kit purchased. *Note: Patterns purchased within the kit count as pattern purchases outlined in step #2 above and the kit purchases must have been made in 2016 and before this sew-along starts.
Happy Sewing,
Danielle StormDid someone say something about a prize? I love prizes and I know you do also. At the close of the Frannie Sew-Along we will be giving away Whimsical Fabric $10 gift certificates to 5 lucky winners! Make sure to join the Facebook Group so you have a chance to win.

We will give out entries for the prize drawing at the end of the sew-along. There are three different ways to earn entries into the prize drawing.
1. At the end of each lesson posted on this blog there will be a link to add a picture of your completed lesson into a photo album on our Whimsical Fabric & Me Facebook group. Each day that you turn in an assignment on time you will receive 1 entry per item you create. Thus, the more items you make, the more entries you will receive.
2. We will also award 1 entry for purchasing the Frannie pattern from the Sew-Along #14 Category. Note: This purchase must have been made in 2016 and before this sew-along starts.
3. In addition, if you purchased a kit from the Sew-Along #14 Category we will award you another 2 entries for each kit purchased. *Note: Patterns purchased within the kit count as pattern purchases outlined in step #2 above and the kit purchases must have been made in 2016 and before this sew-along starts.
Happy Sewing,
www.whimsicalfabric.com
No comments:
Post a Comment