

Hey it's Jona from Stitches and Spills here to share a quick and easy back to school tutorial! Our family is striving to create less waste and invest in more reusable products around our home. Last year I made a few reusable snack bags, and they have been a complete hit in our home! Today I will be showing two different methods for making snack bags (one using a serger and one using a sewing machine).
A few notes before we begin:
• You will need NON-directional fabrics. Otherwise one side of your reusable bag will be upside down.
• I recommend pre washing your fabric as these will be washed over and over. Also press well before sewing.• These are NOT water tight! They are made with two layers of cotton, so are perfect for snacks such as crackers, pretzels, or even a peanut butter and jelly sandwich. For a better water seal, food safe PUL can be used for the lining. This won't make it 100% water tight, but helps prevent moisture from soaking through.• The fabric is not tested to be food safe. If this is a concern, find a lining fabric that you feel is safe.
Now, let's get sewing!
Supplies:
• 2 coordinating cotton fabrics. (Two fat quarters will make two snack bags and one sandwich bag)
Note: Art Gallery solids or Riley Blake solids are a great choice for adding embroidery or applique. I also love the Dr. Seuss fabrics for back to school.• Notions such as buttons, ric-rac, and/or embroidery floss
I used Jumbo Ric-Rac for mine!• Serger or sewing machine
Cutting:
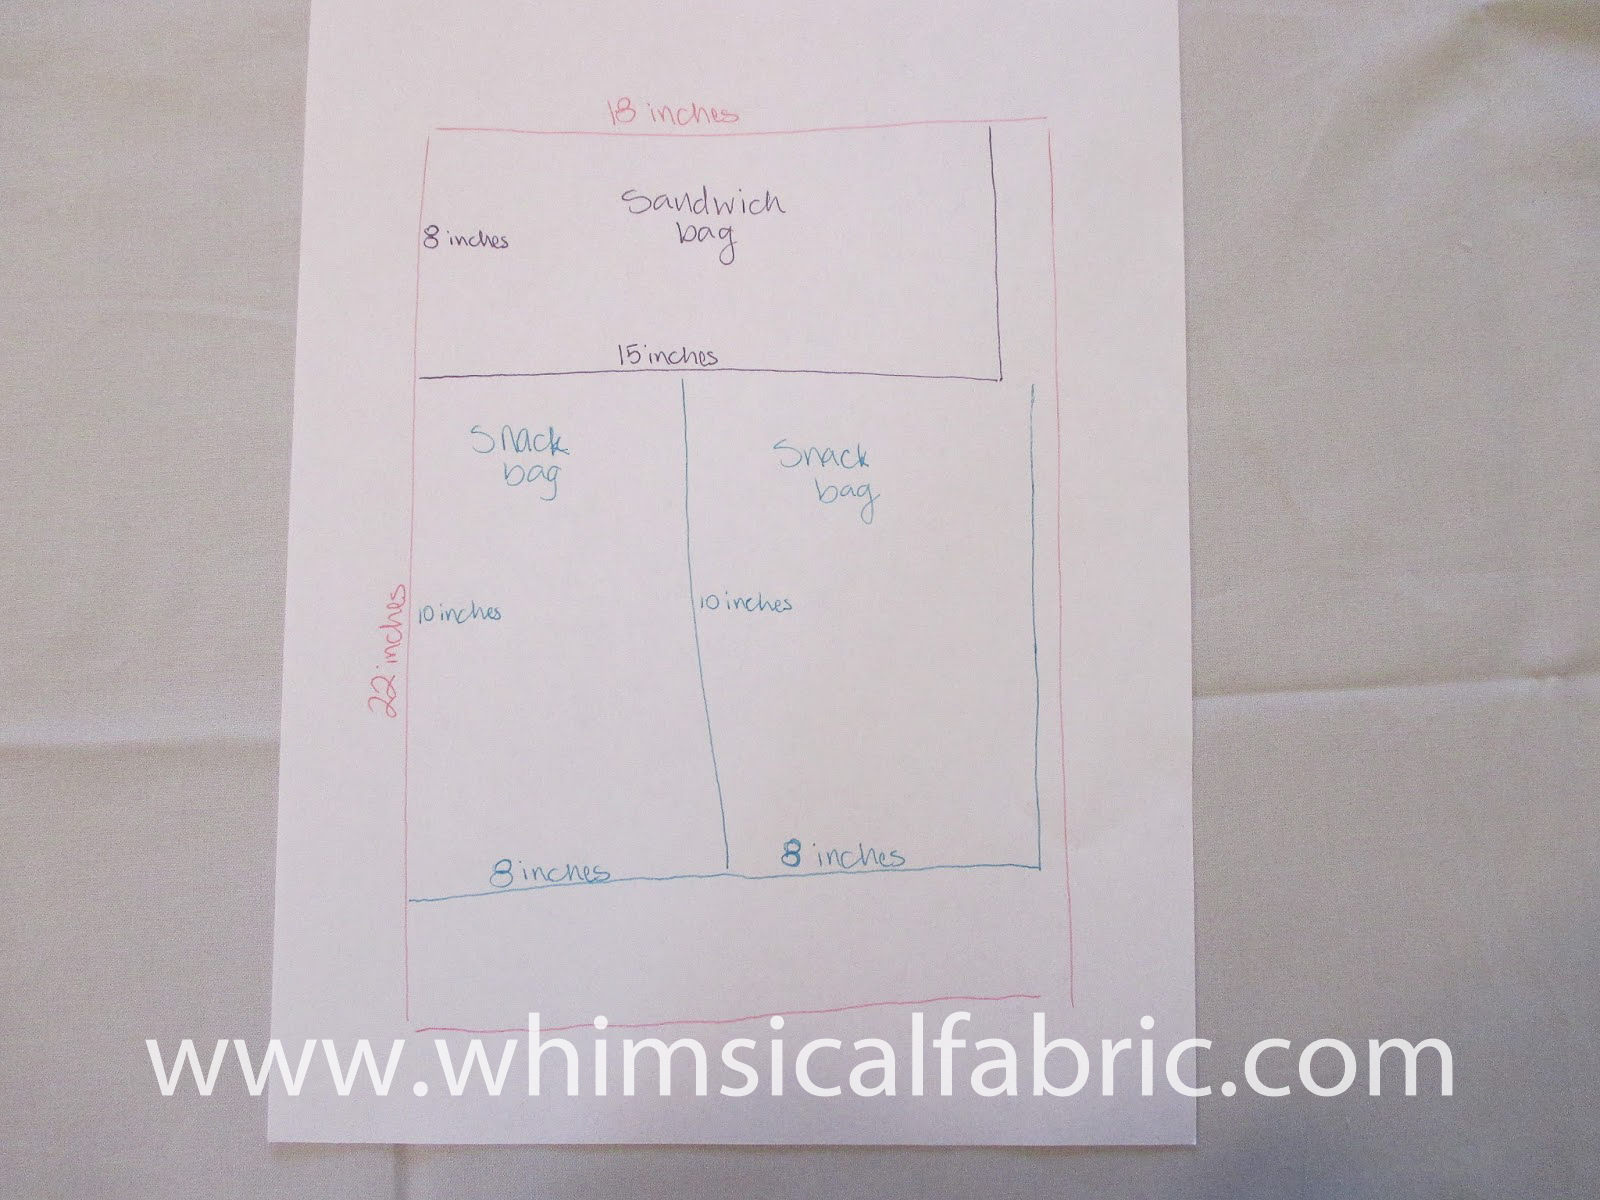
• Snack bag: cut TWO 10" by 8" rectangles. One from the main print and one from the lining.• Sandwich bag: cut TWO 15" by 8" rectangles. One from the main print and one from the lining.

Note: If using fat quarters, cut using this diagram to make the most of the fat quarter.


Embellishments:
At this point, figure out if there are any embellishments you would like to add. Feel free to scroll down to the bottom of this post to see how to add hand embroidery to your reusable bag (this is added BEFORE the bag is sewn together).


Serger Method: (scroll down for the sewing machine method)
• With WRONG sides together, serge the 8" sides of the bag together.

• With the main print down and the lining facing up, fold the bottom seam up towards the top, stopping TWO inches below the top seam.

• Fold the top seam down and pin in place if desired.

• Serge each side. Be sure to finish the beginning and ending tails using your preferred method.


And you are done! Wasn't that easy?!
Sewing Machine Method:
• With RIGHT sides together, sew a 1/4" seam all the way around, but leave an opening on one of the long sides (10" or 15" side depending on which bag you are making) to turn the fabric.


• When doing the sewing machine version, ric -rac can be added to the flap of the bag by putting it along the top seam PRIOR to sewing.

• Clip the corners and turn right side out through the opening along the side. Press well.


• With the main print down and the lining facing up, fold the bottom seam up towards the top, stopping TWO inches below the top seam.

• Fold the top seam down and pin in place if desired.

• Stitch along one side with a seam less than 1/4" to ensure the opening along the side gets closed. Backstitch at the beginning and end. Repeat with other side.


Wasn't that quick?!?!
Adding Hand Embroidery:
Personalize the snack bag with a cute hand embroidery design! The sandwich bag size is simply perfect for adding a cute design, or some kid art!
• Figure out where the top fold and bottom fold will be on the main bag fabric. To do this, fold the bottom of the bag up to 2.25"-2.5" from the top of the bag. Mark the top and bottom folds (finger creasing works perfectly).

• Add fusible interfacing to the wrong side of the fabric to strengthen the design, if desired.
• Transfer the design (here I used a picture drawn by my five year old). I used a Frixion pen, but any water soluble pen/pencil will do. To transfer, I simply held the paper and the fabric up to our sliding glass window and traced the design.
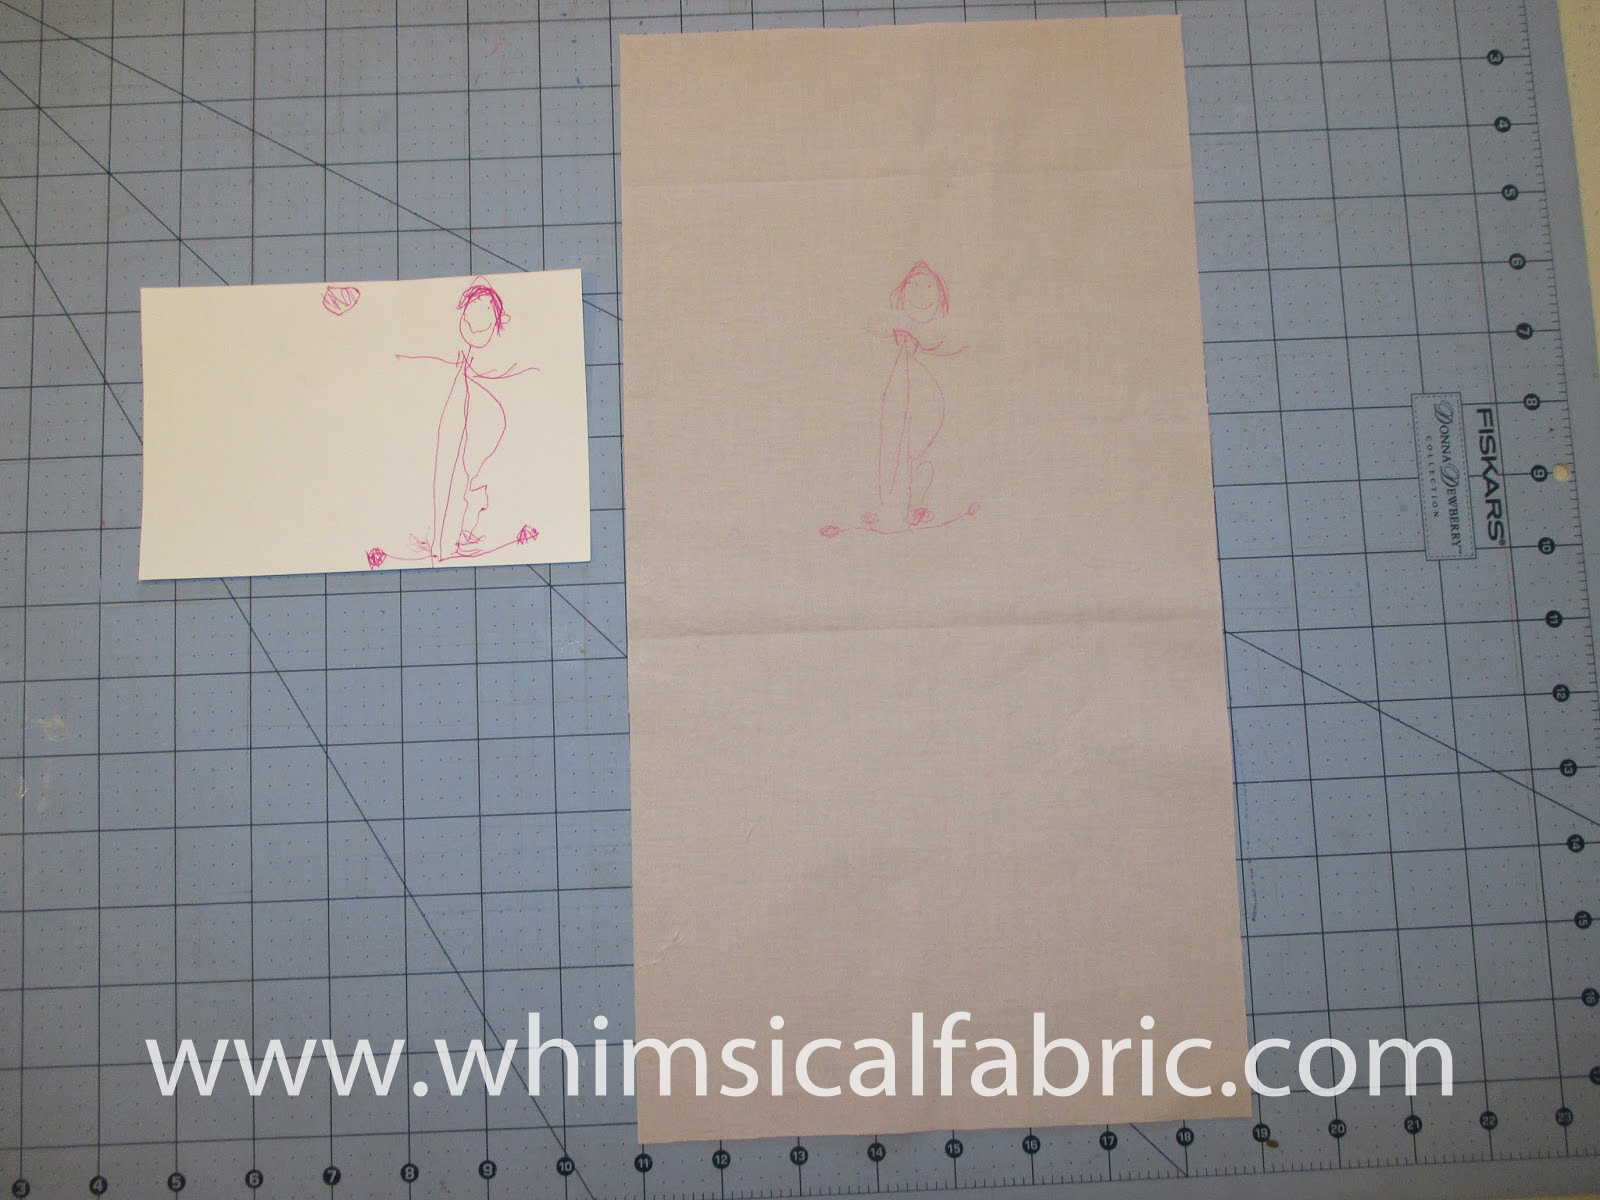
• Place design in the hoop and start stitching. New to hand embroidery? Browse our Pinterest Board for some ideas and tutorials! Also, Google searches, Pinterest, and YouTube are fantastic resources.

• Iron out any wrinkles, remove drawings, and continue creating the snack/sandwich bag as shown above.
Happy Creating!
Jona Lourenco
www.whimsicalfabric.com
No comments:
Post a Comment