
Larissa Gibbs of Connected by a Thread brings us our March Tutorial Tuesday.
**Note, click on the pictures to enlarge them for better detail**

Fabric Requirements
1/2 yard Main Fabric
1/2 yard Lining Fabric
Pellon SF 101
Peltex 71F
Wonder Under
Scraps: white, black, pink for face
All seams are 1/2" unless otherwise specified.
Cut - (WxH)
Base:
12" x 12" : 1 exterior, 1 lining, 2 SF 101
11" x 11": 1 Peltex 71F
Sides:
12" x 6" : 4 exterior, 1 SF 101
11" x 5" : 4 Peltex 71F
Strap:
31" x 4" : 1 exterior, 1 SF 101
30" x 3/4": 1 Peltex 71F
Bunny Face FMA (optional)
Cut out all pieces, using the template. Click here to download the template. Following the directions for the Wonder Under, fuse it to all face and ear pieces, leaving the paper on.
Remove the paper backing on the inner eye and ear pieces. Layer them on the outer pieces and fuse.
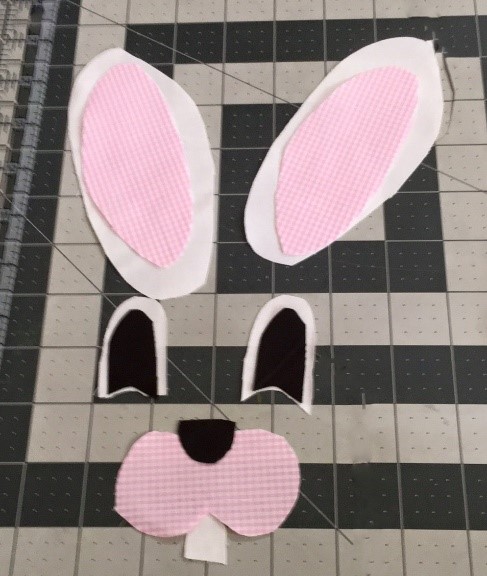
Use wonder under to secure your face pieces to one of the side panels. Stitch around and add details using Free Motion Applique (FMA). Be sure to lower your feed dogs before starting your FMA.

Basket Construction
1. Fuse SF101 to all pieces.
2. Apply Peltex 71F to all exterior pieces except handle, leaving 1/2 around all sides.
3. Sew two side pieces RST along one short edge. Open and press seam. Repeat with remaining side pieces.
4. Place side pieces RST and sew along short ends, creating a square hoop.

5. Pin/clip the bottom to the sides RST. Sew along all four sides to create your basket. Go slow around the corners easing the fabric as needed.
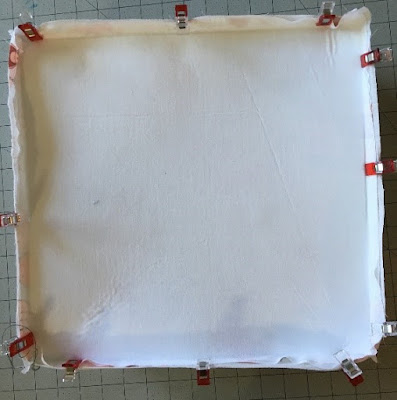


6. Repeat steps 4 and 5 with the lining.
7. Turn the lining right side out and place inside the main fabric with right sides together. Sew around the top, leaving a 4" opening to turn.

8. Turn and press well. Topstitch along the top of the basket.

9. Fold your handle in half along the long edge, wrong sides together and press. Open up and fold one edge to the center. Repeat with the other side. Fold in half along your original fold line and press well. Open and place your stabilizer strip inside; fold back and press well. Fold each end in by 1/2" and press well again.

10. Topstitch along the entire length of the strap about 1/8" from the edge.

11. Center the handle on one side of the basket, placing the bottom of the handle 1 1/2" down from the top edge of the basket, Sew in a a square, making sure to double stitch for added security.

12. Repeat on the opposite side of the basket with the opposite end of the handle.
13. Add ears, where desired. Either hand or machine stitch in place.

14. Press well with a lot of steam to get all of the wrinkles out.

And enjoy your bag!


No comments:
Post a Comment