
Hello, this is Sharon Knowles here of Sweet Pea & Pumkin Patterns, with February's Tutorial Tuesday. I thought I would share with you lovely ladies a tutorial for a free doll dress pattern that is a favorite of my daughters. My Valentine's day gift to you!
**Note, click on the pictures to enlarge them for better detail**


This is a western dress with a drop waist that has belt loops, a belt, and a full skirt. The bodice features a real button placket on the front with a stand up collar.

You can easily leave the button placket off and make the dress fully lined for an easier skill level of sewing, but I do recommend trying it with the button placket first. It is a lot of fun to sew!

To make this dress you will need the PDF pattern print out for the front, back, sleeve, and collar pieces. You can find it on the website here.

You will need to cut out
| • 1 front bodice |
| • 2 back bodices, mirrored images |
| • 2 sleeves |
| • 4 collar pieces, mirrored images |
| • 1 skirt 5" x 32" |
| • 2 belt loops 1½" x 4¾" |
| • 1 large button placket 2" x 4¼" |
| • 1 interfacing piece 3/8" x 4¼" for large button placket |
| • 1 small button placket 2" x 3¾" |
| • 1 interfacing piece 3/8" x 3¾" for small button placket |
| • 2 belt pieces 16" x ¾" (non fraying fabric - not pictured) |
| • hook and loop tape 1½" long for the belt (not pictured) |
You will also need
| • 2-3 small buttons |
| • hook and loop tape for dress back |
Pattern pieces have a ¼" seam allowances included. The purple line is the cut line and the black line is the seam allowance line.

1. First, we are going to make our marks to sew our button plackets onto the bodice. On the wrong side of both the long and short button plackets, draw a line on the inside raw edge with your fabric marker starting a 1/4" up from the bottom then going all the way to the top.
Mark the center of your front bodice the same length as the line on the shorter placket.
Make another mark a 1/4" to the right side of this mark the very same length.
To the left of the center mark, make another line a 1/4" from this center the very same length as the line on the longer placket. It will be longer than the other two lines. (See picture below.)
Now, to make our cut lines for the placket, we will make the triangle mark that is pictured below. Mark 1/4" up from the bottom center line. Now, from the right side bottom draw a straight line to the center mark you just made. Repeat this line with the left side so the cut lines are mirrored.

2. Press the non-marked side of each button placket under a 1/4". Apply the interfacing to the folded side with the interfacing butted up next to the fold line.

3. Take your button plackets and match up the lines you drew on the button plackets to the lines you drew onto the front bodice. The center line is where the two button placket raw edges will meet in the center and the lines to the right and left are to be matched with the lines on the button plackets themselves. Pin in place.

4. Stitch on the placket lines starting at the bottom and a 1/4" up where the line first starts, locking your stitches, and sewing up to the top raw edge on each button placket.

5. Press the seam of the button placket away from the center on each placket. Then cut on the center line to the top of the triangle you made. Follow the triangle markings to the stitch line, but be careful to not cut into the stitching line.

6. Flip your bodice over. Working on the shorter placket, press the seam towards the button placket. Press the bottom of the placket up a 1/4" as well.

7. Flip the bodice back to the right side, fold the placket in half with the right sides facing, pin.

8. Stitch the very top of the placket with a 1/4" seam starting at the folded edge and stopping at the raw edge of the pressed fold of the bottom placket. Trim the seam here where you stitched only, being careful not to cut into your stitching.

9. Turn the placket back right side out, pushing the corner out. Fold the placket in half with the folded edge meeting the stitch line and press. Pin in place.

10. Stitch around all four sides of the button placket. While stitching this you will be stitching the back side of the placket closed as well.

11. Repeat steps 6-10 with the left placket.
12. Mark 3/4" up from the bottom of the placket on the left side, (or the longer placket).
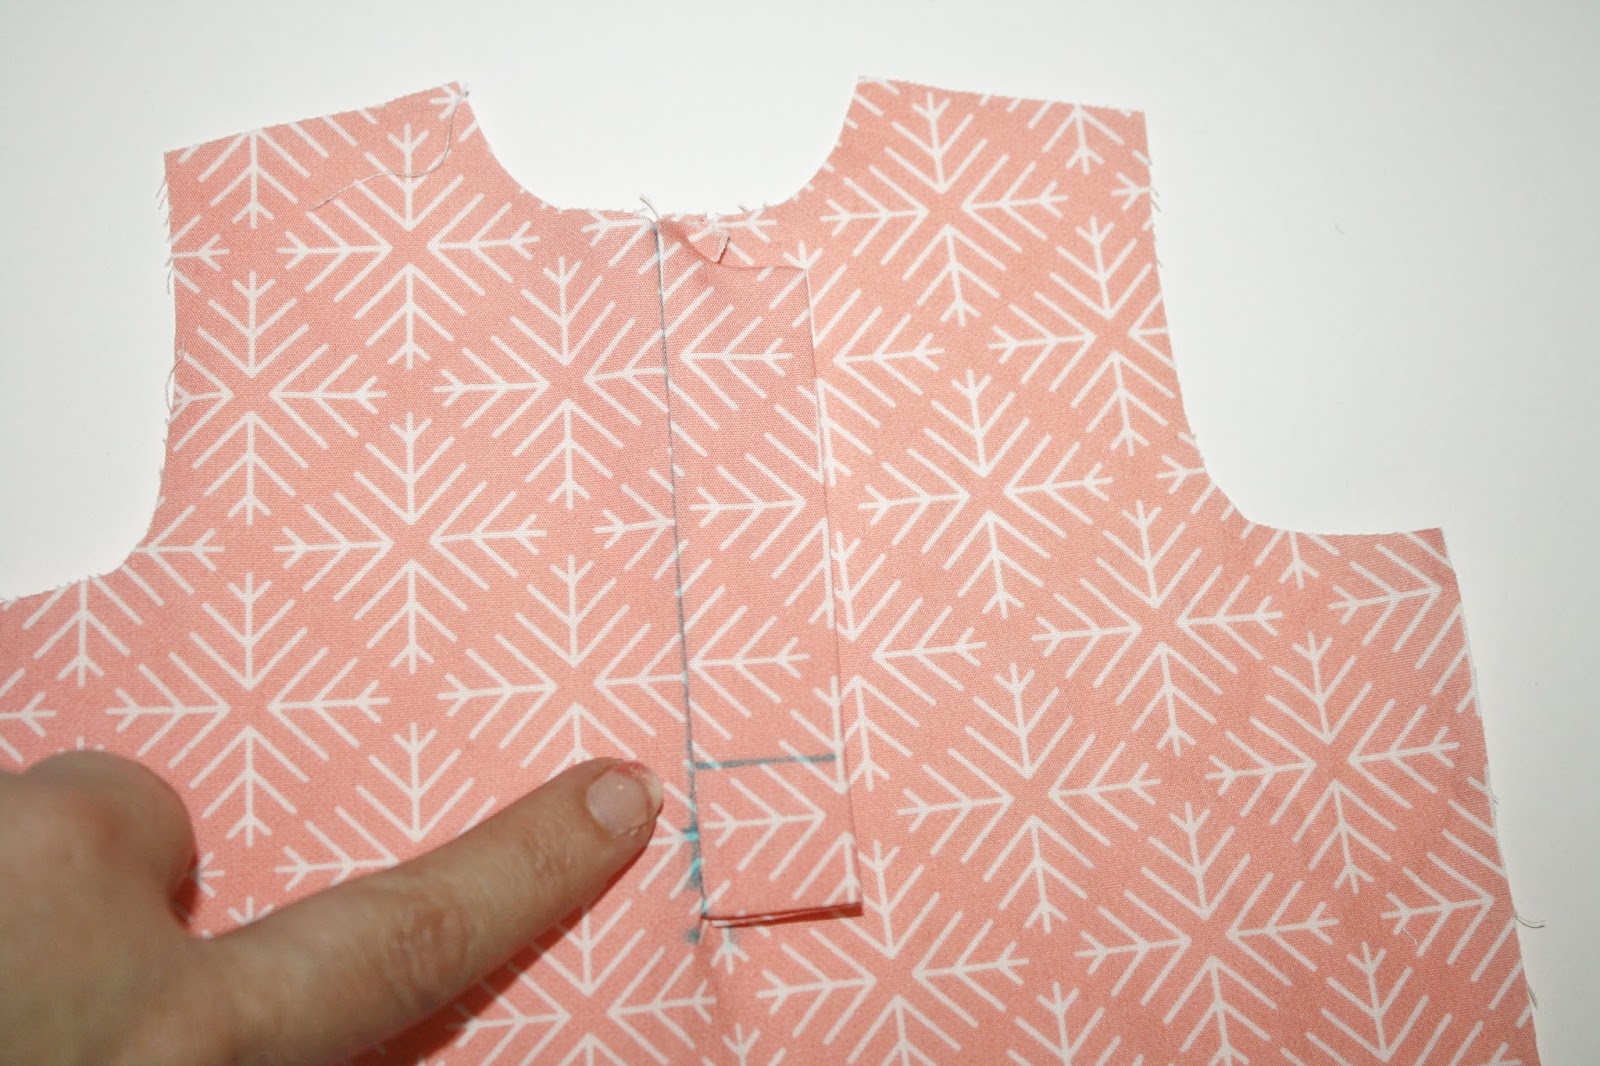
13. Pull the upper placket out of the way and fold the right placket behind the triangle. Fold the left placket back on top so that the triangle piece is sandwiched between the short and long plackets. Pin in place.

14. Sew the line you just made. Then sew around to make a "square" shape by sewing over the stitch lines you just made.

15. If you plan on sewing buttonholes now is the time to to make them. Evenly space two-to-three buttonholes. I made two only due to the size of my buttons being larger.

16. Place the back bodice over the front bodice with the right sides facing, stitch the shoulders together. Finish the seam then press the seam towards the back bodice. Finish the back center seam on both back bodice pieces.

17. Take all four of your collar pieces and place two together with the right side facing. Stitch around the curved side and the short side only. Trim the seam then turn and press. Top stitch the collar around if desired.

18. Take one of your collar pieces and place the bottom of the raw edge of the curved side right up next to the center front raw edge of the neckline. Pin in place and continue pining the collar all the way around to the back side. The collar will come to a 1/4" of the back finished edge.

19. Fold the back edge of the back bodice over the back side of the collar so that the collar is sandwiched between the back bodice. Stitch around the neck line with a 1/4" seam. Finish the seam then press the collar up away from the bodice and push the back comer out and press. repeat with the other side of the bodice. Now press the finished edge of the center back bodice under 1/4" on both sides.

20. Stitch the back center fold down then top stitch around the neck line to keep the seam allowance in place.

21. Hem each sleeve with a narrow hem by pressing the sleeve under a 1/4" twice and stitching in the fold in place.
22. Sew a gathering stitch across the top of each sleeve.
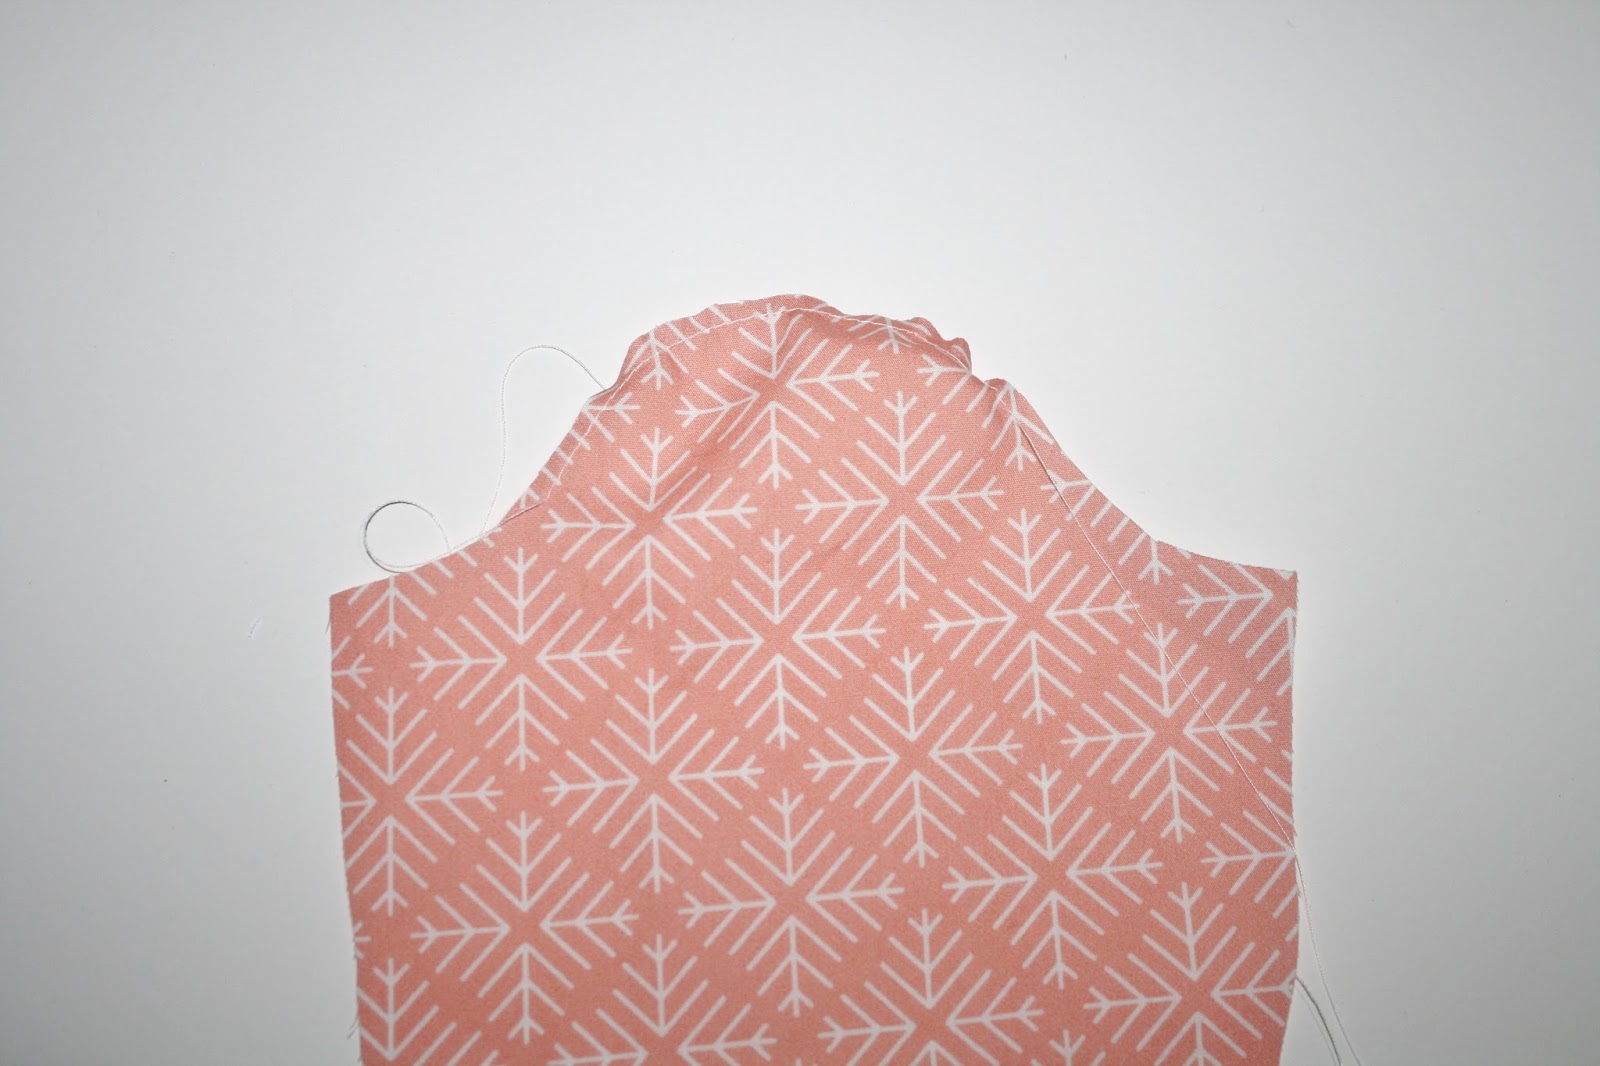
23. Pin the sleeve to the arm hole and gather the sleeve evenly to fit. Sew in place then finish the seam. Repeat with second sleeve.
24. Fold the bodice in half with right sides facing, matching up the sleeve seam, and pinning together the sleeve and bodice front and back. Sew from the sleeve hem to the bottom of the bodice. finish the seam. Repeat with the second side.

25. Narrow hem the long bottom edge of the skirt in the same manner as the sleeve. Then narrow hem the back two short sides of the skirt. Sew a gathering stitch across the top edge of the skirt.

26. Now taking our two belt loops pieces in hand, fold in half lengthwise with wrong sides facing. Open up and fold the two raw edges towards the center fold mark and press again.

Refold the belt loop piece in half, tucking the raw edges in the center, press.

27. Stitch each side of the belt loops. Then cut each belt loop in half, to make four belt loops.

28. Place on belt loop on each back bodice piece in the center, pin in place. Next find the center of the front bodice, then mark the quarter mark between the side seam and the center of the front bodice. Pin a belt loop here. Repeat with second front bodice side. Baste all four belt loops in place.

29. Gather the skirt up evenly and pin in place to the bottom bodice raw edge with the right sides facing. Sew together, then finish the seam, press the seam up towards the bodice. Top stitch the seam in place around on the bodice. (Be careful as not stitch the belt loops on this step.)
30. Press the top on the belt loops under a 1/4" then stitch in place to the bodice.

31. Cut a length of hook and loop tape the same length as the back bodice. If your hook and loop tape is wide, cut it in half lengthwise to make a long narrow strip. Stitch the rough side of the hook loop tape onto the wearer's right side facing up. Stitch the smooth side of the hook and loop tape to wearer's left side facing the inside of the dress.

32. On to the belt. Take your two pieces of belt and place them together with the wrong sides facing. Cut one of the short sides with a rounded edge.

33. Sew all the way around the edge to connect the two pieces. ( I used brown on my right side and white on my wrong side).

34. Take a piece of hook and loop that is a 1 1/2" long and sew the rough side onto the straight short side on the right side of the belt. Next, sew the smooth piece of hook and loop tape onto the rounded short end of the belt on the wrong side.

That's it, we are all done!!! Go and let your sweetheart enjoy her dolly dress!!

Sharon Knowles
A Challenge For You!
1.) Sew up a Sweetheart Dress or two, or three, etc.
2.) Share them on our Facebook Group, Whimsical Fabric & Me, AND include the hashtag #whimsicalfabrictutorialtuesday
3.) You can also blog about your Sweetheart dress and link up your blog in our link party (light blue buttom below). Make sure to grab the graphic below to use on your blog post and link it back to this tutorial. And don't forget to share your blog post on all your favorite social media outlets, Facebook, Twitter, Pinterest, Instagram, etc.
This challenge closes at noon CST, Tuesday, 2-9-16. One winner will be drawn from all entries (both Facebook group and Link Party). The winner will a receive a FREE copy of Sharon's NEW pattern, Winter's Dance, which releases soon!

Please link it back to this tutorial. Thank you!


