Tuesday, November 10, 2015

CC Ruthie Dress Pattern Review and 20% Off Coupon


Today we are reviewing the Children's Corner Ruthie Pattern. This pattern is rated as a moderate sewing level with two different options; one short yoke dress with short sleeves and one full yoke length with long sleeves options. Both versions can be mixed and matched. The pattern comes in two different size ranges as well, the smaller contains sizes 1-4 and the larger contains sizes 5-8. Today I am reviewing the long sleeve, full yoke dress version in a size 6.
Note:Please click on images to view in a larger format.

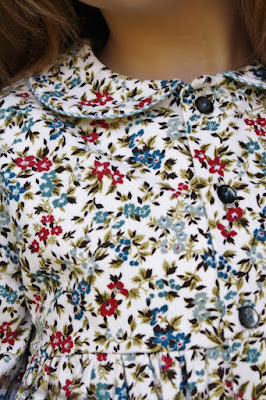
For this dress I used Fabrics Finders Country Floral Corduroy for the main part of the dress and  Wedgewood Gingham for the lining and piping on the collar. My daughter and I both love how warm and cozy the corduroy fabric is, perfect for autumn. The gingham is just as soft and lovely as well.

The dress features a full button down front bodice and skirt, a one piece collar that wraps around to the back bodice and back again to the front bodice, and has sweet elastic gathered cuffs at the end of the sleeves. The bodice is fully lined, but unlike other dress patterns I have used before, this one requires no hand stitching! The instructions have a clever way of sewing the front bodice/lining on the machine to give such a beautiful finish that I used the same method to sew the the back bodice main to the lining as well. The back bodice sewing was a slight modification I made, the pattern calls for it to be hand sewn, but it was very easy to sew the back bodice in the same manner as the front.

I found the instructions of this pattern to be very easy to read and follow. The front bodice pattern piece has the main and lining all in one pattern piece (the front bodice is cut on the fold so only two to cut total) but unlike other patterns that I have sewn, this pattern gives the most clear directions on how to sew the front and back bodice pieces all together without any mishaps. It left me thinking, "How clever!", and I wish I knew this years ago. I will be using the same instructions from now on with other patterns as well. 

In the pattern there are also tips on installing piping on the collar to make it a bit easier. I really do love to make and add my own piping to collars. I used the petite cording that is carried in the Whimsical Fabric shop to make mine. It is the perfect size for this dress.

I also wanted to show you the dress not being worn. I just adore the look of the back bodice peeking out from the front. This is a nice way to add a bit of a fun detail to the dress. My daughter loves when I add little surprises to the inside, such as this lining fabric.

I am am very happy with this pattern and will be using it again and again until my daughter out grows it. Even with making my own piping it was a fairly quick sew. I can see this pattern being made in the short sleeves version for spring and summer. The fit is wonderful. It has plenty of room in it for my daughter to run and play, but still looks beautiful. It is a perfect pattern for us to use for her school wardrobe and more.

All the products used for this dress can be found in the Whimsical Fabrics shop. Click on the links below and use the coupon code Ruthie to save 20% on the CC Ruthie pattern, all Fabric Finders Corduroy fabric, all Fabric Finders Gingham fabric, and Petite Cording now through Monday, November 23rd.
Happy Sewing!
Sharon

Sunday, November 8, 2015

Time is Running Out on this FREE Pattern Download!


You still have time to download StitchArt's FREE Tea Time PDF Free Motion Applique pattern. Hurry though, as time is running out. StitchArt has generously created and is offering this a adorable pattern free to all Whimsical Fabric & Me Facebook group members. Join our group today (if you are not already a member) and download this precious design before it's gone. Offer ends tomorrow night, Monday, at 11:59pm CT.  Yes, we have extended this freebie for an extra 24 hours to make sure you get it.  ;)


 And don't forget to shop StitchART on our site. Use the coupon code StitchArt to save 25% off your order now through Monday night, 11/9/15. (Also extended an additional 24 hours for you.)
 

You can read more about StitchART and learn a cool tip on how to cover stains and holes in clothing by reading our earlier blog post here.

http://whimsicalfabricblog.blogspot.com/2015/11/introducing-stitchart-free-motion.html

Happy Creating!
Danielle Storm
 

Saturday, November 7, 2015

Black Friday $500 Giveaway - Start Shopping Now!


We have been busy adding raffle tickets to packages for our Black Friday Giveaway.  Just a reminder, for every $20 spent (after discount and before shipping) on our website, you will receive a raffle ticket. The more you buy, the more tickets you will earn!

Please note that tickets will only be included on shipped orders.  If you purchase downloadable products (PDFs) and would like to receive tickets, you must include an item on your order that requires shipping.  Tickets will only be given for website orders unless otherwise stated.  

International winners will not receive physical prizes, but instead will receive store credit to Whimsical Fabric in the amounts as follows; First Prize - $200, Second Prize - $100, Third Prize - $65.00. This offer ends on Monday, November 23rd. To read more about the prizes and giveaway check out this page on our site.
 
 You could win your choice of this Brother 1034D Serger
Valued at $345.00.

OR
a $200 Amazon.com gift card to buy whatever your sewing heart desires.

We will also be giving away a $100 store credit to our website. . .

and this gorgeous Ardently Austen Fat Quarter bundle by Riley Blake Designs.  Valued at over $65.00 shipped.

And if you don't happen to have a winning ticket this time around, make sure to still save all the tickets you've earned. Collect 20 and mail them back to us to earn a $20 credit to our site!! That's $20 in free fabric, or $20 in free patterns. $20 to spend on anything we stock on the website. So SAVE those tickets!!

Start shopping today and earn yourself some tickets.  You might just win BIG this Black Friday!!

Happy Creating!
Danielle Storm
 

Friday, November 6, 2015

Join Us For the Bistro Dress Sew-Along


Our Bistro Dress Sew-Along starts on Monday.  You don't want to miss this great sew-along.  It's a awesome chance to sew up a pretty dress for yourself.  The reviews on this dress have been fantastic and it looks amazing on every body type we've seen.


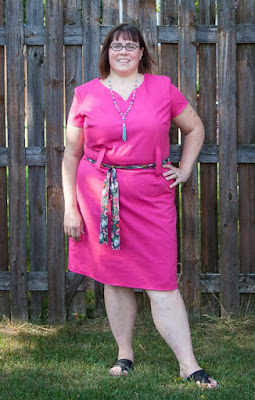
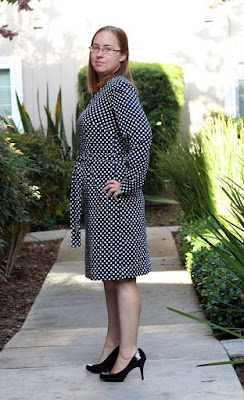
Sharon, our amazing teacher (she's the pretty lady in the blue chambray dress above), will walk you through the construction, step by step. She will even be teaching a full bust adjustment and a small bust adjustment for this dress.


It's not too late to join us.  Grab your pattern and/or fabric kit today (it contains everything but the thread) and join the fun!  Patterns are instant download and kits are shipping out same day for orders placed before 5:00pm CT (except on Sunday)To save 15% off your pattern and/or kit purchase, use the coupon code SewAlongSavings before 11:59pm MT Monday, 11/9.

Then, join our Facebook Group for a chance to win one or more of these great Liesl+Co patterns!


All lessons for the Bistro Sew-Along may be found here. We will also be posting links daily within the Facebook Group.

Happy Creating!
Danielle Storm
 

Tuesday, November 3, 2015

November Tutorial Tuesday - Hostess Holiday Zip Pouch Trio


Hi Everyone! So happy to be back on the Whimsical Fabric blog.
 

I chose to make the Hostess Holiday Zip Pouch Trio! With the holidays fast approaching now, its a great time to make up a few bundles to stash away for quick gifts during the holiday rush. I wanted to make them with basic staple fabrics so they would be easy to keep on hand, quick to stitch and to have fun with those awesome Selvages I save. Do you save your selvages? If not, no worries, you can use Ribbon, a strip of coordinating fabric, a small Machine Embroidery design or just some Straight Line Quilting for cute Covers to mix and match.

5 Fat Quarters will make 2 bundles or 6 Pouches.
I chose 2 Fabric Finders Corduroy - Chestnut and Grey
3 Riley Blake Honeycomb Dots - Navy, Green and Yellow
Eyelet Trim and 
Thank You Again Danielle!

Finished Sizes:
Sm. 4"h x 5"w, Med. 5"h x 7"w, Lrg. 7"h x 9w"
All Seams are 1/2" unless otherwise noted

Supplies:

  • 5 Fat Quarters -2 Solids/3 Prints for Main Covers and Linings
  • 1yd Woven Fusible Interfacing - Pellon sf101 (20"w)
  • 1/2yd Fusible Fleece - Pellon 987f (60"w) (foam interfacing or cotton batting may be substituted)
  • 3 Zippers-nylon coil #3 -sm. 8", med. 10", lrg. 12"...or longer, I used 14" then cut to fit :-)
  • 1/2" Ribbon-18" length for 6 tabs (2 sets)
  • 1" Ribbon - 1-2yds for each Bundle
  • Split Rings (optional) 
  • Wonder Tape (optional) - double sided water soluble sewing tape
Selvages and Trim for decorated pouch cover:
  • Selvages from fabrics used or coordinating fabrics - Sm. 1.5"h x 6"w, Med. 2.5"h x 8"w, Lrg. 3.5"h x 10"w -height is approx. for all sizes
  • Ric-Rac - approx. 1.5yds for 2 sets -cut to width of each chosen pouch
  • Ruffle/Lace - approx. 1.5yds for 2 sets -cut to width of each chosen pouch    


Cutting

2) Main/Covers p/pouch         
     Sm. 5"h x 6"w
     Med. 6"h x 8"w
     Lrg. 8"h x 10"w

2) Linings p/pouch
     Sm. 5"h x 6"w
     Med. 6"h x 8"w
     Lrg. 8"h x 10"w

Fusible Woven Interfacing (SF101) -for Lining
     Sm.  *4) 4.5"h x 6"w for Main and Lining
     Med. 2) 5.5h x 7.5"w
     Lrg. 2) 7.5"h x 9.5"w

Fusible Fleece -for Main Covers -Cotton Batting may be substituted for quilting
     Sm. *No Fleece
     Med. 2) 5.5"h x 7.5w
     Lrg. 2) 7.5"h x 9.5"'w

1/2" Ribbon -3" per tab for each pouch

Construction
*Pictures are from making the Medium Zip Pouch - Directions are the same for all sizes!


1. Fuse Interfacings -Fleece to Main Covers, Woven (SF101) to Linings (or all Small Pouch pieces)

2. Add Selvage and Trim decoration to Main Cover (see instructions at bottom of this tutorial), Quilt Main Cover pieces or decorate to your choice. I quilted the pouch in this tutorial by Straight Line Quilting about every inch or so both ways.
3. Place 1 Main Cover (Green Dots) face up on table, long edge up. Apply double sided Wonder Tape along upper edge. Remove paper from tape and place zipper long edge, upside down, on tape (or pin). ***Zipper should be centered so as to not hit any metal parts during the final construction steps. ***Zipper pull will be upside down and to the left. 

4. Place Wonder Tape along top edge of zipper tape, remove paper and place 1 Lining piece long edge face down on top of zipper, matching top long edges. 


5. Stitch these layers together with 1/4" seam, creating a Zipper Sandwich. You may want to use your machine's zipper foot to get even closer to the zipper teeth...I didn't, these are supposed to be quick and easy and Im okay with seeing more of the zipper tape.


6. Fold right sides together and press. Topstitch at 1/8" along zipper teeth to connect Cover and Lining on 1 side.

7. Repeat Step 3-Step 6 to attach other Cover and Lining to the other long side of Zipper.
*The Zipper will still be placed upside down on the 2nd Cover fabric but the zipper pull will be facing to the right.

Both sides of the Zipper Sandwich completed.

8. Fold 3" Ribbon for Tab in half and place about 3/4" down from bottom of zipper tape on left side. Tape Ribbon Tab in place with open ends facing out and 1/2" past edge of fabric. ***OPEN ZIPPER HALF WAY!!!***

9. Open sandwiches so both Main Covers are right sides together and both Linings are right sides together. ***Mark 3" center of Lining long edge to leave open for turning. Clip (or pin) around all edges.  

***Zipper Tape edges should be folded to face the Main Cover side and the Zipper Teeth facing to the Lining side***
This is important so you have nice sloping corners when you pouch is complete.

10. Stitch Main Covers around 3 open sides. Start at just on the zipper tape/lining seam allowance on the right (gray dot) and go around until you get to the zipper tape/lining seam allowance (gray dot) on the left. I tried to draw arrows to help with this step. Do not stitch over the zipper teeth! Tip: Make sure to catch enough of the zipper tape in the very first and the very last few stitches so your zipper won't come out of the ends of your finished pouch. 

11. Stitch Linings around the 3 open sides leaving 3" open at bottom center (lower gray dots) for turning through. Start just under the zipper teeth (upper gray dot) on the right and stop at the zipper teeth on the left (upper gray dot). Do not stitch into zipper teeth!

12. Trim the zipper ends to 1/2" from seam allowance/fabric edge and clip corners. You can add a few hand stitches across the zipper teeth just past the outside stitch line now but I didn't feel like I needed them.  Here is why I really like using longer zippers...so easy to put in (no sewing over teeth!) and the metal bits get cut right off, woot woot! And I save the leftovers to use for Tabs, with my selvages :-)

13. Reach through the opening with one hand and push one of the corners inward with the other to turn it through completely so all fabrics are right side out. Tip: wiggle your fingers through to open the zipper further when you are getting started turning, it made it easier to pull the cover fabrics through and to poke out the corners of the cover nicely.

14. Push out the corners and press the opening inward 1/2". Straight stitch or hand stitch opening closed. 

15. Tuck the lining down into the Main Cover, close the zipper...and start the next size :-)  


Selvage Decoration 
1. Lay 1 interfaced Main Cover face up, find center along left and right edges. Mark center on short sides, left and righ sides and Lay Selvage across to match with center marks on Cover. Add Wonder Tape to top long edge of Selvage and remove paper to expose sticky. Stick (or pin) the Ric Rac to match evenly with the upper long edge of the selvage. You can click and make the picture larger to see the wonder tape. Tip: I Love Wonder Tape for Zippers and Trims!

2. Flip under the Ric-Rac, matching center marks, stick (or pin) and press lightly.

3. Top stitch across center of Ric Rak and folded under selvage. Apply wonder tape across the bottom of the selvage, either on top of where it meets the cover or just under the selvage long edge and lays on top of the cover. Love that Selvages have that no seam finish needed edge :-)  
 4. Top stitch the trim along the long bottom edge of the Selvage....either on top of the the selvage...

OR underneath the selvage and on top of the cover. So cute, so easy, so quick, done :-) 

If you have any questions about these please let me know. You can find me on FB or IG @vintagebarngirl
And my blog is Vintage Barngirl. I enjoyed making these up and love that I'm 2 bundles of gifts ahead of the holiday craze. Thank You so much for having me.

Happy Holidays!!!
Vanessa Behymer
Vintage Barngirl

Monday, November 2, 2015

Introducing StitchART Free Motion Applique - A FREEBIE and a SALE too!


Hi all!!!!! My name is Jeanine Thomlinson and I am the artist and designer behind StitchART Free Motion Applique Patterns.  I'm a 30 something, carb loving, mom of two cute girls and I am VERY excited to be here on the Whimsical Fabric blog sharing with you today!
 

Today's projects are all using the very buttery soft Art Gallery Wonderland line!  LOVE that this line has wovens and knits! The owl knit I used on the leggings is a gorgeous weight and great for holding up to kids play. The woven has such a nice drape and so soft it is FAB for tunics and dresses.  It gives them flow.
(Cheeks is wearing the Oliver and S Playtime Set)

My passion is sewing and sketching, so it only made sense to start combining my interests to maximize my time, and thus I began creating free motion applique patterns!

Free motion applique is using your free motion foot/darning foot on your regular sewing machine and pretty much drawing with your machine to create a gorgeous, one of a kind, applique! You can read more about free motion applique HERE and ask any questions you have in my Facebook Group.
 

I am SOOOO excited to be joining with Whimsical Fabric for their 5000 Member Celebration with a FREE (for a limited time) Tea Time applique pattern that you can find in their Whimsical Fabric & Me Facebook Group.
  

Free motion applique is also a fun way to make lemonade when a lemon comes your way during the sewing process (thanks serger ...)  I was on my FINAL seam finish and literally 2 inches left and the knife catches the bodice!!! AHHH!!!!! After a brief moment of panic, I cut a few extra flowers from the Tea Time pattern.

I put a little lightweight iron on interfacing on the back of the bodice, making sure the fabric was in original place, and then put the free motion applique directly on top of the hole in the front. FMA is great for holes because thanks to all that stitching and lines it is well covered. Also, the heat and bond used in the free motion applique helps keep the edges from fraying.
Click To Enlarge
You can find my patterns HERE on Etsy.
My patterns are NOW also available on the Whimsical Fabric website. Use the coupon code StitchART and save 25% off your StitchART order on Whimsical Fabric now through Sunday, 11/8/15  Monday, 11/9/15!  Yup, it's been extended for an extra 24 hours!!  Woo hoo!

You can't even tell this free motion applique on the bodice wasn't a part of the original plan!

PS. I just love that the Oliver and S Playtime pattern comes with a topstitching template to stitch around the front and back to keep the facing down. It is a GORGEOUS finishing detail!

Please make sure to join the Whimsical Fabric & Me Facebook Group today so you can pick up your FREE copy of the Tea Time Free Motion Applique pattern by StitchARTThis design will only be available free on our Facebook Group through Sunday, 11/8/15  Monday, 11/9/15.
 
And don't forget to shop StitchART on our site and use the coupon code StitchArt to save 25% off your order now through Sunday, 11/8/15  Monday, 11/9/15!

Happy Shopping and Creating!
Danielle Storm
 

Hurry and Grab Your TREAT Before This Offer Ends

www.whimsicalfabric.com
Today is the last day to save up to 25% off almost everything on our website.  The entire website is marked 15% off.  In addition, spend $25 and use the code TREAT to save an additional 10% off the already reduced website prices.  The code expires tonight at 11:59pm MT.  Enjoy!

Happy Shopping and Creating!
Danielle Storm