
** If you would like to see an image on our blog in a larger format, just click on it to enlarge.
Note: Links to products within this post are either links to our website or affiliate links.
You can find the Oliver + S Sailboat pattern in the shop. Kits are available as well. Click on the links below:
Welcome to Day 4
Happy sewing,
Before we begin with today's lesson be sure to read all of the patterns instructions. Today, and throughout the entire sew along, you will need your pattern in hand to go along with each lesson. Some things
I will share/teach will not be in the pattern, but are some tricks and
tips I have learned over the years from sewing this pattern.
Today we will be starting our pants/shorts. Some of the methods I will be using are not in the pattern, such as the shorts mods, lining, and some of the finishing techniques so if you have any questions along the way please don't hesitate to ask. Ready? Let's start!
1. Add the interfacing to the wrong side of the front facing and the front side panels. I always trim my interfacing a ½" to accommodate the ½" seam allowance however when I am working with lighter weight fabrics, I do not trim..
2.
Transfer all your pattern markings onto the fabric pieces. The
buttonhole, button placement onto the front side and the pivoting mark
onto the wrong side side. I like to use the tailors chalk for the denim
or dark fabrics.

3. Finish the front facings bottom edge, being careful not the trim any of the fabric away.

4. A. Place the front two panels with right sides facing; stitch the curve crotch area only. I like to stitch a second row right next to the first stitching to help re-enforce this area. Finish the seam allowance and press well.

B. For the lined version repeat this same step with the lining as well. Trim your seam.

5. A. Add the facing to the right side of the pants/shorts front with the right sides facing; match up the notches and corners; pin in place. Stitch around with pivoting at both dots. Trim the seam, turn, and press well.

B. For lined version, place the lining over the main front shorts with the wrong sides facing. Pin in place around the top portion as shown below, repeat with step A above.

6. Top stitch around the open flap and top of the pants/shorts with a 1/8" seam.

7. Take the two front side panels and place them with the right sides facing with the two interfaced front side panels. Stitch around the top and curved portion, pivoting at the dot and leaving the side open. Trim the seam, turn, and press.

8. Top stitch the sewn edges of both side front panels.

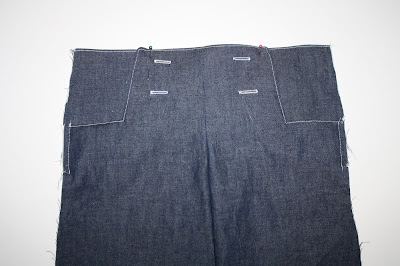
9. Stitch your buttonholes now onto the front of the pants.

Back view...

10. Pin the front side panels in place, matching the notches on the side panels and front of the pants.

11. Baste the side panels in place with a 1/3" seam allowance.

I like to leave the front panels pinned to the front of the pants while I sew these next few steps.
Back view...

12. A. Place your two back pants/shorts panels together and pin in place. Stitch the seam, then again stitch the seam a second time just a hair over from the first to help re-enforce the seam. Finish the raw edge and press the seam.
B. If making the lined version repeat this step with the two lining back pants/short pieces. Trim your seams and press.

13. If making the lined version only: Place your back pants/shorts panel over the lining back panels with the wrong sides facing, pin them around the top and sides only, baste in place. I like to take the seams and pace them facing in opposite directions to help reduce the bulk in the this area. (see the next two photos for this step.)


14. Finish the side seams only of both the front and back side of the pants/shorts.

Use a tapestry needle to weave your serger thread tail into the stitching to leave a nice finished edge.

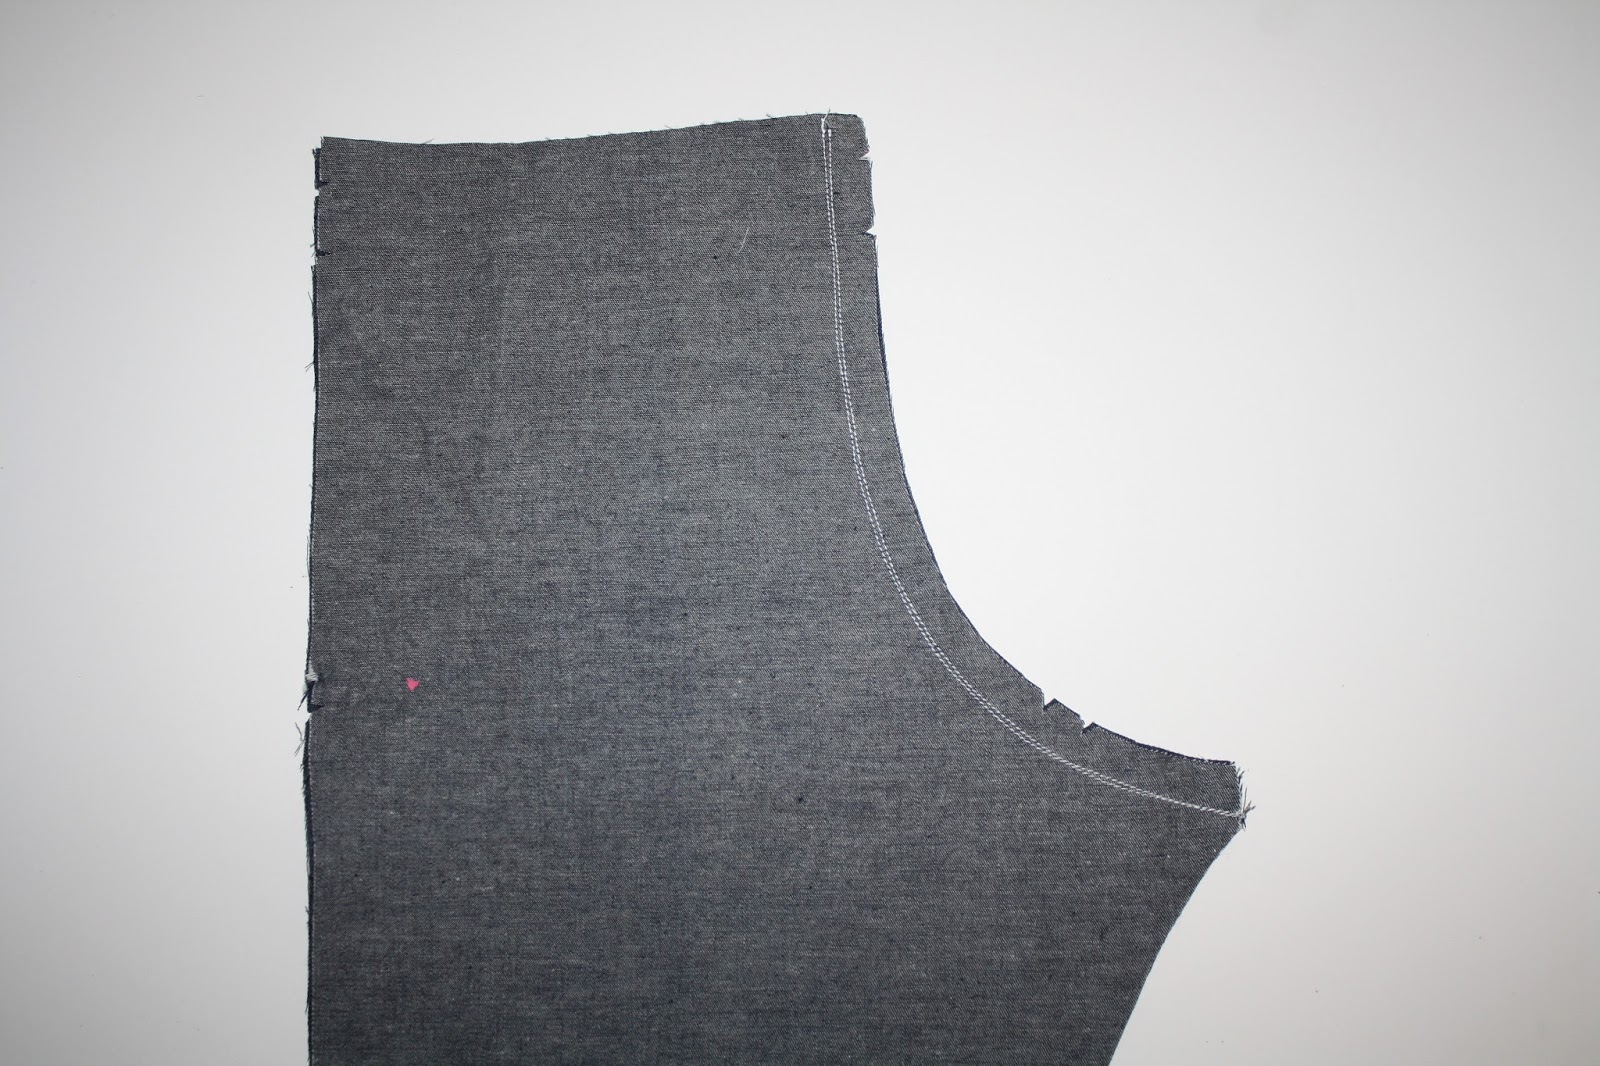
This is the side view of the finished pants seam. I like to finish the edge of the top of the "L" shape as well when I serge the side seam. I do this by pulling the" L" shape straight with the side seam as I am serge the side seam.

This is where we are leaving today's lesson off, come back tomorrow as we continue to work on our pants and shorts.
Let us know if you have any questions for today's lesson either here or in the Facebook group. Also be sure to add a photo of today's lesson in our Facebook sew along album. I will see you lovely ladies back here tomorrow as we continue on our pants/shorts!
Today we will be starting our pants/shorts. Some of the methods I will be using are not in the pattern, such as the shorts mods, lining, and some of the finishing techniques so if you have any questions along the way please don't hesitate to ask. Ready? Let's start!
1. Add the interfacing to the wrong side of the front facing and the front side panels. I always trim my interfacing a ½" to accommodate the ½" seam allowance however when I am working with lighter weight fabrics, I do not trim..

3. Finish the front facings bottom edge, being careful not the trim any of the fabric away.

4. A. Place the front two panels with right sides facing; stitch the curve crotch area only. I like to stitch a second row right next to the first stitching to help re-enforce this area. Finish the seam allowance and press well.

B. For the lined version repeat this same step with the lining as well. Trim your seam.

5. A. Add the facing to the right side of the pants/shorts front with the right sides facing; match up the notches and corners; pin in place. Stitch around with pivoting at both dots. Trim the seam, turn, and press well.

B. For lined version, place the lining over the main front shorts with the wrong sides facing. Pin in place around the top portion as shown below, repeat with step A above.

6. Top stitch around the open flap and top of the pants/shorts with a 1/8" seam.

7. Take the two front side panels and place them with the right sides facing with the two interfaced front side panels. Stitch around the top and curved portion, pivoting at the dot and leaving the side open. Trim the seam, turn, and press.

8. Top stitch the sewn edges of both side front panels.

9. Stitch your buttonholes now onto the front of the pants.

Back view...

10. Pin the front side panels in place, matching the notches on the side panels and front of the pants.

11. Baste the side panels in place with a 1/3" seam allowance.

I like to leave the front panels pinned to the front of the pants while I sew these next few steps.

Back view...

12. A. Place your two back pants/shorts panels together and pin in place. Stitch the seam, then again stitch the seam a second time just a hair over from the first to help re-enforce the seam. Finish the raw edge and press the seam.
B. If making the lined version repeat this step with the two lining back pants/short pieces. Trim your seams and press.
13. If making the lined version only: Place your back pants/shorts panel over the lining back panels with the wrong sides facing, pin them around the top and sides only, baste in place. I like to take the seams and pace them facing in opposite directions to help reduce the bulk in the this area. (see the next two photos for this step.)


14. Finish the side seams only of both the front and back side of the pants/shorts.

Use a tapestry needle to weave your serger thread tail into the stitching to leave a nice finished edge.

This is the side view of the finished pants seam. I like to finish the edge of the top of the "L" shape as well when I serge the side seam. I do this by pulling the" L" shape straight with the side seam as I am serge the side seam.

This is where we are leaving today's lesson off, come back tomorrow as we continue to work on our pants and shorts.
Let us know if you have any questions for today's lesson either here or in the Facebook group. Also be sure to add a photo of today's lesson in our Facebook sew along album. I will see you lovely ladies back here tomorrow as we continue on our pants/shorts!
Happy sewing,
Sharon
*If you would
like to earn entries into the prize drawing, please make sure to submit
a photo of your completed Lesson Four to this Facebook Album by 12:00 noon CT, Tuesday, September 6th. If you
have any questions the Facebook Group is a great place to ask.
No comments:
Post a Comment